Phone:
(701)814-6992
Physical address:
6296 Donnelly Plaza
Ratkeville, Bahamas.

Phone:
(701)814-6992
Physical address:
6296 Donnelly Plaza
Ratkeville, Bahamas.

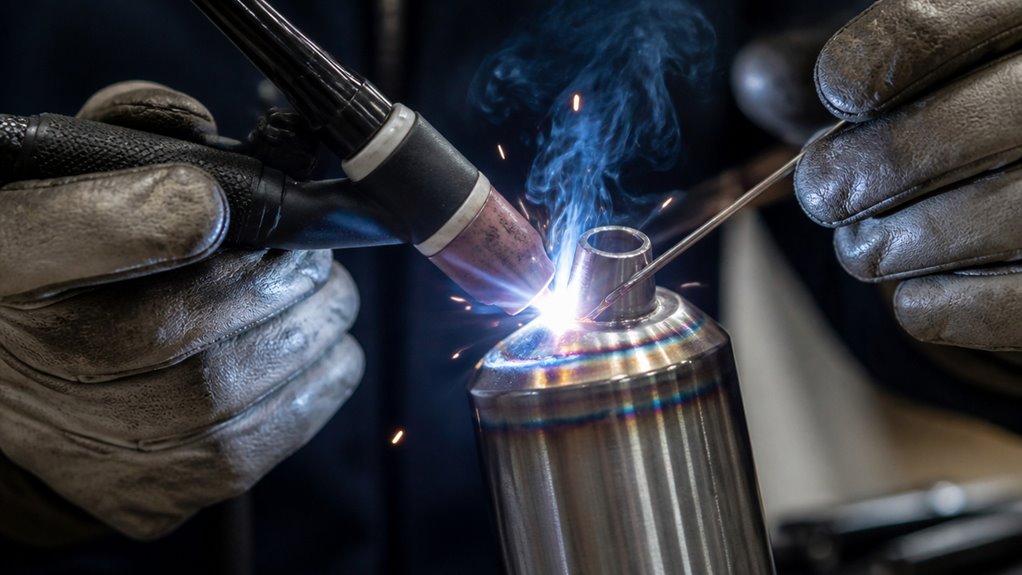
To TIG weld aluminum effectively, wipe the surface with acetone and isopropyl alcohol. Then mechanically remove the oxide layer.
Use lanthanated tungsten and 100% argon for thin aluminum or argon-helium mixes for thicker sections. Set amperage to about 1 amp per 0.001 inch thickness and control heat with a foot pedal.
Preheat thicker parts as needed. Hold your torch at a 5°–15° backward tilt with a short arc length, adding filler metal at the puddle’s leading edge.
Applying these basics guarantees strong, clean welds. Fine-tuning these techniques can take your aluminum work to the next level.
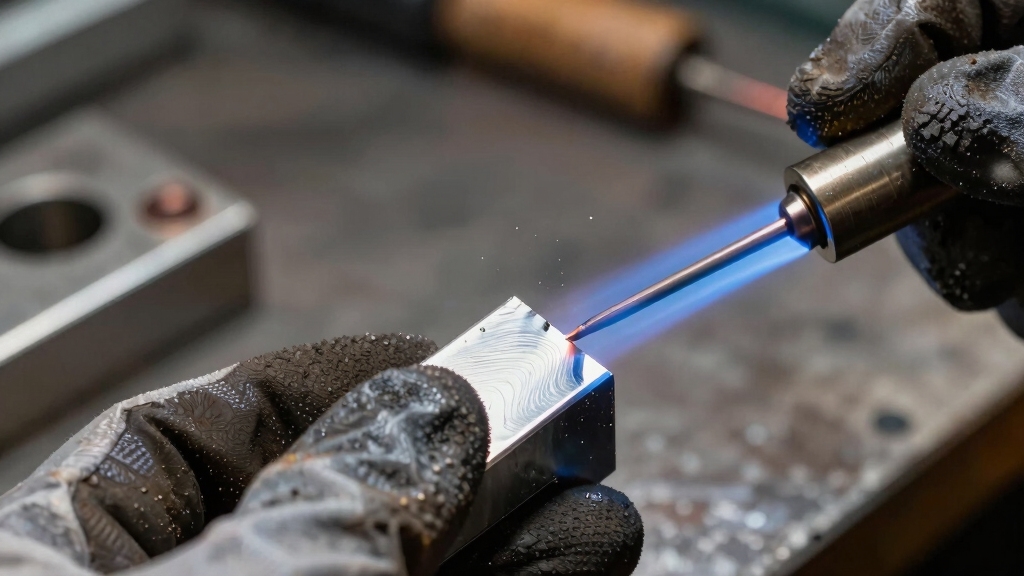
Preparing aluminum surfaces for TIG welding starts with thoroughly removing contaminants to guarantee a clean, oxidation-free base.
You should begin by wiping the metal with acetone to eliminate oils, grease, and dirt.
Follow this with isopropyl alcohol to draw any remaining contaminants to the surface and remove them completely.
Aluminum oxidizes rapidly, so cleanliness is critical for strong welds.
Avoid abrasive tools that embed debris; instead, use clean, lint-free wipes.
Make sure the surface is dry before welding to prevent moisture-related defects.
Proper preparation minimizes porosity and weak welds caused by surface impurities.
Mechanical removal of the aluminum oxide layer after degreasing is essential to ensure proper weld penetration and prevent defects.
How do you guarantee the cleanest, most stable arc when TIG welding aluminum?
Start by selecting the right tungsten electrode and shielding gas. Use lanthanated or ceriated tungsten, as these provide excellent arc stability and resistance to contamination in AC aluminum welding.
Avoid sharp tungsten tips; instead, form a balled or slightly rounded tip to maintain arc consistency.
For shielding, 100% argon is ideal for aluminum plates up to 12 mm (0.5 inch) thick, offering excellent gas coverage and oxidation prevention.
For thicker aluminum, enhance penetration by mixing helium with argon, increasing thermal conductivity.
Proper tungsten and gas choices directly affect arc quality, weld bead appearance, and penetration.
Lanthanated tungsten is highly recommended for inverter machines due to its reliable performance and extended electrode life.
Once you’ve selected the proper tungsten and shielding gas, the next step is to fine-tune your amperage and heat input to match the aluminum thickness and welding conditions.
After choosing the right tungsten and gas, adjust amperage and heat to suit aluminum thickness and conditions.
Aluminum’s high thermal conductivity demands increased amperage, about 20–25 amps above baseline. Use the rule of thumb: 1 amp per 0.001 inch of thickness as a starting point.
Balance your travel speed with amperage to avoid overheating or puddle washout. Set your machine’s maximum amperage before starting, then modulate precisely with the foot pedal.
Visualize controlling heat by:
For optimal aluminum welding, using a multi-process welder with TIG capabilities and adjustable parameters is highly recommended.
To get those clean aluminum weld beads you’re aiming for, try holding your torch at a slight backward angle—somewhere between 5 to 15 degrees—as you push forward. It’s also important to keep your arc length close to the diameter of your tungsten. This helps ensure you’re getting that precise heat where you need it.
Now, while you’re at it, make sure to keep the torch about 10 degrees off vertical. This little adjustment can really optimize heat distribution and give you better control over the puddle.
Oh, and don’t forget about the alignment! Keep your torch and filler rod at roughly 90 degrees. This alignment is key for ensuring consistent filler metal placement, which ultimately leads to better bead quality. Happy welding!
Using an AC-capable TIG welder is crucial to effectively remove aluminum oxide and maintain arc stability during welding.
Consistently maintaining the correct torch angle is essential for producing clean aluminum TIG welds. You want to hold the torch at a slight backward tilt, typically between 5° and 15°, while pushing forward to guarantee smooth metal flow and optimal penetration.
The torch angle directly influences heat distribution and puddle control, which are critical for aluminum’s rapid oxidation and thermal conductivity.
Focus on these key points for optimal torch angle:
Mastering these angles guarantees clean, consistent aluminum welds. Using a short arc length about equal to the tungsten diameter helps concentrate heat and prevents contamination for better weld quality.
Maintaining a precise arc length is essential for achieving clean, controlled aluminum TIG welds. You should keep the arc length equal to the tungsten diameter, typically up to ¼ inch, to guarantee the arc remains focused and the puddle stays stable.
Holding the torch at a backward tilt of about 5–15 degrees while pushing forward helps maintain this arc length consistently. Keep the tungsten electrode positioned roughly 1 to 2 times its diameter from the workpiece, around 1/8 inch, to prevent sticking and arc instability.
This distance optimizes heat distribution and puddle formation, allowing clean, smooth beads. Avoid letting the arc length lengthen, as this increases contamination risk and reduces arc control.
Precise arc length control directly impacts bead quality and weld integrity when TIG welding aluminum. Maintaining consistent torch angle and arc length also helps produce uniform puddles and secure alignment for stronger welds, as emphasized in torch handling.
Mastering the alignment between your torch and filler rod is crucial for producing clean, uniform aluminum TIG welds. Proper torch angle and arc length guarantee stable arc control and peak heat distribution.
Hold the torch at a backward tilt of 5–15°, pushing forward without dragging. Maintain the arc length equal to the tungsten diameter (up to ¼ inch) to keep the arc focused and puddle controlled.
Position the torch about 10° off vertical for aluminum and keep the tungsten electrode 1 to 2 times its diameter from the workpiece. Align the filler rod at roughly 90° to the torch for consistent metal addition.
Ensure thorough oxide removal before welding to prevent contamination and ensure proper fusion.
When you’re working with aluminum, it’s important to add filler metal right at the leading edge of the puddle. This helps you keep control over the shape and penetration of your bead.
You want to maintain a steady rhythm—dab-and-move, dab-and-move. This way, you ensure even distribution and prevent any part from overheating.
Now, a great way to practice is by stacking “dimes.” Think of it like rhythmically placing small, uniform deposits.
Not only does this technique create a strong weld bead, but it also gives you that clean, professional look. So, take your time and get into the groove!
For the best results, always use the appropriate filler wires like ER4043 or ER5356 to match the aluminum alloy you are welding.
Control filler metal placement carefully to guarantee strong, consistent aluminum welds.
Position the filler rod at the leading edge of the molten puddle to assure proper fusion without trapping oxides.
Maintain a steady, controlled feed to avoid contamination and excessive buildup.
Keep the filler rod within the shielding gas envelope to prevent oxidation and porosity.
Proper placement helps achieve a smooth bead profile and peak penetration.
Introduce filler metal at the puddle’s front edge, not the center.
Pause briefly after each addition for puddle stability.
Hold filler rod close to the argon gas flow between dabs.
Keep a consistent distance between filler rod and workpiece.
Use rhythmic, precise movements to stack filler metal evenly.
These techniques enhance joint strength and weld integrity in aluminum TIG welding.
Selecting the correct tungsten electrode type is essential to maintain arc stability and minimize contamination during the welding process.
Consistently applying a steady dab rhythm when adding filler metal guarantees uniform bead formation and peak fusion in aluminum TIG welding.
You should add filler metal at the leading edge of the puddle, pausing briefly to let it melt fully before moving forward.
This controlled dab-and-move sequence prevents overheating and guarantees a balanced weld pool.
Keep your torch movement smooth and maintain a roughly 90-degree angle between torch and filler rod for precise placement.
Between dabs, hold the filler rod close to the argon gas flow to avoid contamination.
By mastering this steady rhythm, you prevent uneven bead width, porosity, and weak joints.
This technique is vital for managing heat input and securing strong, defect-free aluminum welds without sacrificing weld aesthetics or integrity.
Preheating thicker parts to about 500–600°F can help maintain even puddle formation and reduce thermal shock during welding, as described in Flame Setup, Control, and Heat Management.
Master stacking dimes by rhythmically adding small, evenly spaced filler metal deposits along the weld puddle’s leading edge. This technique guarantees strong, uniform aluminum joints with excellent cosmetic appeal.
Focus on a controlled dab-and-move rhythm, placing each filler increment precisely where the molten puddle leads. Maintain consistent torch travel speed and keep the filler rod close to the argon shielding to avoid contamination. Visualize each “dime” as a small, rounded bead stacked neatly in succession.
Steady torch movement with a 5–15° backward tilt. Add filler metal exactly at the puddle’s leading edge. Keep filler rod within the argon gas envelope.
Pause briefly to allow each deposit to solidify partially. Maintain a consistent arc length equal to tungsten diameter.
This approach yields strong, uniform weld beads with minimal defects.
When welding aluminum, managing heat input is crucial to prevent warping and distortion. Start by applying small, controlled tack welds about ½ inch from the joint ends to avoid tack failure from excessive heat.
Use short weld increments and maintain a balanced travel speed to control heat buildup. Wrapping bare copper wire tightly near the joint acts as a heat sink, drawing excess heat away and minimizing heat saturation.
For thin aluminum, adjust pulse settings; set around 1 pulse per second with 33% background and pulse widths to stabilize the arc and reduce heat input. Always modulate amperage carefully with the foot pedal, easing off as the metal heats to avoid puddle washout.
These measures help maintain dimensional accuracy and weld integrity during TIG aluminum welding.
You need a welding helmet with an auto-darkening lens to protect your eyes from intense UV and infrared rays.
Wear flame-resistant gloves and a long-sleeve jacket to shield your skin from sparks and heat.
Use safety glasses underneath for extra eye protection.
Respiratory protection is vital since aluminum fumes can be hazardous, so use a respirator or guarantee proper ventilation.
Don’t forget ear protection to guard against noise and potential sparks.
Imagine you’re welding aluminum and suddenly notice tungsten particles in your weld pool. To troubleshoot tungsten contamination, first check your tungsten tip shape. Avoid sharp points; instead, use a balled or slightly rounded tip.
Also, make certain your tungsten isn’t touching the workpiece or filler rod. Contamination often occurs from arc length too long or improper torch angle. Maintain a consistent arc length equal to tungsten diameter and a 10° torch tilt to prevent it.
Common signs of aluminum weld defects include porosity, which appears as small holes or bubbles in the weld bead, and cracks, visible as sharp lines or splits often caused by rapid cooling or contamination.
You might also see lack of fusion, where the weld metal doesn’t properly bond with the base metal, or excessive oxidation leading to dull, discolored welds.
Poor bead shape and undercut edges also indicate defects affecting strength and appearance.
You can TIG weld aluminum outdoors in windy conditions, but it’s challenging. Wind disrupts the argon shielding gas, causing oxidation and weld contamination.
To maintain weld quality, use windshields or enclosures around the work area. Shielding gas flow rates might need to increase slightly, but too much causes turbulence.
Controlling the environment is vital; without protection, weld defects like porosity and poor penetration will increase. This undermines your aluminum weld’s integrity.
After use, clean tungsten electrodes by gently grinding the tip with a dedicated tungsten grinder to remove contamination without altering the shape drastically.
Avoid using sharp tips for aluminum welding; maintain a balled or slightly rounded tip.
Store electrodes in a clean, dry container to prevent oxidation and contamination.
Label storage compartments to quickly identify electrode types, protecting lanthanated or ceriated variants from damage and ensuring consistent welding quality.
By preparing aluminum surfaces thoroughly and selecting the right tungsten and shielding gas, you set the foundation for quality TIG welds.
Controlling amperage precisely and maintaining the correct torch angle help produce clean, strong beads. Did you know that improper heat control causes up to 70% of aluminum weld defects?
Mastering filler metal techniques and managing tack welds effectively minimizes warping, ensuring durable joints.
With these tips, your aluminum TIG welding will be both efficient and reliable.