Phone:
(701)814-6992
Physical address:
6296 Donnelly Plaza
Ratkeville, Bahamas.
Phone:
(701)814-6992
Physical address:
6296 Donnelly Plaza
Ratkeville, Bahamas.
To TIG weld aluminum as a beginner, wear proper protective gear like a welding helmet, fire-resistant clothing, and gloves.
Clean your aluminum thoroughly with specialized cleaners and remove oxide layers using a wire brush.
Secure parts firmly to prevent movement. Set your machine to AC, match tungsten type and size to amperage, and keep a short arc length.
Hold the torch steady at a slight angle, feed the filler rod steadily, and control your travel speed to avoid burn-through or weak joints.
There’s plenty more to master for flawless welds.
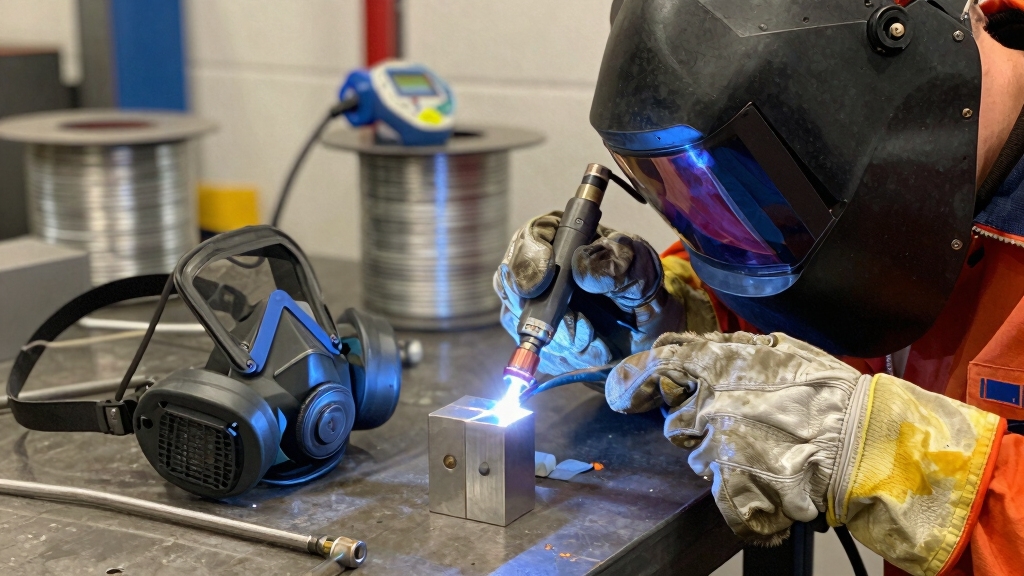
What gear do you need to stay safe while TIG welding aluminum?
First, always wear a welding helmet with a proper shade to protect your eyes from intense UV light and sparks.
Always wear a welding helmet with the correct shade to shield your eyes from UV light and sparks.
Next, put on heavy, fire-resistant clothing to shield your skin from heat and spatter. Long sleeves and pants are essential.
Don’t forget insulated welding gloves to protect your hands from burns and electric shock.
Eye protection underneath the helmet, like safety glasses, adds an extra layer of defense.
Finally, make certain your work area is clear of flammable materials and wear closed-toe leather boots for foot safety.
Using this protective gear consistently will help you avoid injuries and focus confidently on mastering your aluminum welding skills.
Additionally, avoid synthetic fabrics like polyester or nylon, and opt for flame-resistant cotton or leather to prevent burns from melted materials.
Before you dive into welding, it’s super important to clean the aluminum surface really well. You want to make sure you get rid of any oxide layers, oils, or dirt that might mess with your weld. Think of it like prepping a canvas before painting—every little bit counts!
For cleaning, you can use a stainless steel wire brush or grab a dedicated aluminum cleaner. Either way, aim to get that metal spotless.
Be sure to clean the aluminum surface immediately before welding to prevent rapid re-oxidation and ensure the best weld quality.
Achieving a clean aluminum surface is essential for producing strong, defect-free TIG welds.
Start by removing any oil, grease, or dirt with a dedicated aluminum cleaner or acetone. Use a clean rag to wipe the surface thoroughly.
Next, remove the oxide layer, which can prevent proper fusion, by gently scrubbing with a stainless steel wire brush reserved exclusively for aluminum. Avoid using brushes or tools contaminated with other metals, as this can introduce impurities.
If the surface is heavily oxidized, lightly sanding with fine-grit sandpaper helps expose fresh metal. After cleaning, wipe the area again with a clean cloth to remove any residue.
Taking these careful steps guarantees your weld puddle forms smoothly and bonds well.
This sets a solid foundation before you strike the arc.
It is also important to rinse thoroughly and ensure the surface is dry to prevent flash corrosion that could weaken the weld quality.
Properly preventing aluminum contamination starts with understanding how easily impurities can compromise your weld. Before welding, thoroughly clean the aluminum surface using a dedicated stainless steel wire brush or a chemical cleaner to remove oxides and oils.
Avoid touching the cleaned surface with bare hands, as skin oils can introduce contaminants. Use clean filler rods and keep your workspace free of dirt or dust. Always make sure your tungsten electrode doesn’t contact the aluminum, preventing contamination transfer.
Maintaining a clean and sharp tungsten tip is essential for preventing tungsten inclusions and ensuring a stable arc during welding.
| Contamination Source | Prevention Method |
|---|---|
| Aluminum oxide layer | Wire brushing, chemical cleaning |
| Oils and grease | Degreasing with acetone or alcohol |
| Tungsten contact | Maintain proper arc length and torch control |
Following these steps helps you achieve a clean, strong weld every time.
Clamping down your aluminum parts firmly is essential to keep everything aligned and stable during TIG welding. Use strong clamps, vise grips, or angle irons to secure the pieces tightly, preventing any movement as you weld.
Make sure the joints fit snugly; minimizing gaps helps create a clean, strong weld and reduces filler metal buildup. Check alignment carefully before you start. Misalignment can cause weld defects and weaken the joint.
If needed, use flat bars or additional supports to maintain the proper angle and position. Take your time with this step, as a stable setup improves weld quality and safety.
Properly secured parts give you confidence to focus on torch control and puddle formation without worrying about shifting metal. Using clamps made from high-carbon steel with heat-treated jaws ensures durability and prevents deformation under welding heat.
When setting up your TIG welder for aluminum, selecting the right amperage and tungsten type is essential for smooth, stable arcs and quality welds.
Start by calculating amperage at about 1 amp per 0.001 inch of aluminum thickness. For example, 0.125-inch material needs roughly 125 amps. Adjust with the foot pedal to maintain puddle control as heat builds.
Choose tungsten carefully: pure tungsten suits basic AC machines, while 2% ceriated tungsten works better with square-wave units for stable arcs.
Match tungsten size to your amperage—1/16 inch diameter for 30–80 amps, and up to 1/8 inch for 100–180 amps. Keep your tungsten sharp and clean to avoid contamination and ensure consistent arc performance throughout your weld.
Use a 2.4 mm gas lens and form a ball-shaped tungsten tip slightly smaller than its diameter for optimal arc stability and penetration during welding torch setup.
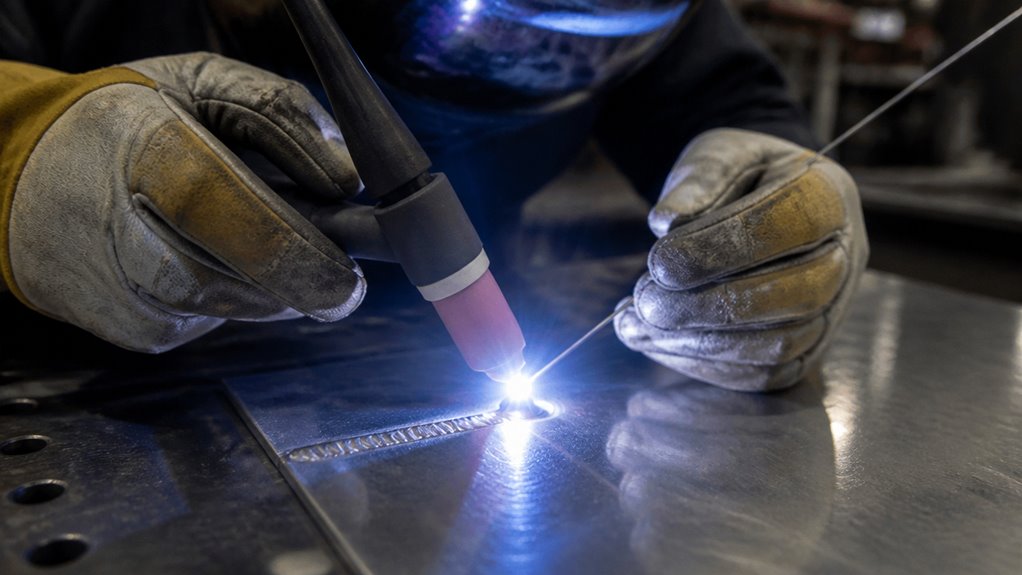
When you’re holding the torch, try tilting it slightly forward—about 10 degrees. This little adjustment helps keep the arc focused and stable, which is super important. Also, remember to keep your arc length short, roughly the same diameter as your tungsten.
This way, you can avoid contamination and have better control over your weld.
To ensure smooth and consistent movement, steady your hand. You can brace it against something or use a pencil grip.
This will help you maintain that fluid motion throughout the welding process.
Using 2% ceriated tungsten electrodes can significantly improve your arc stability when TIG welding aluminum.
Mastering the proper torch angle is essential for achieving clean, consistent aluminum TIG welds. Hold your torch so it tilts slightly forward, roughly 10 degrees off vertical, avoiding backward tilt.
This forward angle helps direct shielding gas over the weld puddle, preventing contamination and ensuring a stable arc. Keep your hand steady, bracing it if needed to maintain control.
Aim for a torch angle around 75 degrees relative to the workpiece, which balances visibility and gas coverage. Avoid letting the tungsten touch the aluminum to prevent contamination.
As you move the torch steadily forward, this angle supports smooth puddle formation and consistent heat input, key to managing aluminum’s rapid heat conduction.
Practice maintaining this angle to build confidence and improve weld quality. Maintaining a consistent electrode-to-work distance of about 1.5–3 mm is also critical to ensure arc stability and optimal penetration.
Keep your arc length exceptionally short to maintain control and weld quality when TIG welding aluminum. Aim for an arc length roughly equal to your tungsten diameter, about 1/16 to 1/4 inch from the workpiece.
This tight gap helps concentrate heat, allowing you to form a clean, stable puddle without overheating or contaminating the metal. Hold the torch at a slight forward angle, around 10 degrees off vertical, to direct shielding gas effectively and improve visibility.
Avoid touching the tungsten to the aluminum, which can cause contamination and erratic arcs. Move the torch steadily, pushing forward rather than dragging, to maintain an even arc length.
Practicing this consistency builds your confidence and results in smooth, high-quality welds. For aluminum TIG welding, be sure to set the machine to AC current to optimize arc stability and cleaning action.
Maintaining a stable hand position is essential for controlling the torch and producing consistent aluminum TIG welds.
You want to grip the torch like a pencil, which allows for smooth, precise movements. Rest part of your hand or wrist lightly on the work surface to steady your motion and reduce fatigue.
Avoid holding the torch too tightly, as this can cause shakiness and uneven travel speed. The torch should be angled slightly forward, about 10 degrees off vertical, to guarantee proper shielding gas coverage and arc control.
Keep the arc length short and steady, roughly the diameter of your tungsten, while pushing the torch forward steadily. Practicing this stable hold helps you develop better control over puddle size and bead consistency, which are vital for quality aluminum welds.
Ensure you use a tungsten electrode compatible with AC current to promote stable arc formation when welding aluminum.
Starting the aluminum weld puddle is a pivotal step that sets the foundation for a strong, clean weld.
Begin by striking a steady arc and focus on forming a small, consistent puddle without adding filler.
Start with a steady arc and create a small, consistent puddle before adding any filler.
Keep your torch at the right angle, about 10 degrees off vertical, and maintain a short arc length, around the tungsten diameter, to avoid contamination.
Use your foot pedal to carefully adjust heat as the workpiece warms, reducing amperage near edges or corners to prevent burn-through.
Watch the puddle size closely; a uniform puddle helps prevent washout and uneven bead width.
Practice controlling the puddle alone first, so you build confidence in managing its width and travel speed.
This control is key before you move on to adding filler metal.
Although you’ve already mastered puddle control, adding filler rod properly takes careful coordination to guarantee a strong, uniform weld bead. Feed the filler rod steadily into the leading edge of the puddle, not its center, to prevent weld defects.
Keep a consistent dab rhythm, adding small amounts quickly to avoid bulges. Hold the filler rod nearly perpendicular to the torch, maintaining about a 90-degree angle for ideal heat transfer.
| Aspect | Tip | Reason |
|---|---|---|
| Filler Location | Leading edge of puddle | Guarantees proper melting |
| Dab Frequency | Small, rapid dabs | Prevents bead irregularities |
| Rod Angle | ~90 degrees to torch | Maximizes control |
| Steady Motion | Move torch steadily | Maintains bead uniformity |
Practice this coordination patiently to build consistent, professional-quality aluminum welds.
Balancing your travel speed and heat input is essential when TIG welding aluminum to achieve a clean, consistent bead.
Aluminum dissipates heat quickly. If you move too slowly or apply too much amperage, the puddle can become too fluid, causing burn-through or a wide, uneven bead. Conversely, moving too fast or using too little heat can result in poor fusion and a narrow, weak weld.
Use your foot pedal to adjust amperage as the workpiece heats. Lower heat near corners or ends where aluminum absorbs more. Keep your travel speed steady, pushing the torch smoothly to maintain a consistent puddle size.
Practicing without filler lets you develop control over how heat and speed interact before adding complexity. This balance guarantees your weld looks clean and performs well.
When you’re new to TIG welding aluminum, it’s easy to make mistakes that affect weld quality and safety. One common error isn’t cleaning the aluminum surface thoroughly, which leads to contamination and weak welds.
Starting TIG welding aluminum? Thoroughly clean surfaces to avoid contamination and ensure strong, safe welds.
Avoid touching the tungsten to the metal, as this contaminates the electrode and the weld pool. Another beginner pitfall is inconsistent travel speed; moving too fast or slow creates uneven beads or puddle collapse.
Use a steady hand and brace your torch for control. Neglecting proper protective gear or gas flow can also cause defects and safety risks. Finally, don’t overload the puddle with filler rod.
Add small, consistent dabs at the puddle’s leading edge. Practice these habits patiently to build solid, clean welds.
You’ll find argon/helium blends like 75% argon with 25% helium or 50/50 mixes improve aluminum TIG welding by increasing heat input and enhancing arc stability.
The added helium raises arc temperature, helping you weld thicker sections more easily and get better penetration.
These blends also produce a wider, more fluid puddle, which can improve bead appearance and reduce welding time.
Just remember to adjust your settings for the hotter arc.
Temperature changes affect aluminum TIG weld quality markedly because aluminum conducts heat about four times faster than steel. This rapid heat transfer means you need to carefully adjust amperage and travel speed to avoid overheating and puddle collapse.
If the temperature fluctuates too much, you risk warping or cracking. You’ll want to reduce heat near edges and corners. Use your foot pedal to maintain a stable puddle and consistent bead for a strong weld.
You can TIG weld aluminum outdoors, but windy conditions make it tricky. The argon shielding gas protects your weld pool, and wind can blow it away, causing contamination and poor weld quality.
To avoid this, set up windbreaks or weld in a sheltered area. If you can’t, consider welding indoors or using specialized enclosures to maintain gas coverage and keep your weld clean and strong.
Think of your TIG torch as a finely tuned instrument. It needs care after every performance.
After welding aluminum, clean the torch’s tungsten carefully to remove any aluminum splatter or oxidation.
Check the ceramic cup for cracks or buildup and replace if needed.
Wipe the torch body and inspect cables for damage.
Keeping your torch spotless guarantees a steady arc and prevents contamination. This ensures your next weld sings smoothly and strong.
Different aluminum alloys affect your TIG welding technique mainly through their melting points and thermal conductivity.
For example, 6061 alloy requires slower travel speed and more heat control because it dissipates heat quickly.
In contrast, 3003 alloy is softer and melts faster, needing gentler heat input.
You’ll adjust amperage, pedal control, and filler rod choice accordingly to prevent burn-through or weak welds.
Understanding each alloy helps you maintain consistent puddle size and bead quality.
As you master TIG welding aluminum, picture your torch as a painter’s brush, carefully blending metal with heat and precision.
With the right gear, steady hands, and mindful pacing, you’ll transform raw aluminum into seamless art.
Remember, patience is your ally. Each weld puddle is a ripple in a calm lake, reflecting your growing skill.
Keep practicing, avoid common pitfalls, and soon your welds will shine like polished silver under a clear sky.