Phone:
(701)814-6992
Physical address:
6296 Donnelly Plaza
Ratkeville, Bahamas.
Phone:
(701)814-6992
Physical address:
6296 Donnelly Plaza
Ratkeville, Bahamas.
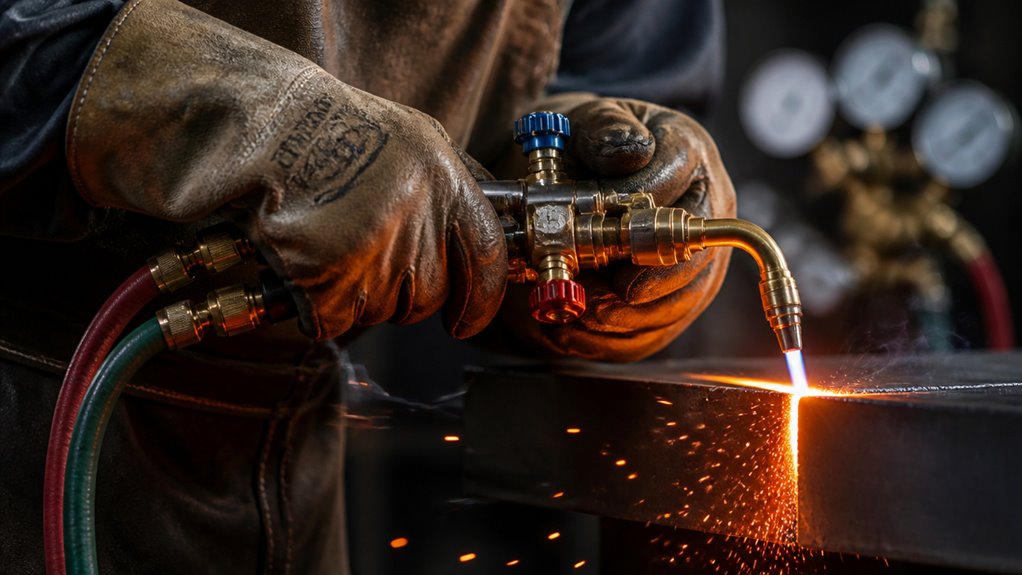
To use an oxy acetylene welding torch, first securely set up oxygen and acetylene cylinders with flashback arrestors and check for leaks.
Attach the correct torch tip, then ignite the torch by opening the acetylene valve slightly and using a striker.
Gradually add oxygen, adjusting to achieve a stable, neutral blue flame. Maintain proper angle and travel speed for welding or cutting.
Always wear safety gear and follow shutdown procedures. Understanding these basics prepares you to master detailed techniques and safety steps.
Although oxy-acetylene welding might seem complex at first, it works by combining acetylene gas with oxygen to create a high-temperature flame capable of melting metals.
You’ll use this flame to heat the base metal and filler rod until they fuse, forming a strong joint. This process also allows cutting and heating, depending on how you adjust the torch.
The acetylene-oxygen mix delivers precise, controllable heat, essential for various metal thicknesses and types. Understanding how the flame interacts with the metal is key; you’ll preheat, melt, or cut by controlling gas flow and flame shape.
Mastering this core function sets the foundation for effective metalwork, enabling you to weld, cut, or heat with accuracy and efficiency.
Selecting the correct flame type is crucial for achieving optimal weld quality and metal compatibility.
Understanding how to control and apply the oxy-acetylene flame sets the stage for safe operation.
Mastering oxy-acetylene flame control is essential for ensuring safety and precision in welding.
Before you start, equip yourself with essential safety gear: flame-resistant gloves, goggles or a welding helmet with proper shading, fire-retardant clothing, and a leather apron to protect against sparks and heat.
Make certain your work area is clear of combustible materials and well-ventilated to prevent gas buildup.
Always use flashback arrestors on both oxygen and acetylene lines to prevent flame reverse flow.
Check all connections and hoses for leaks using soapy water, never a flame.
Keep a fire extinguisher nearby and maintain an emergency shutoff plan.
These precautions protect you from burns, gas leaks, and fires, guaranteeing a controlled, hazard-free welding environment.
Additionally, always perform a thorough cylinder inspection before use to identify any dents, cracks, or leaks that could compromise safety.
Properly setting up oxygen and acetylene cylinders is essential for safe and effective oxy-acetylene welding.
Start by securing both cylinders upright using chains or straps to prevent tipping.
Position oxygen cylinders away from acetylene cylinders at least 20 feet apart or use a fire-resistant barrier.
Attach regulators carefully; oxygen regulators have right-hand threads, acetylene left-hand to avoid cross-connection.
Open the oxygen cylinder valve fully. Open the acetylene valve only a quarter to a full turn to allow quick shutoff.
Set regulator pressures to about 5–10 PSI for oxygen and 5–7 PSI for acetylene.
Ensure acetylene pressure stays below 15 PSI to prevent instability.
Always check for leaks with soapy water, never flame. This setup guarantees controlled, stable gas flow for safe welding operations.
Verify that regulators are connected securely and leak-free before adjusting pressure to maintain flame control.
When you’re picking out torch tips, it’s important to choose ones that fit your specific welding or cutting needs. Think about the tip size and the orifice design, as these factors play a big role in achieving the best flame control.
Before you get started, make sure to inspect and clean your tips. A quick check can go a long way in removing any clogs or debris that might mess with gas flow and flame stability.
Taking care of your torch tips is key! Regular maintenance not only ensures consistent performance but also helps extend their lifespan. So, always handle them with a bit of care.
Always prioritize tip compatibility with your torch brand and seat type to maintain safety and prevent gas leaks through proper seat selection.
Since the torch tip directly controls flame shape and heat output, selecting the right size and type is critical for effective welding or cutting. Choose tips based on the metal thickness and task: smaller tips for thin materials and precision welding, larger tips for thicker metals or cutting.
Match the tip size to the acetylene flow rate and oxygen pressure recommended by the manufacturer. Use welding tips with multiple orifices for smooth, even flames. Cutting tips feature a central oxygen jet surrounded by preheat ports.
Make certain the tip’s threads and connectors are compatible with your torch handle. Proper tip selection optimizes flame stability, heat concentration, and fuel efficiency. This reduces oxidation and incomplete melts.
Always verify the tip size stamped on the tip body before installation to avoid mismatched flame characteristics. For heating large metal surfaces, consider using rosebud welding tips which provide broad, even heat distribution ideal for preheating and brazing tasks.
Although selecting the right torch tip is essential, maintaining its cleanliness and condition guarantees consistent flame quality and safe operation.
After each use, clean the tip orifices with recommended tip cleaners or fine wire to remove carbon deposits and slag buildup.
Avoid using oversized tools that can damage the orifice shape.
Inspect the tips for cracks, warping, or erosion.
Replace any damaged tips promptly to prevent irregular flames or flashbacks.
Store tips in a dry, dust-free environment to prevent corrosion.
Regularly check the tip seating and threads for tight, leak-free connections.
Proper maintenance assures peak gas flow and flame stability, reducing the risk of accidents and improving weld quality.
Don’t forget to follow manufacturer guidelines for cleaning intervals and methods specific to your torch tips.
Additionally, always conduct a thorough equipment inspection before use to identify any damage or wear that could lead to safety hazards or equipment failure.
To get started, you’ll want to open the acetylene valve just a little bit. Once that’s done, grab a striker and ignite the gas. You should see a nice, stable flame.
Next up, it’s time to add some oxygen. Go slowly here—gradually increase the oxygen until you notice the flame transforming into a tight, blue neutral cone. This is what you’re aiming for!
Why is this important? A neutral flame ensures that you have proper heat control, which is crucial for welding or cutting. Plus, it helps you avoid any soot or feathering. So, take your time with these adjustments for the best results!
Achieving the right oxygen-to-acetylene ratio is essential to reach the maximum flame temperature and maintain clean combustion.
Ignite the acetylene by opening its valve slightly and using a striker to produce a controlled flame, avoiding open flames for safety.
Open the acetylene valve about one-quarter turn to allow a steady gas flow.
Hold the striker close to the torch tip and quickly activate it, producing a spark that ignites the gas.
Make certain the flame is stable and yellowish initially, indicating incomplete combustion.
Avoid adjusting the oxygen valve until the acetylene flame is lit.
If the flame sputters or goes out, close the acetylene valve fully, wait a moment, then restart.
Once the acetylene flame is stable, you can proceed to adjust it for welding or cutting.
Proper ignition prevents flashbacks and ensures safe, effective torch operation.
Always wear appropriate personal protective equipment when igniting the torch to avoid injury from sparks and heat.
After successfully lighting the acetylene flame, you gradually open the oxygen valve to introduce oxygen into the mix.
This step requires careful control to avoid unstable flames. Adjust the oxygen flow slowly until the flame sharpens and shortens, indicating a proper mixture.
Watch for these signs:
Keep the flame steady by fine-tuning the oxygen valve while monitoring the flame’s size and color. Proper oxygen addition guarantees efficient heat and safe operation before moving to neutral flame adjustment. This process is crucial because oxyacetylene welding provides adjustable flame temperature for controlled heat input, minimizing thermal distortion.
Open the acetylene valve slightly and use a striker to ignite a small, steady flame. Once lit, slowly open the oxygen valve while observing the flame’s shape and color.
Your goal is a neutral flame characterized by a sharp, well-defined inner blue cone and an outer featherless envelope. Avoid a sooty or yellowish tip, which indicates insufficient oxygen.
Steer clear of a noisy, feathered flame caused by excess oxygen. Adjust both valves incrementally until the flame stabilizes with a crisp, blue cone roughly half an inch long.
This neutral flame delivers optimal heat without oxidizing or carburizing the metal. Maintain this precise balance to guarantee clean welds and consistent heating.
Adapt flame size and shape to the specific metal thickness and task requirements.
Always wear proper flame-resistant fabrics and protective gear when operating the torch to ensure safety from sparks and heat.
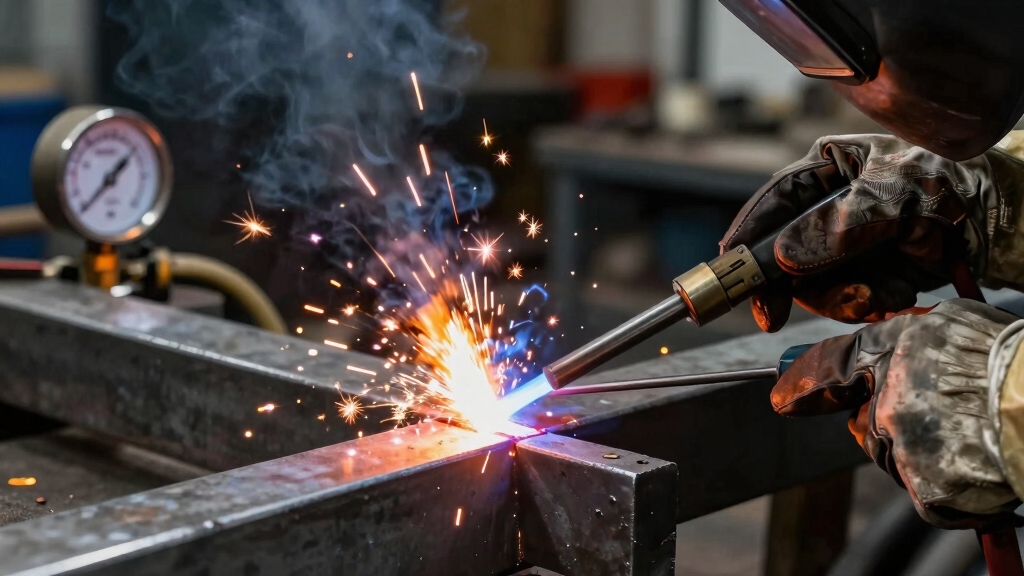
Mastering the basic oxy-acetylene welding technique with filler rods requires careful control of the flame and steady manipulation of both the torch and rod.
Position the torch to preheat the joint evenly, maintaining a neutral flame to avoid oxidation or soot buildup.
Introduce the filler rod steadily into the molten pool, allowing it to melt and blend with the base metals for a strong weld bead.
Keep a consistent travel speed to prevent defects like undercutting or porosity.
Focus on these key actions:
Cutting metal effectively with an oxy-acetylene torch requires precise control of flame settings and steady torch movement.
First, adjust the flame to a sharp, neutral cone by opening acetylene slightly and then adding oxygen until you see a clean, blue flame.
Preheat the metal uniformly to a cherry-red color before engaging the cutting oxygen lever.
Hold the torch at a 90-degree angle to the workpiece and maintain a consistent travel speed to avoid irregular cuts or slag buildup.
Apply the cutting oxygen stream steadily to oxidize and separate the metal efficiently.
Avoid moving too fast, which can cause incomplete cuts, or too slow, which wastes gas and damages the metal.
Proper tip size matching the metal thickness also guarantees effective cutting performance.
After completing your cutting or welding task, properly shutting down and maintaining your oxy-acetylene equipment assures safety and prolongs tool life.
Properly shutting down oxy-acetylene equipment after use ensures safety and extends the lifespan of your tools.
Begin by closing both oxygen and acetylene cylinder valves fully. Acetylene should be closed carefully to avoid gas leaks. Next, open the torch valves to release residual gas pressure, then close them again.
Finally, bleed the hoses by loosening the regulator screws to release trapped gas.
Follow these steps for effective shutdown and upkeep:
Consistent maintenance assures reliable performance and reduces hazards.
Left-hand threads on acetylene fittings prevent accidents by making it impossible to connect acetylene hoses or regulators to oxygen fittings, which always use right-hand threads.
This design stops you from mixing the gases incorrectly, avoiding dangerous leaks, explosions, or equipment damage.
When you handle your setup, the distinct thread direction acts as a physical safety feature.
It ensures you connect each gas line correctly and maintain safe, reliable operation.
Think of acetylene pressure like a tightly wound spring. If you push it beyond 15 PSI, it becomes dangerously unstable and can explode.
You must keep acetylene pressure below 15 PSI because higher pressures risk gas decomposition inside the cylinder. This can lead to fire or explosions.
Staying under this limit guarantees safe, controlled combustion. This protects you and your workspace during welding or cutting operations.
Never exceed this pressure for your safety.
A blowing, feathery flame happens when you add too much oxygen during torch adjustment.
This excess oxygen disrupts the flame’s balance, causing it to become unstable and produce those feathery edges.
To fix this, reduce the oxygen flow gradually until the flame forms a tight, blue, neutral cone shape.
Maintaining the right oxygen-to-acetylene ratio guarantees efficient combustion and prevents wasted fuel or unsafe flame conditions.
You might think torch angle barely matters, but it directly impacts weld bead and cut quality.
Holding the torch too steep or too flat can cause uneven heat distribution, leading to poor penetration or excessive melting.
A proper angle guarantees consistent heat, smooth bead formation, and clean cuts.
For welding, keep the torch slightly tilted forward to guide the filler metal.
For cutting, a perpendicular angle gives precise, controlled cuts.
Flashback arrestors prevent dangerous flames from traveling back into your gas hoses or cylinders, which can cause explosions or equipment damage.
They act as safety devices by stopping flame propagation, protecting you and your setup. Always install them on both oxygen and acetylene lines before operation.
Regularly inspect and maintain them to guarantee reliability. Using flashback arrestors is a critical safety step every time you set up your oxy-acetylene system.
Now that you’ve mastered the setup, safety, and technique, you’re ready to wield the oxy acetylene torch with confidence.
Remember, precision fuels success. Adjust your flame, steady your hand, and let the heat shape your work.
Like a conductor guiding an orchestra, your control transforms raw metal into strong, lasting bonds.
Stay sharp, stay safe, and keep your equipment well-maintained to guarantee every weld sings with strength and reliability.