Phone:
(701)814-6992
Physical address:
6296 Donnelly Plaza
Ratkeville, Bahamas.

Phone:
(701)814-6992
Physical address:
6296 Donnelly Plaza
Ratkeville, Bahamas.

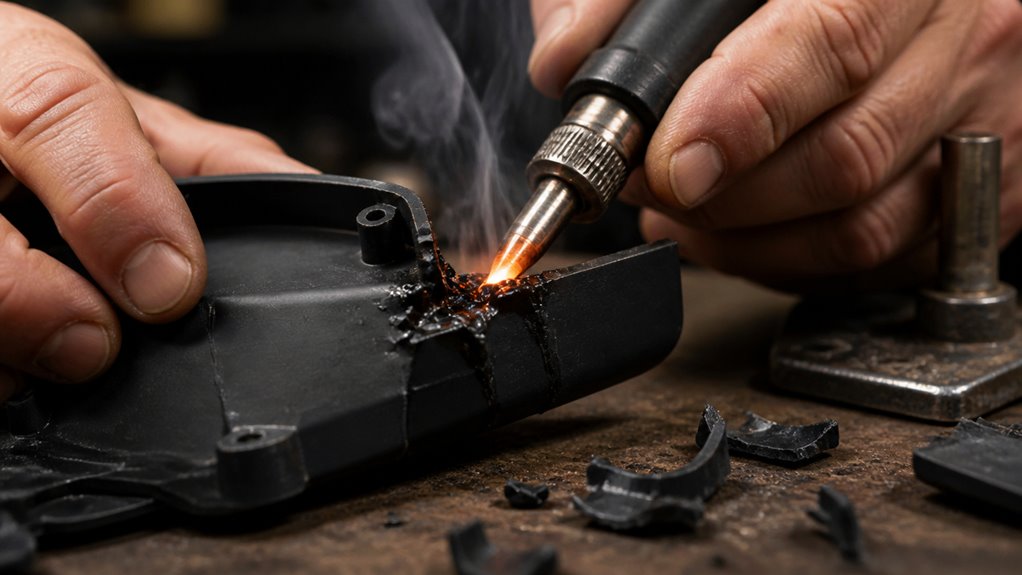
To plastic weld with a soldering iron, first clean and sand the joint edges to form a V-groove for better penetration.
Choose a filler material that matches the base plastic and make certain your soldering iron is fully heated to 200–350°C depending on plastic type.
Use a wide chisel tip, apply short controlled passes, and feed filler into the molten bead while smoothing it immediately.
Maintain proper temperature to avoid damage and reinforce weak joints if needed.
Further techniques will improve your weld quality and reliability.
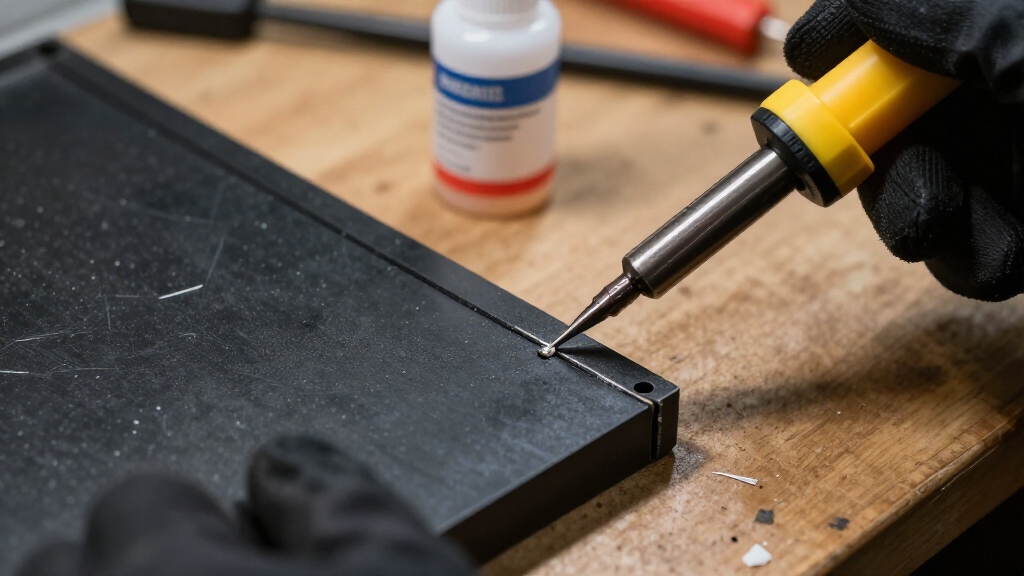
Start by thoroughly cleaning the plastic surfaces with soap and a degreaser to remove any dirt, oils, or residues that could weaken the weld.
Begin by cleaning plastic surfaces with soap and degreaser to ensure a strong, lasting weld.
Next, sand or bevel the edges of the crack to form a V-groove, which improves weld penetration compared to a flush hairline crack.
Select a soldering iron fitted with a wide chisel or spade-style tip for optimal heat transfer and seam control.
Allow the iron to fully warm up, typically several minutes, before starting.
Begin welding at a moderate temperature, adjusting between 200–260°C or 250–350°C depending on the plastic type.
Monitor the melting carefully; the plastic should soften smoothly without smoking or burning.
This preparation guarantees a clean, controlled welding environment that maximizes joint strength and durability.
Proper temperature control is critical to avoid thermal distortion and ensure a strong, defect-free weld.
After preparing your plastic surfaces and selecting the right soldering iron setup, focus on choosing a filler material that closely matches the base plastic. This compatibility guarantees optimal fusion and mechanical strength in the weld.
Identify the plastic type; common options include ABS, HDPE, or nylon. Select a filler rod or filament made from the same polymer. Using 3D-printing filament of matching composition or compatible zip ties can serve as effective filler materials.
Avoid solder wire or unrelated plastics, as these won’t bond properly and may weaken the repair. Confirm the filler’s diameter fits your groove size, typically around 1.75 mm for filament.
Matching thermal and chemical properties prevents poor adhesion, cracking, or delamination. This maximizes the durability of your plastic weld.
Additionally, setting your soldering iron to the correct temperature based on the plastic type is essential to avoid overheating or underheating, which can degrade the weld strength.
Align the plastic pieces firmly before applying heat to guarantee a stable seam throughout the welding process.
Begin by tack-welding small points along the seam to hold parts in place. Use a soldering iron with a wide chisel tip, running it along the V-groove in short, controlled passes.
Employ a stitching motion: press, melt, lift, move slightly, and repeat to create a consistent molten bead.
Feed filler material into the leading edge of the hot tip rather than pushing directly into the weld pool; this assures better fusion and bead uniformity.
Immediately after melting, smooth the bead using a flat PTFE-coated spatula or damp silicone tool while the plastic remains hot to avoid voids and weak spots.
Maintain alignment to preserve seam integrity throughout.
For optimal results, always match welding rod material exactly to the base plastic type to ensure strong, compatible welds.
Although maintaining the correct temperature might seem straightforward, it’s critical to avoid overheating or underheating your plastic weld. Excess heat can burn or deform the plastic, while insufficient heat prevents proper fusion.
To keep temperature right and avoid common mistakes, follow these steps:
Proper cleaning and surface preparation, similar to contaminant removal in metal welding, can significantly improve the quality of plastic welds.
After you form the weld bead, it’s a good idea to smooth it out right away while the plastic is still molten. This helps eliminate voids and ensures that you have a tight surface contact.
You can use a flat PTFE-coated spatula or even a damp silicone tool to press the bead flat and make it uniform.
For an extra boost in strength, why not consider embedding some stainless steel wire mesh or repair staples into the softened plastic? This can really help reinforce the joint and make it last longer.
Controlling heat input during welding is important to minimize the heat-affected zone and maintain joint strength.
Smooth the weld bead immediately after passing the soldering iron to prevent voids and guarantee consistent surface contact. This step is critical to avoid weak spots and ensure a uniform joint.
Use these techniques:
Always ensure your workspace is set up with proper ventilation and safety to prevent inhaling harmful fumes during welding and smoothing processes.
Enhance the durability of your plastic welds by incorporating reinforcement techniques that integrate additional materials directly into the weld bead.
After shaping the bead with a PTFE-coated spatula or damp silicone tool, embed stainless steel wire mesh or repair staples into the softened plastic while it’s still malleable.
This guarantees the reinforcement sinks flush, distributing stress evenly and preventing crack propagation.
Use compatible mesh materials to avoid bonding issues.
Apply consistent pressure during embedding to eliminate voids and gaps.
Work swiftly before the weld cools, as premature solidification traps weaknesses.
Reinforcements combined with properly shaped weld beads greatly increase mechanical strength and longevity.
Always match reinforcement types and filler materials to the base plastic for peak fusion and structural integrity in your repair.
Ensure thorough surface cleaning before welding to promote maximum adhesion and prevent contamination during repair surface preparation.
Although plastic welding can be an effective repair technique, you must prioritize safety by working in a well-ventilated area.
Control the soldering iron’s temperature to prevent overheating and harmful fumes.
Additionally, recognize situations where plastic welding won’t work to avoid wasted effort or damage.
Consider these limitations:
For repairs involving glass surfaces, it is important to understand the limitations of resin-based kits as plastic welding is not suitable for laminated or tempered glass.
You can repair holes as well as cracks with plastic welding, but holes require more preparation.
You’ll need to bevel and clean the edges around the hole to create a V-groove. Then use compatible filler material to build up the missing section.
Tack-weld the filler in place gradually, ensuring proper fusion and avoiding overheating.
Reinforcement like stainless steel mesh can help strengthen larger holes, producing a durable, structurally sound repair.
Think of your weld as molten lava cooling into solid rock. It sets quickly but gains full strength over time.
Typically, a plastic weld feels set within minutes as it cools below melting temperature.
Full curing takes 24 to 48 hours, depending on plastic type and thickness.
During this period, molecular bonds stabilize, so avoid stress or load on the repair to guarantee a durable, resilient joint.
Yes, you can paint over a plastic weld, but you need to wait until the weld fully cools and cures to avoid surface defects.
Start by sanding the welded area smooth to guarantee proper paint adhesion.
Use a plastic-compatible primer to enhance bonding between the weld and paint.
Apply thin, even coats of paint to avoid runs or cracking.
Proper surface prep and curing time are essential for a durable, professional finish.
You can plastic weld outdoors in cold weather, but you’ll need to control the environment carefully.
Cold temperatures slow melting and cooling, which can cause weak bonds or warping.
Use a temperature-controlled soldering iron set at the correct heat.
Work in a sheltered spot to reduce wind and drafts, and preheat the plastic slightly if possible.
Keep your passes short and consistent to maintain proper fusion and avoid cracking during cooling.
If your plastic weld cracks like dry earth or peels away like old paint, it’s a clear sign of failure.
You’ll notice weak seams, gaps, or rough, brittle beads instead of smooth, glossy joins.
Inspect for discoloration or burn marks, which indicate overheating.
Also, if the repaired area flexes or breaks under slight pressure, the bond hasn’t fused deeply enough.
This signals you need to revisit cleaning, temperature, or filler compatibility.
Think of plastic welding like stitching fabric with a hot needle. Precision matters.
Just as a tailor selects matching thread for durability, you must choose the right filler and maintain the correct temperature for a strong bond.
A study found that improper heat can reduce weld strength by 40%.
By mastering technique and preparation, you make certain your repairs hold firm, saving time and materials.
Remember, patience and precision turn plastic welding from a quick fix into lasting craftsmanship.