Phone:
(701)814-6992
Physical address:
6296 Donnelly Plaza
Ratkeville, Bahamas.

Phone:
(701)814-6992
Physical address:
6296 Donnelly Plaza
Ratkeville, Bahamas.

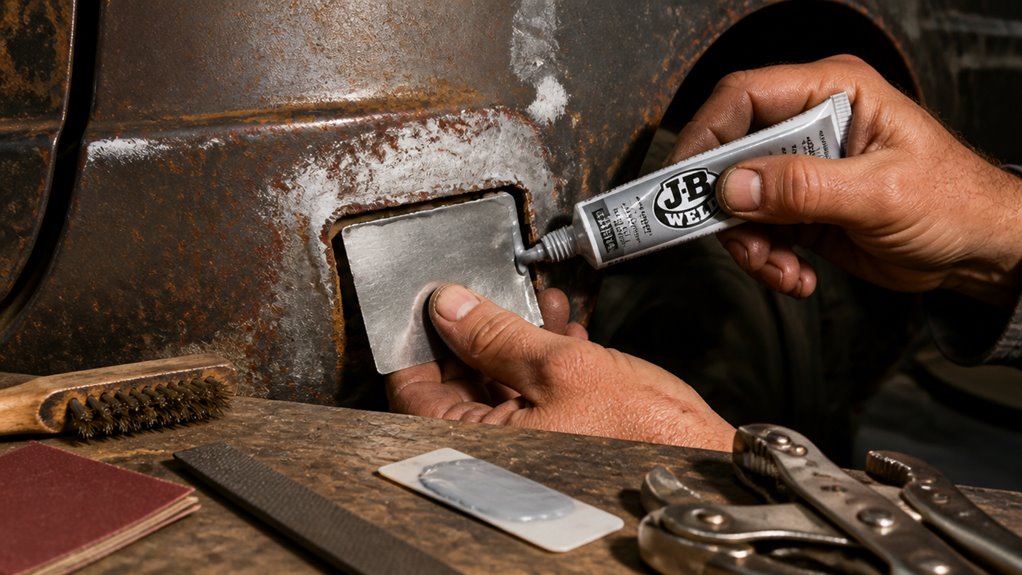
To fix a hole in metal without welding, start by thoroughly cleaning and sanding around the damaged area to bare metal. This removes rust and corrosion.
Choose a repair method based on stress and exposure. Epoxy fillers suit temporary fixes, while mechanical patches with screws or rivets offer durable strength.
You can also use soldering or UV-curable patches with urethane sealants for watertight bonds. Proper surface prep and finishing guarantee lasting adhesion and corrosion resistance.
Here’s how to select and apply each technique effectively.
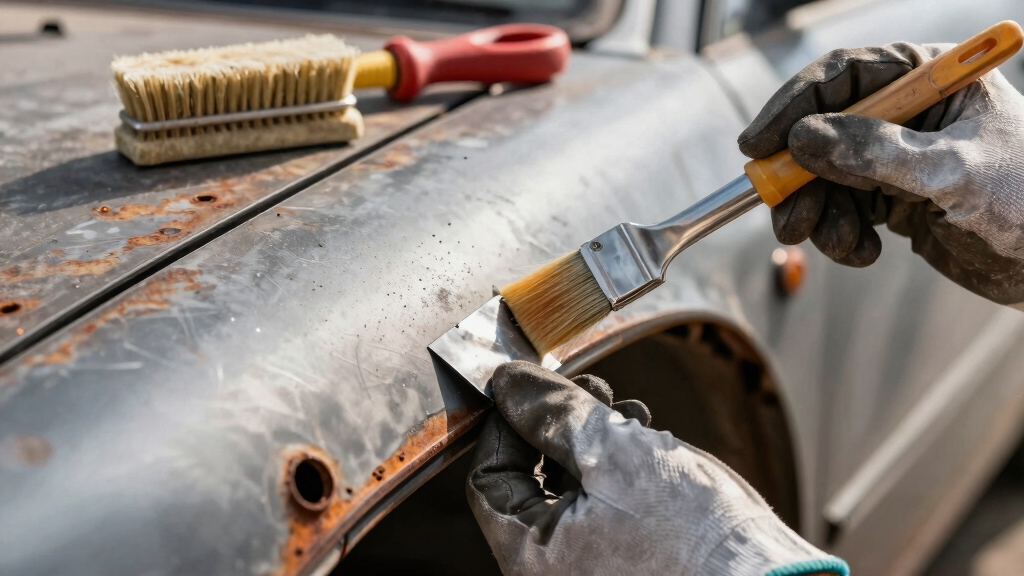
Start by thoroughly cleaning and sanding the metal surface around the hole to guarantee proper adhesion of any repair materials. Use 80-grit sandpaper to remove paint, rust, grease, and corrosion down to bare metal, extending about one inch beyond the hole on both sides.
Thoroughly clean and sand around the hole with 80-grit sandpaper for optimal repair adhesion.
After sanding, wipe the area with acetone or a water-and-toothbrush scrub to eliminate dust, acid residues, and debris. Make certain the edges of the hole are clean and smooth, free from loose particles.
For rusted areas, strip rust completely with coarse sandpaper before proceeding. Before applying any patch or filler, dry the surface thoroughly and clean again with an alcohol-drenched cloth to remove residual dust.
Proper preparation prevents adhesion failure and extends the repair’s durability. It is crucial to use effective degreasing solvents such as acetone to remove grease and oils that can compromise the repair materials’ adhesion.
When it comes to repairing metal holes, durability is key. Before you choose a method, think about how strong you need the repair to be. For example, using metal patching with fasteners typically provides a sturdier and longer-lasting solution compared to epoxy fillers.
Also, consider the amount of surface preparation each method requires. Taking the time to thoroughly clean and sand the area can really make a difference. Good prep work ensures proper adhesion and helps prevent any future corrosion, which is always a plus!
Finally, it’s important to match your repair technique to the condition of the metal and the kind of stress it will face. This way, you can optimize your fix without resorting to welding. It’s all about finding the right balance!
For epoxy-based repairs, following proper surface preparation and allowing full curing time is essential to achieve maximum strength and durability.
When selecting the best method to repair a hole in metal, consider how durable the fix needs to be based on the metal’s application and exposure conditions.
Durability varies with repair type, environmental stress, and load demands. You want a method that withstands mechanical strain, corrosion, and temperature changes.
Evaluate these factors to decide:
Match your repair choice to these criteria to make sure the fix remains reliable and functional over time. Proper surface preparation is critical to ensure strong and durable bonding when using adhesives or brazing methods.
Proper surface preparation is critical to guarantee a strong, lasting bond between the repair material and the metal. You’ll need to sand hole edges with 80-grit paper down to bare metal, removing paint, rust, and grease.
Clean the area with acetone or a detergent solution, making certain no debris or oils remain. A clean, roughened surface promotes adhesion and prevents future corrosion.
| Step | Purpose |
|---|---|
| Sand edges (80-grit) | Remove contaminants and rust |
| Clean with acetone | Eliminate oils and residues |
| Wipe dry | Prepare for filler or patching |
Skipping these steps weakens the repair and causes failures. Proper surface prep ensures your chosen method, whether epoxy, patching, or soldering, achieves maximum durability and longevity. Maintaining a clean welding area helps prevent contaminants that could compromise the repair’s strength and quality.
Sure! Here’s a more conversational version of your text:
—
Alright, let’s get started on fixing those metal holes with epoxy! First things first, you’ll want to mix equal parts of resin and hardener. Just take your time with this step to avoid trapping air bubbles in your epoxy—it makes a big difference.
Once you’ve got your mixture ready, grab a putty knife and start applying it evenly over the hole. If you’ve got some thin sheets of metal mesh, it’s a great idea to press them behind the area for extra support.
After that, gently clamp the area to hold everything in place. It’s important to let the epoxy cure for about 24 hours, especially in a warm spot. This way, you’ll ensure a strong and lasting bond. Easy, right? Let’s get to it!
Keep in mind that proper surface preparation is critical for the epoxy to bond well and provide maximum strength.
—
Mixing epoxy correctly requires combining equal parts resin and hardener while stirring slowly to prevent air bubbles that weaken the bond.
To guarantee a strong, durable patch on metal, follow these steps precisely:
Use a smooth, disposable surface and a clean, rigid mixing tool to ensure consistent mixing and avoid contamination during preparation of the epoxy components.
Apply the epoxy filler evenly over the hole using a putty knife or applicator, assuring full coverage and slight overfilling to allow for sanding later.
If the metal is thin, press a scrap metal disc or mesh on the backside before applying filler from the front. Lightly clamp the repair without squeezing out the epoxy to maintain adhesion and structural integrity.
Place the piece in a warm, stable environment, avoiding high heat that can degrade curing. Allow the epoxy to cure undisturbed for 24 hours to reach full hardness.
After curing, sand the excess filler flush with the metal surface using progressively finer grit sandpaper to prepare for finishing. Proper application and curing assure a durable, gap-free repair without welding.
For best results, ensure the metal surface is thoroughly cleaned and mechanically roughened to achieve maximum adhesion strength.
When you need to patch metal holes without welding, selecting the right method depends on the hole size, metal type, and desired durability. You can use epoxy fillers, soldering, or UV repair patches for effective results.
Choosing the best non-welding patch method depends on hole size, metal type, and durability needs.
Each method requires precise surface preparation and curing to guarantee durability. Proper surface preparation is essential to ensure adhesion and prevent future corrosion or damage.
Secure metal patches firmly by selecting a patch that extends at least two inches beyond the hole’s edges. Prepare both surfaces with rough sanding to enhance adhesion.
Apply adhesive beads to the patch’s back and edges before positioning it over the hole. Use pan-head sheet metal screws spaced 3 to 4 inches apart around the perimeter.
Place screws within one inch of the patch’s edges to guarantee even pressure and secure sealing. For a watertight bond, install rivets using a rivet gun, drawing the patch tightly against the base metal.
Drill pilot holes before fastening to avoid metal distortion. This mechanical fastening method reinforces the patch’s hold, maintains alignment, and supports the adhesive underneath.
It provides a durable, leak-resistant repair without welding. In some cases, techniques like mechanical bonding through plug welds can be used when welding is feasible for stronger joint integrity.
Beyond fastening patches mechanically, soldering and brazing offer a reliable method to bond metal directly at the hole site.
You start by beveling the hole edges with a 3/16 drill bit to increase surface contact, improving solder adhesion.
Next, heat the metal until it’s hot enough to prevent solder from running off.
Then apply a thin base layer of solder, known as tinning, to create a solid foundation.
Finally, feed solder into the hole where flux activates, allowing it to wick into the gap and form a strong bond.
After cooling, clean off flux residues thoroughly to avoid corrosion.
This precise process guarantees durable, seamless repairs without altering the metal’s structural integrity.
Proper flux selection and controlled heating are crucial to avoid damaging the zinc coating and minimize harmful fume release.
Apply a UV repair patch by first thoroughly cleaning and preparing the metal surface to guarantee maximum adhesion.
Sand the area around the hole with coarse grit. Then wipe it clean of dust, grease, and corrosion using alcohol or acetone.
Next, spread a color-matched urethane sealant evenly over the metal plate to enhance bonding.
Press the UV patch firmly onto the damaged spot, guaranteeing no air bubbles or gaps remain.
Expose the patch to a UV light source for 5–10 minutes, following manufacturer instructions precisely to complete curing.
This process hardens the patch into a durable, permanent fix without welding.
Make sure the patch edges fully adhere to prevent moisture ingress and guarantee structural integrity.
Avoid disturbing the patch during curing for best results.
Typically, finishing and protecting your metal hole repair involves carefully sanding the cured filler to achieve a smooth, flush surface.
Finishing your metal hole repair starts with sanding the cured filler to create a smooth, even surface.
You’ll want to progress through finer grits to guarantee uniformity and prepare the area for sealing. Follow these steps:
This method guarantees durability and corrosion resistance, extending the lifespan of your repair without welding.
You can repair metal holes outdoors in cold weather, but you’ll face challenges.
Epoxy and adhesives cure slower or may not harden properly below 50°F (10°C). To improve results, warm the surface with a heat gun or work in a sheltered area.
Avoid moisture and ensure thorough surface cleaning.
UV patches also need sufficient light exposure, so choose sunny conditions or use artificial UV light for proper curing.
Coincidentally, the lifespan of your metal repair often matches how well you prepare and finish it.
Typically, without welding, a properly applied epoxy or patch can last from several months to a few years, depending on stress and exposure.
To maximize durability, make certain thorough cleaning, use high-quality adhesives or fasteners, and protect the repair with primer and paint.
Regular inspections help you catch any weakening before failure occurs.
Yes, you face health risks when using epoxy fillers. They emit volatile organic compounds (VOCs) and can cause skin irritation, respiratory issues, or allergic reactions if inhaled or touched without protection.
You should always wear gloves, goggles, and a respirator mask in a well-ventilated area. Avoid direct skin contact and prolonged exposure.
Proper cleanup and disposal are also vital to minimize harmful effects and guarantee your safety during and after application.
You’ll need sandpaper like 80-grit to strip down to bare metal with surgical precision, plus acetone and a toothbrush for scrubbing away every speck of grease, paint, and corrosion.
Don’t forget a clean cloth soaked in alcohol to wipe dust and debris.
These tools guarantee your metal’s surface is perfectly prepped, giving adhesives or fillers a rock-solid bond and preventing future rust or repair failures.
You shouldn’t paint metal repairs immediately after curing. Wait until the epoxy or filler fully cures, typically 24 hours.
Then sand the repair flush using 120- to 220-grit sandpaper for smoothness. Clean the area thoroughly to remove dust and oils.
After cleaning, apply a primer coat to seal the repair. Only after priming should you paint, ensuring better adhesion, durability, and a seamless finish matching the surrounding metal.
So, you’ve learned how to fix that pesky metal hole without breaking out the welding gear or summoning a blacksmith.
Who knew epoxy, screws, and even UV patches could save the day?
Now you can proudly avoid fire hazards and molten metal mishaps while keeping your project intact.
Just remember, patience and precision beat brute force unless you want your “fix” to become a modern art sculpture.
Happy patching!