Phone:
(701)814-6992
Physical address:
6296 Donnelly Plaza
Ratkeville, Bahamas.
Phone:
(701)814-6992
Physical address:
6296 Donnelly Plaza
Ratkeville, Bahamas.
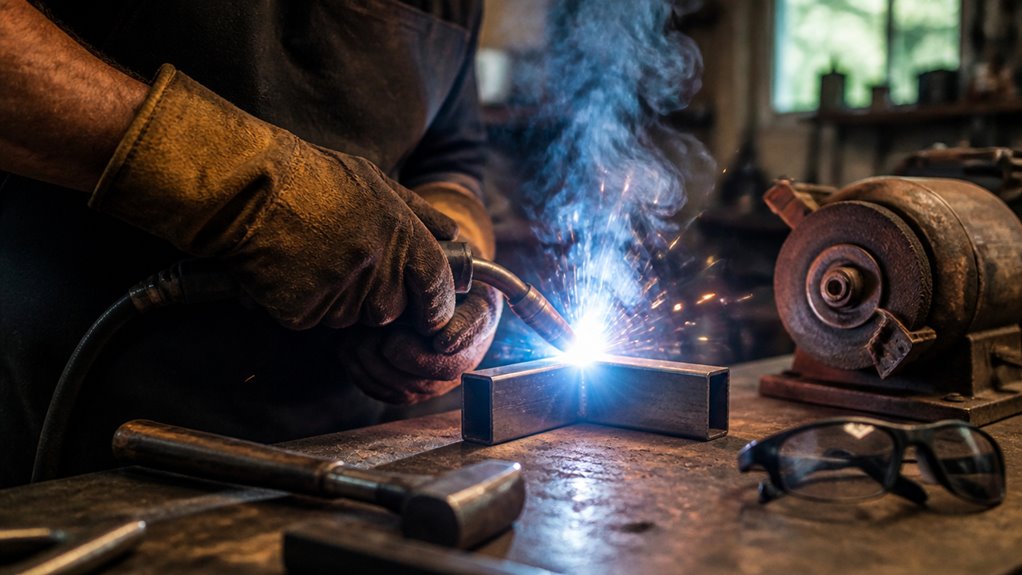
Set up a safe, well-ventilated workspace near open doors or windows. Clear away flammable materials.
Gather essential gear like a welding helmet, gloves, torch, and compatible filler wire.
Prepare metal by cleaning rust, oil, or paint. Ensure tight joint fit-up with clamps.
Practice steady torch control while maintaining a consistent arc and travel speed on scrap steel.
Inspect welds for defects and clean slag properly.
Following these steps builds solid fundamentals before advancing to simple projects and techniques.
Choosing a well-ventilated spot for welding at home safeguards you from harmful fumes and maintains a safer working environment.
Select a location with ample airflow, such as near open doors or windows, or use fans to direct fumes away from your breathing zone.
Make certain your work surface is nonflammable, like a metal table, and clear the area of combustible materials to prevent fire hazards.
Position your welding cables, gas lines, and leads to avoid trip hazards and accidental damage.
Keep a fire extinguisher within easy reach and inspect the surroundings for hidden ignition sources like oily rags or paper.
Always wear personal protective equipment to protect your skin and eyes.
Establishing these safety measures helps create a controlled, hazard-minimized setup for effective home welding practice.
Additionally, ensure that fume extraction systems are properly positioned to draw smoke away from your breathing zone for enhanced respiratory safety.
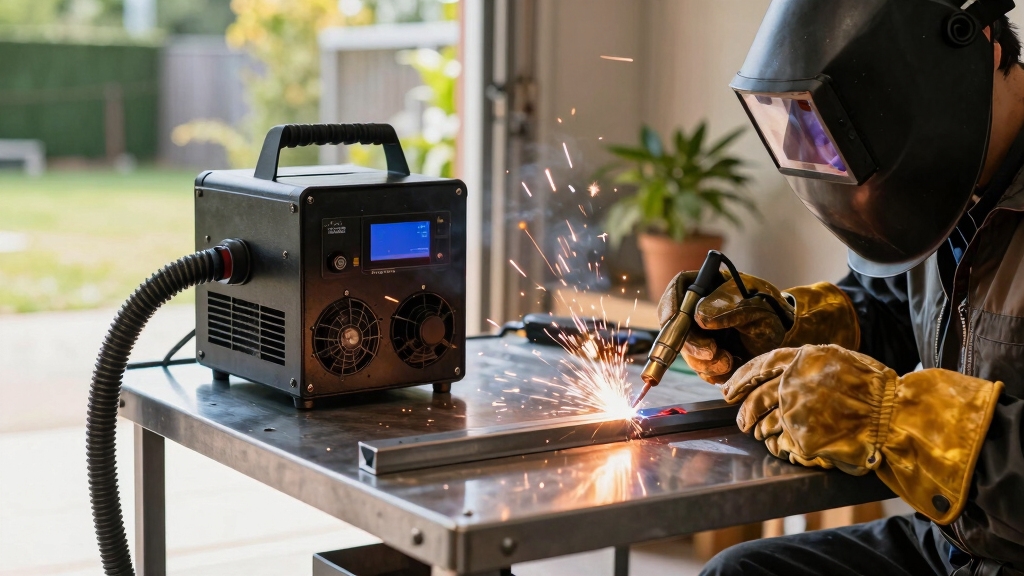
When you’re getting started with welding, the first thing you’ll want to do is gather some essential equipment. You’ll need a torch or gun, along with cables and a regulator that match the welding process you’ve chosen. It’s like setting up your workspace—everything should be ready to go!
Next up, let’s talk about materials. For beginners, scrap steel is a great option. It’s super cost-effective, and it’s perfect for practicing your skills without breaking the bank. Plus, you can really get a feel for the process without the pressure of using expensive materials. Proper machine setup and metal preparation are crucial to avoid defects and achieve strong welds.
Typically, assembling essential welding equipment starts with a basic home welding kit, which includes a torch or gun, cables, and a regulator suited to your chosen welding process.
You’ll also need protective gear such as a welding helmet, gloves, and flame-resistant clothing. Preparation tools like clamps and grinders guarantee proper fit-up and surface cleanliness.
For beginners, MIG welding gear is recommended due to its ease of use.
| Equipment Type | Purpose |
|---|---|
| Welding Kit | Torch/gun, cables, regulator |
| Safety Gear | Helmet, gloves, protective wear |
| Prep Tools | Clamps, grinders, measuring devices |
Make sure your setup is organized to avoid hazards and maintain a safe workspace with good ventilation. Using a multi process welder can provide versatility and efficiency if you plan to explore different welding techniques as you progress.
Once your welding equipment and safety gear are ready, focus on selecting practice materials that suit your skill level and welding process.
Start with scrap steel plates or mild steel sheets, as they’re affordable and weld well with MIG, TIG, or stick welding.
Make certain the metal is clean. Remove rust, paint, and oil to avoid contamination and weak welds.
Match your filler wire or electrodes to the base metal and welding type for ideal results.
Use clamps or magnets to hold pieces securely during practice.
Avoid thin or coated metals initially, as they complicate heat control and bead formation.
Gather basic prep tools like a grinder, wire brush, and measuring instruments to ensure accurate fit-up.
These materials and gear will help you build consistent technique safely and efficiently.
Always ensure thorough surface preparation, including removing oxidation and contaminants, to improve strength and durability of your welds, a crucial welding best practice.
To kick things off, you’ll want to give those metal surfaces a good cleaning. It’s super important to get rid of any rust, oil, or paint because these can really compromise your weld strength.
Once your surfaces are clean, check how well the pieces fit together. They should be nice and snug! Use clamps or magnets to hold everything in place; this way, you won’t have to worry about anything shifting while you’re welding.
And before you dive into the welding, take a moment to measure and mark your joints. Keeping everything accurate is key for maintaining consistency and alignment throughout your project. Trust me, it’ll make a big difference in the end!
Remember that proper rust removal is essential to prevent weak welds and porosity, ensuring a strong joint.
Clean metal surfaces are essential for achieving strong, defect-free welds. Before you start welding, remove any rust, paint, oil, or dirt that can cause contamination, porosity, or weak bonds.
Use proper tools and techniques to ensure the metal is spotless and ready for welding. Here’s how to prepare:
Use a wire brush or grinder to eliminate rust and scale.
Apply solvents or degreasers to remove oils and grease.
Scrape off any paint or coatings near the weld joint.
Wipe the surface with a clean, lint-free cloth.
Inspect the metal visually and by touch for remaining contaminants.
Ensure the metal is completely dry before welding to avoid contamination and weak bonds.
When aligning metal pieces for welding, ensuring a tight fit is essential to prevent gaps that can weaken the joint or cause weld defects. You need to position the metal edges flush without overlaps or spaces.
Use miter clamps, C-clamps, or magnet squares to hold pieces firmly in place, maintaining alignment throughout the welding process. Clamps minimize movement from heat distortion or accidental contact, which can disrupt bead consistency.
Check that clamping force doesn’t deform the metal or alter joint angles. For thinner materials, use multiple smaller clamps to distribute pressure evenly.
Consistent, tight fit-up reduces porosity and improves penetration by allowing the weld pool to flow uniformly across the joint. Proper clamping setup sets the foundation for clean, strong welds and efficient practice sessions at home.
Selecting clamps made of high-carbon steel with heat-treated jaws can significantly improve durability and maintain clamping force under welding heat and pressure.
After securing your metal pieces with clamps for a tight fit, you need to accurately mark and measure each joint before cutting or welding.
Precise measurements guarantee proper alignment and consistent weld quality. Use a metal scribe or fine-tip marker for clear, permanent lines.
Double-check all dimensions with a steel ruler or caliper to avoid errors. Mark reference points for bevels or weld starts to guide your work.
Verify joint angles and lengths precisely before proceeding. Use square tools or protractors to confirm correct geometry.
Mark bevel lines if deeper penetration welds are planned. Label each piece to maintain orientation during assembly.
Keep marks clean and visible without contaminating metal surfaces. This preparation step prevents misalignment and promotes clean, strong welds.
Properly securing pieces with clamps and magnets ensures consistent joint fit-up and prevents shifting during welding.
Although mastering basic welding movements can seem challenging at first, controlling your torch angle precisely is essential for producing consistent, high-quality welds.
Mastering torch angle control is key to achieving consistent, high-quality welding results.
Keep the torch angled between 10 to 15 degrees from vertical, pointing in the direction of travel to guarantee proper penetration and bead shape.
Maintain a steady, smooth motion, avoiding abrupt changes that lead to uneven welds or porosity.
Focus on keeping a consistent arc length, the gap between the electrode and workpiece, to stabilize the arc and control heat input.
Practice moving the torch at a uniform speed, which directly influences bead width and penetration depth.
Additionally, maintaining a proper stickout length helps balance heat input and arc stability for better weld quality.
Mastering basic welding movements and torch angle control sets the foundation. Building skill requires hands-on practice with controlled drills and bead runs.
Focus on consistent travel speed and steady torch angle to develop smooth, uniform beads. Use scrap steel to run padding beads, refining your stickout and arc length control.
Repeating line-tracing drills will improve hand steadiness. Practicing puddle control helps you understand molten metal behavior. Short, controlled welds let you assess and adjust your technique step-by-step.
Run straight beads on flat plate to develop uniformity.
Maintain consistent torch angle and arc length.
Trace marked lines to improve hand control.
Observe puddle shape and adjust speed accordingly.
Repeat short welds, reviewing each for improvement.
Correct tungsten electrode grinding is essential for arc stability and improved weld quality.
Inspect your welds carefully to ensure structural integrity and identify any defects. Start by removing slag from flux-based welds using a chipping hammer and wire brush. This exposes the weld surface for thorough inspection.
Carefully inspect welds by removing slag with a chipping hammer and wire brush for a clear, thorough examination.
Look for uniform bead shape, consistent width, and smooth shifts without undercuts or overlaps. Check for cracks, porosity, or inclusions that compromise strength. Assess penetration by observing discoloration patterns near the weld, indicating proper heat spread and fusion.
Use a grinder sparingly to smooth rough areas, avoiding excessive metal removal that weakens the joint. Compare your welds to previous attempts, noting improvements or recurring issues.
Proper cleanup and inspection help you understand weld quality. This enables targeted adjustments to your technique and ensures safer, stronger connections in your projects.
Start by selecting simple projects that match your current skill level to effectively apply and reinforce your welding techniques. Choose tasks that challenge you just enough to practice consistent bead control, joint fit-up, and penetration without overwhelming complexity.
Focus on projects that use scrap steel and basic joint types like butt, lap, or T-joints. Consider the following easy projects:
These projects let you practice fit-up, welding position, and bead consistency. They help you build confidence and skill before tackling more advanced builds.
You should store welding equipment in a dry, well-ventilated area away from combustible materials.
Coil cables and hoses neatly to prevent kinks or damage, and hang them off the floor.
Secure gas cylinders upright with chains or brackets to prevent tipping.
Keep regulators and torches protected in dedicated cases.
Regularly inspect tools for wear before storage.
Make certain all power sources are disconnected to avoid accidental starts or electrical hazards.
Avoid common beginner mistakes like poor surface preparation. Always clean metal thoroughly.
Don’t neglect proper PPE or ventilation; safety is essential. Maintain a consistent travel speed and torch angle to prevent uneven beads.
Avoid excessive arc length, which leads to spatter and weak welds. Don’t rush filler addition; control it carefully.
Finally, don’t skip inspection. Always check for cracks, porosity, and penetration to guarantee weld integrity before moving on.
You can weld different metals together, but it requires careful selection of compatible materials and filler metals.
Avoid joining metals with vastly different melting points or thermal expansion rates to prevent cracking.
Use appropriate welding processes, like TIG, for dissimilar metals.
Clean both surfaces thoroughly and select a filler rod designed for the metal combination.
Always test welds on scrap pieces to verify strong, defect-free bonds before finalizing your project.
You should maintain your welding machine regularly, ideally after every 20-30 hours of use or monthly if used less frequently.
Inspect cables, connections, and gas lines for wear or leaks.
Clean dust and debris from vents and internal parts to prevent overheating.
Check consumables like contact tips and liners, replacing them as needed.
Scheduling routine servicing with a professional annually guarantees peak performance and safety.
Don’t ignore any unusual noises or malfunctions.
If you get welding burns, immediately cool the area with cold running water for at least 10 minutes to reduce tissue damage.
Avoid ice or creams.
Cover the burn with a clean, non-stick sterile dressing.
For minor burns, take over-the-counter pain relief if needed.
Seek medical attention for severe burns, blisters, or if the injury affects a large area.
Always keep a first aid kit nearby and review safety protocols to prevent future injuries.
Remember, practice makes perfect when it comes to welding at home. By choosing a safe, ventilated area and using proper gear, you’ll build solid skills efficiently.
Always inspect your welds carefully and clean up properly to guarantee quality and safety. Start with simple projects to apply what you learn and steadily increase complexity.
With consistent effort and attention to detail, you’ll weld like a pro in no time. Keep sparks flying safely!