Phone:
(701)814-6992
Physical address:
6296 Donnelly Plaza
Ratkeville, Bahamas.
Phone:
(701)814-6992
Physical address:
6296 Donnelly Plaza
Ratkeville, Bahamas.
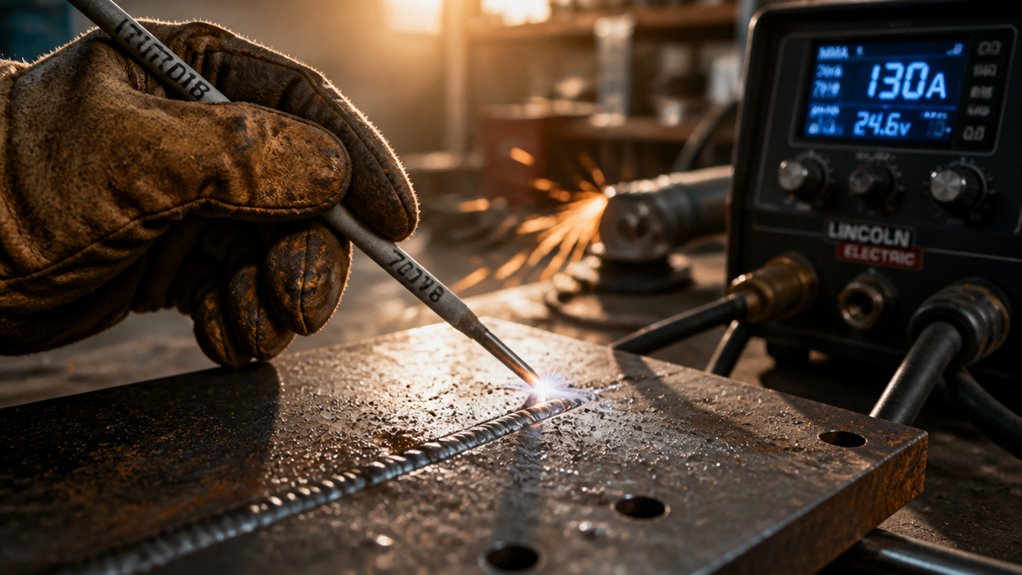
You should set your welder between 75 and 210 amps when using 7018 rods, depending on rod diameter, material thickness, and welding position.
For example, 3/32-inch rods work well at 75–110 amps, while 5/32-inch rods need 145–210 amps.
Use DC+ polarity for ideal arc stability.
Start at the lower end to avoid defects, then fine-tune with test welds.
Understanding these factors helps you achieve strong, clean welds tailored to your needs.
Although the best amperage for 7018 welding rods depends on rod diameter and welding position, you should generally operate within specific ranges to guarantee consistent arc stability and weld quality.
Choosing the right amperage for 7018 rods ensures stable arcs and high-quality welds.
For 3/32-inch rods, maintain 75–110 amps; for 1/8-inch rods, 110–130 amps is optimal. Larger diameters like 5/32 inches require 145–210 amps.
Adjust amperage based on welding position: flat positions tolerate higher amperage, while overhead and vertical positions demand reductions to control the weld puddle and prevent defects.
Starting at the low end of these ranges is advisable if you’re new to welding to avoid burn-through or slag issues. Always verify settings with test welds on scrap material to confirm ideal penetration and bead appearance before proceeding on critical workpieces.
Maintaining the correct amperage also helps preserve the low-hydrogen flux coating integrity, reducing the risk of weld cracking and ensuring better weld toughness.
Calculate the appropriate amperage for a 7018 welding rod by correlating it directly to the rod’s diameter.
Use established guidelines such as 30 amps per 1/32 inch of diameter as a starting point.
For example, a 3/32-inch rod typically requires 75 to 110 amps, while a 1/8-inch rod operates best between 110 and 130 amps.
Larger diameters, like 5/32 inch and 3/16 inch, demand correspondingly higher amperage ranges, up to 230 and 300 amps respectively.
You can also apply the decimal diameter method, where you multiply the diameter in inches by 1000 to estimate amperage.
For instance, a 0.125-inch rod requires approximately 125 amps.
Always verify these calculations with manufacturer recommendations and test welds to ensure optimal penetration and bead quality without overheating or undercutting.
The low-hydrogen flux coating of the 7018 rod requires compatible current settings, typically AC or DC+, to maintain arc stability and prevent weld defects.
Once you’ve determined the amperage based on the rod diameter, adjusting it to match the thickness of the material is the next step.
For 7018 rods, thinner metals require lower amperage to avoid burn-through. Thicker metals need higher amperage to guarantee proper penetration.
For example, 1/8 inch steel typically uses 90 to 125 amps, whereas 1/4 inch steel demands 130 to 140 amps. At 3/8 inch thickness, amperage should range between 180 and 220 amps.
1/2 inch steel requires 225 to 280 amps. You should always start at the lower end of these ranges, especially if you’re less experienced.
Adjust based on weld quality and bead appearance. Precise amperage control directly influences weld integrity and minimizes defects.
Always consider the material thickness and type to match amperage using the general rule of thumb of 1 amp per 0.001 inch for best results.
When welding in different positions, you must adjust your amperage to maintain ideal control over the weld puddle and penetration.
Flat position allows higher amperage for deeper penetration. Vertical and overhead positions require lower amperage to prevent excessive puddle fluidity and sagging. Horizontal welds demand a slight reduction compared to flat to balance penetration and control.
Adjust amperage carefully based on position to achieve strong, defect-free welds with 7018 rods. Maintaining precise control over heat input is crucial for weld quality and can be enhanced by understanding arc energy density in welding processes.
Set your welding machine to the correct polarity before starting with 7018 rods to guarantee peak arc stability and penetration. Typically, 7018 rods perform best with DC+ (direct current electrode positive), which guarantees ideal slag coverage and weld bead quality.
While AC polarity is acceptable, it may reduce arc stability. Confirm your equipment settings align with manufacturer guidelines before welding. Always perform test welds on scrap material to verify settings.
Proper heat input and steady technique are essential to maintain weld integrity and maximize electrode performance.
| Polarity Type | Effect on 7018 Welding |
|---|---|
| DC+ (Electrode Positive) | Best arc stability and penetration |
| AC (Alternating Current) | Acceptable, less stable arc |
| DC- (Electrode Negative) | Not recommended for 7018 rods |
Set amperage and polarity precisely to maximize weld integrity and minimize defects.
You must store 7018 electrodes in a low-humidity environment because moisture absorption degrades their flux coating. If rods absorb moisture, you’ll experience hydrogen-induced cracking and poor weld quality.
Keep them in a rod oven at about 250°F to maintain dryness. If rods get damp, bake them before use to restore performance. Proper storage guarantees consistent arc stability, prevents weld defects, and maintains mechanical properties essential for reliable, high-quality welds.
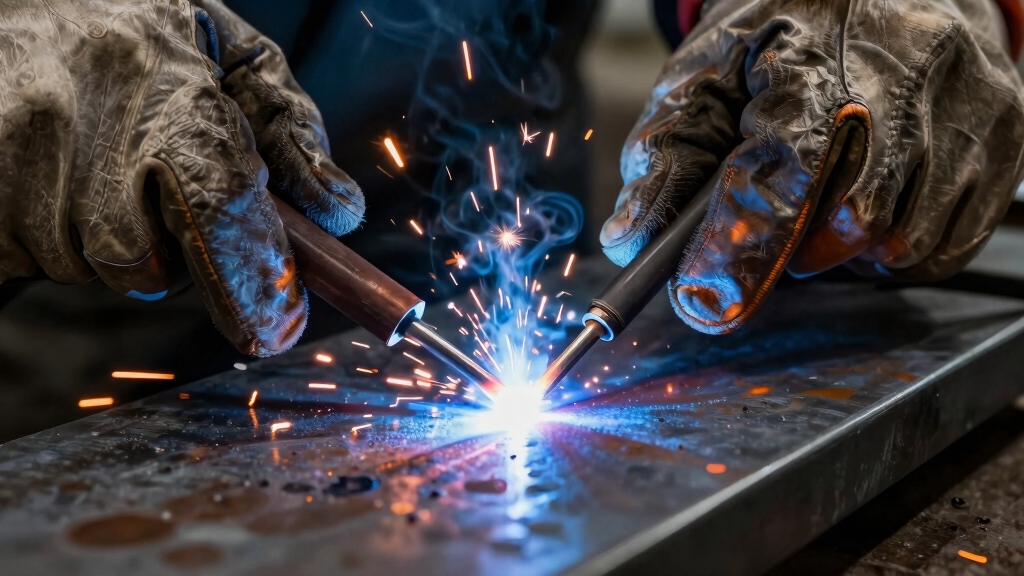
Safety starts with sturdy gear: you need a flame-resistant welding jacket and gloves to guard against sparks and spatter.
Use a welding helmet with a properly shaded lens to protect your eyes from intense UV and infrared rays.
Insulated boots and ear protection shield you from electrical hazards and loud noises.
Always wear respiratory protection when working in confined spaces or with poor ventilation to avoid inhaling harmful fumes.
Stay safe, stay smart.
You shouldn’t use 7018 rods directly on rusty or painted steel because contaminants affect weld quality. Rust and paint introduce impurities that cause slag inclusions, porosity, and weak welds.
You need to clean the surface thoroughly. Grind or wire-brush to remove rust, paint, and mill scale before welding. Proper surface prep guarantees good arc stability and fusion. This helps you achieve strong, defect-free welds with 7018 electrodes.
Think of ambient temperature as the invisible conductor of your weld’s orchestra. It directs how your 7018 rods perform.
Cold temps can stiffen the flux coating, making arc starting harder and increasing cracking risk. You’ll want to preheat the metal and rod.
Hot environments may cause excessive moisture absorption, weakening weld integrity. You should adjust your technique and maintain dry rods to guarantee consistent arc stability and sound welds regardless of temperature.
You should check for proper amperage settings first. Too high causes burn-through; too low leads to poor fusion.
Make certain your electrode is dry. Moisture causes porosity and slag issues.
Maintain correct arc length. Too long creates spatter and undercut.
Use recommended polarity, typically DC+.
Clean the base metal thoroughly to avoid contamination.
If you see cracks or slag inclusions, adjust your travel speed and angle to improve weld bead consistency.
When choosing amperage for 7018 rods, remember that sticking within the ideal range guarantees strong, defect-free welds.
You might worry that exact calculations limit flexibility, but adjusting amperage based on rod diameter, material thickness, and position actually enhances control and weld quality.
Setting proper polarity and equipment parameters is vital for consistent results.
By applying these precise guidelines, you’ll optimize your welds’ strength, appearance, and durability every time.