Phone:
(701)814-6992
Physical address:
6296 Donnelly Plaza
Ratkeville, Bahamas.
Phone:
(701)814-6992
Physical address:
6296 Donnelly Plaza
Ratkeville, Bahamas.
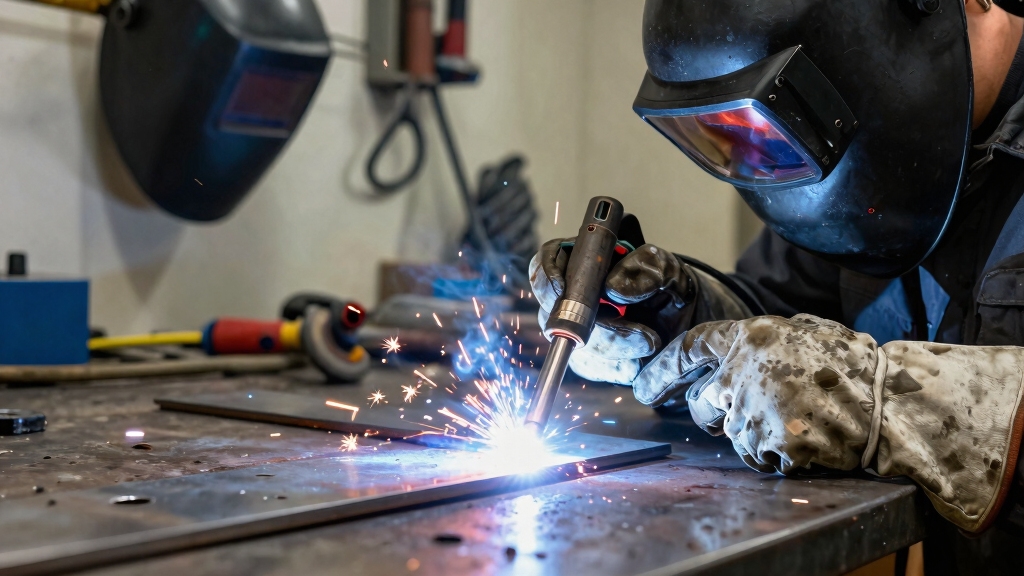
To MIG weld as a beginner, set your machine’s voltage and wire feed speed based on metal thickness using a chart. Secure your clean workpiece with a grounded clamp nearby.
Hold the gun firmly at a 30-degree angle with a consistent ¼-inch stickout. Squeeze the trigger smoothly to start wire and gas flow, moving at a steady speed for uniform bead shape.
Adjust settings by inspecting the bead for flaws. Keep going to refine your technique and troubleshoot common issues.
MIG welding is often the preferred choice for beginners because it simplifies many complex aspects of the welding process.
You’ll use a wire-feed welder that continuously feeds a solid wire electrode through the gun, allowing for a semi-automatic operation.
A wire-feed welder delivers a solid wire electrode continuously, enabling smooth semi-automatic welding operation.
When you pull the trigger, the wire feeds, the motor activates, and shielding gas flows to protect the weld.
This design reduces manual adjustments and helps maintain a steady arc, which is essential for consistent welds.
The wire simultaneously serves as the heat source and filler, making the process more intuitive.
Plus, the shielding gas, typically a 75% argon mix, prevents atmospheric contamination.
This controlled environment lets you focus on technique rather than managing multiple variables, easing your learning curve effectively.
One of the key reasons for its ease of use is the semi-automatic process, which automates wire feed and arc control while allowing manual travel speed.
Before you start welding, make certain your workspace is clean, organized, and well-ventilated to reduce hazards and improve efficiency.
Clear away flammable materials and keep your tools within reach to maintain focus and safety. Proper ventilation prevents toxic fumes from accumulating, protecting your respiratory system.
Prioritize safety by following these steps:
Wear a welding helmet with the correct shade lens and flame-resistant gloves to protect from sparks and UV radiation.
Secure your workpiece on a stable surface using clamps or fixtures to prevent movement during welding.
Use a high-quality copper ground clamp on bare metal close to your weld area to ensure consistent electrical conductivity and prevent erratic arcs.
Ensure you have a fire extinguisher nearby to quickly address any sparks or accidental fires.
Choose the appropriate wire and shielding gas to guarantee strong, clean welds tailored to your metal type and welding conditions.
Select the right wire and shielding gas for durable, clean welds suited to your metal and conditions.
For mild steel, use ER70S-6 solid wire paired with a 75% argon and 25% CO₂ gas mix. This combination offers good arc stability and minimal spatter.
Stainless steel requires a stainless steel wire like ER308L with 98% argon and 2% oxygen or CO₂ shielding to prevent contamination.
Aluminum welding demands a 100% argon gas shield and a softer wire such as 4043 or 5356.
Match wire diameter to metal thickness, typically 0.030″ or 0.035″ for general use.
Make certain your shielding gas flow rate is 20-25 cubic feet per hour to protect the weld pool from oxidation.
Selecting these components precisely will optimize your weld quality and consistency.
Adjusting wire feed speed and voltage settings alongside your wire and gas choice is essential to maintain a stable arc and produce uniform welds.
Alright, let’s get your MIG welder set up! First things first: you’ll want to adjust your machine’s voltage and wire feed speed. This really depends on the thickness of the metal you’re working with and the diameter of the wire. Most machines come with a handy chart, so just check that for guidance.
Now, don’t forget about the ground clamp! It’s super important that it’s securely attached to clean, bare metal near your weld area. This connection helps keep everything stable electrically. Trust me, a good setup here can really prevent those pesky erratic arcs and ensures you get consistent weld quality. You’re on the right track!
Make sure to maintain the proper wire feed speed based on your material thickness to achieve the right current and penetration.
Adjust the voltage and wire feed speed on your MIG welder according to the thickness of the metal and the wire diameter using the machine’s chart as a guide.
Voltage controls the arc’s heat intensity, directly affecting penetration and bead shape. Wire feed speed governs the filler metal’s delivery rate, influencing weld bead size and cooling rate.
To set your machine effectively:
Match voltage to metal thickness; thicker metal requires higher voltage.
Adjust wire feed speed to maintain a stable arc without spatter or burnback.
Use slower feed speeds for thinner metals to prevent burn-through.
Fine-tune settings by running test beads on scrap metal, watching for smooth, consistent arcs and proper bead formation before starting your project.
Ensure you avoid incorrect wire feed speed to prevent poor penetration or spatter issues.
For peak welding performance, attach the ground clamp securely to clean, bare metal close to your weld area. This guarantees optimal electrical conductivity and stable arc initiation.
Use a high-quality copper clamp and remove any paint, rust, or debris where you connect it. Avoid placing the clamp too far from the weld zone, as long ground cables increase resistance and cause erratic arc behavior.
Position the clamp on a flat surface to maximize contact area and prevent slippage during welding. Check that the clamp’s jaws firmly grip the metal without movement.
Before striking the arc, verify the clamp is tight and free of contaminants. Proper ground clamp placement minimizes electrical resistance, stabilizes current flow, and enhances weld quality.
This makes it a critical step in setting up your MIG welder correctly.
Additionally, understanding the impact of cable length on voltage drop helps ensure consistent current flow and optimal welding performance.
Mastering your gun grip and maintaining the correct angle are vital for producing consistent, high-quality MIG welds.
Perfecting your gun grip and angle ensures consistent, high-quality results in MIG welding.
You need a firm yet relaxed two-handed grip, supporting your wrists or forearms to steady the gun and reduce fatigue.
Keep the gun at a precise 30-degree angle to the workpiece, adjusting 10 degrees forward or backward along the travel direction to control bead shape and penetration.
Maintaining a consistent stickout of about 1/4 to 1/2 inch from the contact tip to the surface is indispensable to avoid spatter and ensure stable arc transfer.
Focus on these key points:
Hold the gun steadily with two hands for smooth control.
Maintain a 30-degree gun angle with a slight push or drag motion.
Keep a uniform stickout distance to stabilize the arc and bead formation.
For best results in out-of-position welding, consider using short circuit or pulsed MIG transfer modes to minimize heat input and spatter.
To kick off your welding, just squeeze the gun trigger gently. This will get both the wire feed and the shielding gas going at the same time. It’s pretty important to keep an eye on your wire feed speed. If it’s too fast or too slow, it can really mess with the quality of your bead and how well it penetrates.
Now, when you’re moving the gun, try to keep it steady. Maintaining a consistent speed and angle is key to getting that clean, even weld bead you’re aiming for.
So, just take your time and focus on your motion! Proper machine setup and metal preparation are crucial to avoid defects and achieve strong welds, so don’t overlook these steps when starting out with MIG welding.
A smooth trigger squeeze initiates wire feed, gas flow, and arc creation simultaneously, setting the foundation for a consistent weld.
When you press the trigger, you activate all critical elements that sustain the arc and deposit filler metal efficiently.
Proper trigger control guarantees steady welding without interruption or burnback.
Focus on these key points:
Apply gradual pressure: Avoid jerky trigger pulls to maintain a stable arc and prevent wire feed issues.
Release smoothly: Letting go slowly stops gas flow and wire feed cleanly, reducing spatter and contamination.
Coordinate with motion: Synchronize trigger use with your gun movement to ensure continuous weld bead formation.
Mastering trigger control sets you up for smooth welds and prepares you for managing speed and motion effectively.
Consistent wire feed speed and voltage settings are essential alongside trigger control for optimal weld quality.
Adjusting the wire feed speed controls how much filler metal deposits into the weld pool, directly impacting bead quality and penetration. Set the speed according to metal thickness and wire diameter, referencing your machine’s chart for accuracy.
Too slow a feed starves the weld, causing weak penetration and irregular beads. Too fast overwhelms the arc, resulting in excessive spatter and a cold, convex bead.
When you pull the trigger, the motor feeds wire steadily; maintain consistent speed to guarantee a stable arc and uniform weld. Remember, increasing feed speed raises current, which increases heat input, so balance it with voltage settings.
Always perform test welds on scrap metal to fine-tune wire feed speed before starting your actual project. This precision guarantees strong, clean welds. Matching wire size to amperage range is crucial for maintaining arc stability and preventing defects.
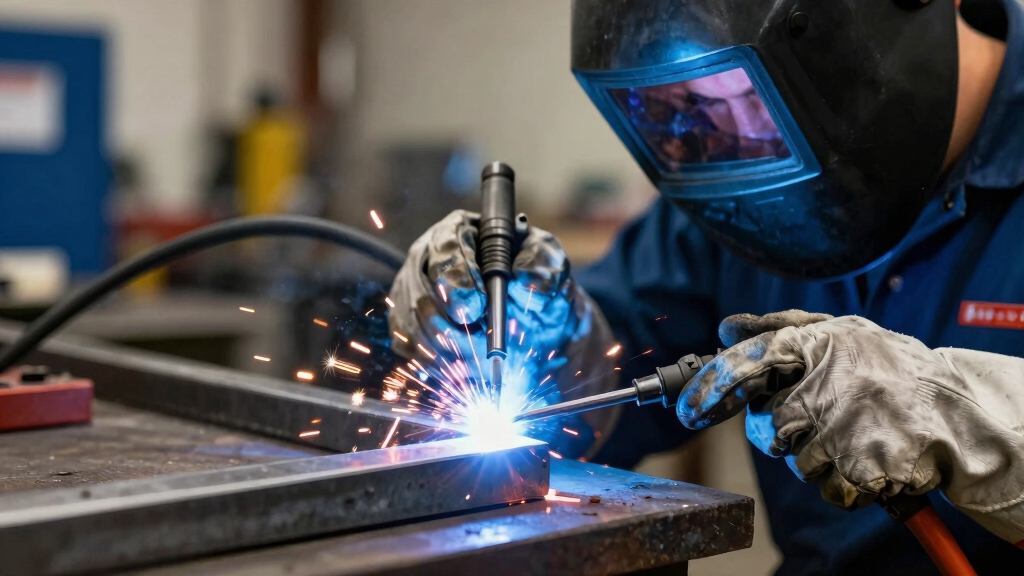
Master the gun motion by gripping it firmly with both hands. Support your wrists or forearms to guarantee steady control throughout the weld.
Squeeze the trigger smoothly to start wire feed and shielding gas flow simultaneously. Maintain a consistent speed to avoid irregular bead size or poor penetration.
Keep the gun at about a 30-degree angle with a slight 10-degree push or drag in the travel direction. Practice steady, controlled movements to ensure even welds.
Remember these key points:
Keep a consistent stickout distance of 1/4 to 1/2 inch from the contact tip to the workpiece.
Use a smooth back-and-forth or zigzag motion to control bead shape. Adjust speed based on bead appearance: too slow creates large beads; too fast causes weak penetration.
Focus on maintaining rhythm and control for quality welds.
Regularly examining your weld bead provides critical insight into the quality of your weld and helps you fine-tune your technique.
Observe bead shape: a convex bead often means insufficient heat or incorrect angle, so increase voltage or adjust gun angle slightly.
A convex bead usually indicates low heat or a wrong angle; increase voltage or tweak the gun angle.
A concave bead suggests excessive heat or too fast travel speed; slow down or reduce voltage accordingly.
Check for uniform width and consistent ripples, indicating steady travel speed and proper wire feed.
Irregularities like undercut or spatter signal poor technique or improper settings.
Use these visual cues to adjust travel speed, gun angle (typically 5-10 degrees), and voltage for peak penetration and bead appearance.
Practice on scrap metal, then inspect beads carefully to develop precise control and improve weld quality before tackling final projects.
When you run into common MIG welding issues like spatter, poor penetration, or erratic arcs, pinpointing the cause quickly saves time and material.
Start by checking your machine settings and environment:
Spatter is often caused by incorrect voltage or wire feed speed. Lower voltage or slow the wire feed to reduce excess splatter.
Poor penetration usually results from insufficient heat. Increase voltage or slow your travel speed to allow the weld pool to fuse properly.
Erratic arc can be due to a weak ground connection or dirty contact tip. Make sure the ground clamp is tight on bare metal and clean or replace the contact tip if needed.
You maintain your MIG welding gun by regularly inspecting and cleaning the contact tip, nozzle, and gas diffuser.
Remove spatter buildup using a wire brush or nozzle dip.
Replace worn contact tips to guarantee consistent wire feeding and arc stability.
Keep the liner clean and free of debris to prevent wire jams.
Routinely check connections and gas flow for leaks.
Proper cleaning and maintenance extend gun life and improve weld quality.
Imagine your thin metal glowing softly as the weld pool forms smoothly.
For welding thin metals, you’ll want to use a wire diameter between 0.023 and 0.030 inches.
This size provides better control and reduces burn-through risk.
Smaller wire feeds steadily, creating a delicate, precise bead.
Adjust voltage and wire speed accordingly to maintain a stable arc and clean penetration.
This ensures crisp, professional welds on your thin sheets.
You can use MIG welding outdoors in windy conditions, but it’s challenging.
Wind blows away the shielding gas, causing weld contamination and porosity.
To minimize this, use a gas nozzle with a larger cup or switch to flux-cored wire that doesn’t require shielding gas.
Alternatively, create a windbreak or weld in a sheltered area.
Always monitor your weld quality closely and adjust your technique or settings to compensate for gas loss.
Coincidentally, storing shielding gas cylinders safely means you prevent accidents and keep your welds consistent.
Always store cylinders upright, secured with chains or straps to a wall or rack. Keep them away from heat sources, sparks, and direct sunlight.
Make sure valve protection caps are in place when not in use. Store in a well-ventilated, dry area, separate from flammable materials.
Regularly check for leaks and damage to maintain safety and gas purity.
You’ll notice a worn-out contact tip when the wire feeding becomes erratic or jams frequently.
Look for enlarged or oval-shaped wire exit holes, which cause poor electrical contact and inconsistent arcs.
Excessive spatter buildup or visible grooves inside the tip indicate wear.
If your weld bead quality degrades despite correct settings, replace the tip promptly to maintain stable wire feeding and proper arc performance.
Now that you’ve got the basics down, think of MIG welding like piloting a steam engine: steady, controlled, and precise. Keep your workspace safe, your settings dialed in, and your gun angle consistent.
Pay close attention to your weld bead and adjust as needed. With practice, you’ll troubleshoot efficiently and produce strong, clean welds every time.
Stick to these fundamentals, and you’ll master MIG welding faster than you’d expect.