Phone:
(701)814-6992
Physical address:
6296 Donnelly Plaza
Ratkeville, Bahamas.
Phone:
(701)814-6992
Physical address:
6296 Donnelly Plaza
Ratkeville, Bahamas.
You can weld a 2.25-inch pipe directly to a 2.5-inch muffler.
However, using a reducer adapter sized for this shift guarantees a tight fit, minimizes heat distortion, and prevents burn-through.
Proper surface preparation and alignment are vital for strong, leak-free joints.
Managing heat input carefully while welding thin exhaust tubing preserves metal integrity.
Choosing between a welded reducer or slip-on adapter depends on your priorities for durability versus convenience.
Exploring these factors will clarify your best approach.
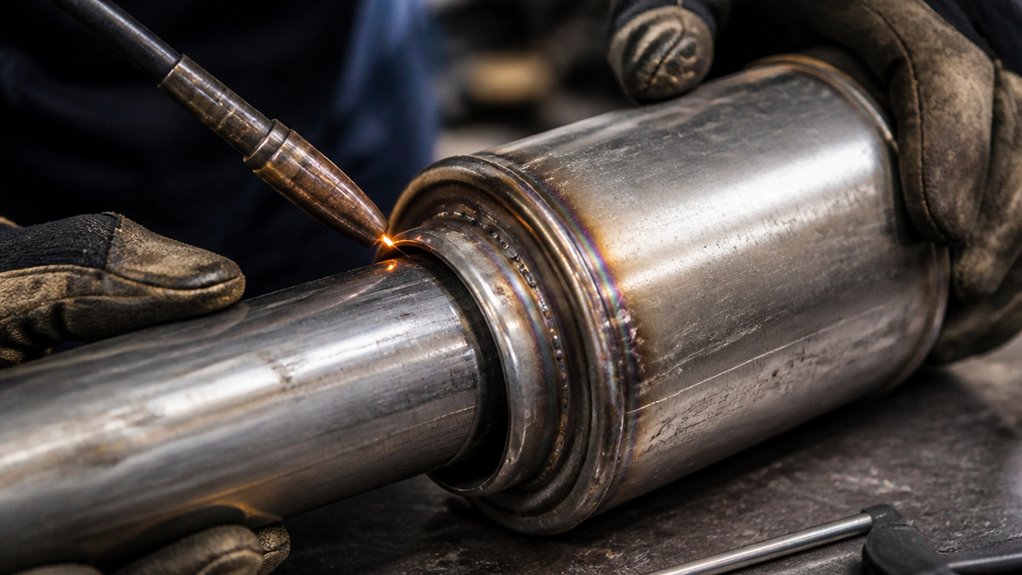
How do you properly join a 2.25-inch pipe to a 2.5-inch muffler? The diameter mismatch of 0.25 inch requires a precise connection to avoid poor fitment and exhaust leaks.
You can weld the joint, but direct welding without an adapter is challenging due to the size difference. Instead, use a reducer or adapter sized for 2.25 to 2.5 inches. This guarantees a tight fit, which minimizes heat distortion and reduces burn-through risk during welding.
Prepare clean metal surfaces before welding to enhance weld quality. Employ short stitch welds and control heat input to prevent warping. While custom fill-welding is possible, it’s less practical than using a dedicated reducer.
Proper alignment before welding also improves joint strength and durability. Following heat control strategies helps avoid burn-through and ensures a strong, clean weld.
When you’re welding a 2.25-inch pipe to a 2.5-inch muffler, it’s really important to use a reducer adapter. Why? Well, it helps manage that change in diameter smoothly, which is crucial for avoiding stress points in your weld.
Plus, using an adapter keeps the gap nice and tight. This tight fit helps control heat input during the welding process, significantly reducing the risk of burn-through, especially on thin-walled tubing.
And let’s not forget about the overall quality of the weld. A precise fit leads to a stronger, more durable joint that’s also leak-resistant. So, in short, a reducer adapter is your best friend in making sure everything comes together seamlessly.
Using a reducer adapter also facilitates proper welding preparation, which is essential to avoid misalignment and ensure a reliable, leak-proof joint.
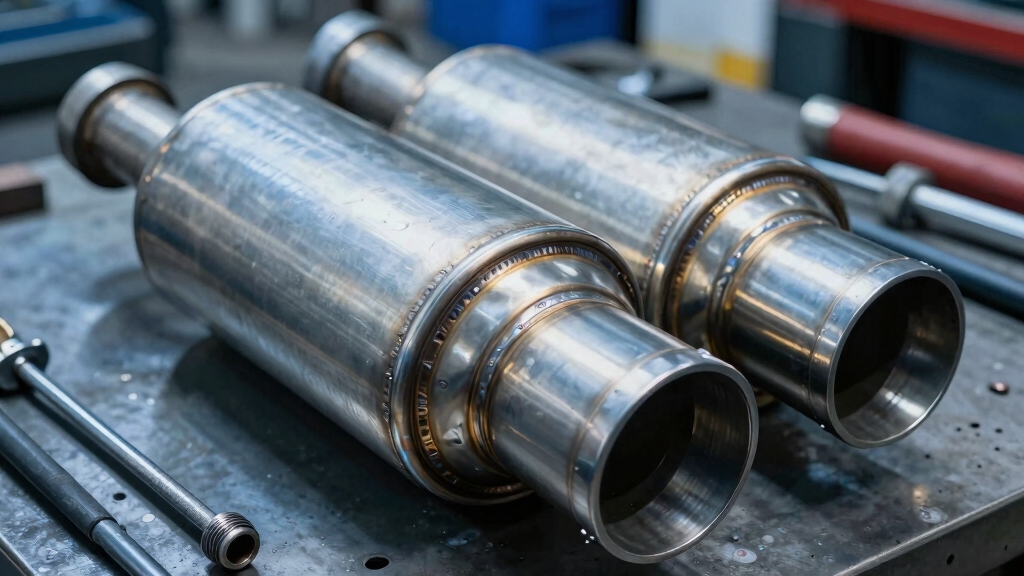
Although welding a 2.25-inch pipe directly to a 2.5-inch muffler might seem straightforward, using a reducer adapter guarantees a smoother, more secure diameter shift. This minimizes turbulence and sealing issues.
The reducer creates a gradual changeover zone, maintaining exhaust flow efficiency. It prevents abrupt cross-sectional changes that induce backpressure and flow separation.
This stable flow reduces stress on weld joints, enhancing durability under thermal cycling and vibration. Without a proper adapter, you risk gaps or uneven welds, increasing leak potential and weakening structural integrity.
Additionally, a tight, well-matched fit facilitated by the reducer simplifies welding. This reduces the burn-through risk on thin tubing.
Ultimately, the diameter changeover’s importance lies in preserving flow dynamics and ensuring a robust, leak-proof joint for long-term exhaust system performance. For added durability, combining reducers with corrosion-resistant clamps can further secure joints when welding is supplemented or replaced by mechanical fastening methods.
Because welding directly between mismatched pipe diameters risks uneven heat distribution, using a reducer adapter helps you control welding temperature more effectively.
The adapter provides a uniform surface, allowing you to apply heat evenly and avoid localized overheating that causes burn-through or warping.
With a tight fit between the 2.25-inch pipe and 2.5-inch muffler, you reduce gaps that concentrate heat and increase distortion risk.
You can use short weld passes and allow cooling intervals, minimizing thermal stress on thin exhaust tubing.
The reducer’s consistent geometry also facilitates cleaner weld beads and stronger fusion.
In contrast, welding raw pipe directly to a larger diameter muffler inlet complicates heat management and raises the likelihood of defects.
This makes the reducer adapter the superior choice for precise, durable exhaust joints.
Additionally, understanding welding heat input and controlling it during the process is essential to maintain weld integrity and prevent defects.
Start by thoroughly cleaning both the pipe and muffler surfaces to remove rust, dirt, grease, and old coatings that could compromise weld integrity.
Use a wire brush or grinder to expose bare metal, guaranteeing a consistent, smooth surface for welding. Then, degrease with a solvent to eliminate oils that cause contamination.
Check for surface irregularities or pits that might weaken the weld.
Key preparation steps include:
Removing all rust and scale with abrasive tools.
Degreasing surfaces with a suitable solvent.
Filing or grinding edges for tight fitment.
Drying surfaces completely before welding.
Inspecting for cracks or damage that need repair.
These steps guarantee a clean, stable base to achieve a strong, defect-free weld between mismatched diameters. Proper joint fit-up and clamping ensures alignment and prevents distortion during welding.
Welding thin exhaust tubing requires careful control of heat input to prevent burn-through, a common issue that weakens the joint and compromises durability.
To avoid this, maintain a tight fitment between pipe and muffler. This minimizes gaps that demand excessive filler or prolonged heat.
Use short stitch welds or spot welds instead of continuous beads to limit heat accumulation. Allow cooling intervals between passes to dissipate heat effectively.
Clean metal surfaces reduce contamination, improving weld integrity and reducing the need for higher heat. Position the weld gun at a proper angle to control penetration depth precisely, preventing excessive melting.
Tack weld the assembly first to guarantee alignment, then complete welds incrementally. These steps reduce distortion and preserve tubing thickness, assuring a robust, leak-free exhaust joint.
Proper preparation such as cleaning and ensuring correct weld technique is essential to minimize heat-related metal distortion and ensure joint strength.
Controlling heat input and achieving a tight fit are key factors in joining 2.25-inch pipe to a 2.5-inch muffler.
Managing heat and ensuring a snug fit are essential when connecting 2.25-inch pipe to a 2.5-inch muffler.
When deciding between a slip-on adapter and a welded reducer, consider these points:
Welded reducers offer a seamless, structurally robust connection with minimal turbulence.
Slip-on adapters provide easier installation but may require clamps for secure sealing.
Tight fitment reduces heat concentration and lowers burn-through risk during welding.
Welding a reducer requires clean metal surfaces and short stitch welds for durability.
Slip-on adapters are suitable when quick assembly or disassembly is needed, but might compromise exhaust flow continuity.
Choosing the right method depends on your priorities: durability and flow favor welded reducers.
Convenience and adjustability lean toward slip-on adapters.
Additionally, proper ventilation and respiratory protection are essential when welding to mitigate hazardous zinc oxide fumes.
When you’re getting a custom fabricated transition piece, the first thing to keep in mind is the importance of starting with thoroughly cleaned, contaminant-free metal surfaces. This step is crucial because it ensures strong welds and helps avoid any defects.
Nobody wants to deal with issues down the line, right?
Next up, maintaining tight fitment is key. You’ll want the pieces to fit together perfectly. Also, using short, controlled weld passes is a smart move. This technique helps minimize heat distortion and reduces the risk of burn-through, especially when working with thin exhaust tubing.
Finally, expect your fabricator to apply precise welding techniques. They’ll need to strike a balance with heat input to secure a durable, airtight joint piece. It’s all about getting that perfect connection, so you can trust that your transition piece will perform as it should!
Additionally, when welding galvanized steel or coated metals, it’s essential to ensure proper ventilation and respiratory protection to avoid hazardous fume exposure.
Although fabricating a custom adaptor piece may seem straightforward, preparing the materials properly is critical to achieving a strong, leak-free weld between the 2.25-inch pipe and the 2.5-inch muffler. You need a clean, precise foundation to prevent defects like burn-through or porosity. Focus on these essentials:
Thoroughly degrease and clean metal surfaces to remove oils and contaminants. Accurately cut pipe ends and ensure square, burr-free edges for tight fitment. Test-fit components to verify alignment and minimize gaps. Remove any corrosion or scale with abrasive tools for consistent weld penetration. Preheat thin tubing if necessary to reduce thermal shock and distortion.
These steps ensure the custom adaptor piece fits tightly and welds reliably, providing durability and optimal exhaust flow. It is also crucial to perform mechanical oxide removal immediately after degreasing to eliminate the aluminum oxide barrier and ensure proper weld fusion.
Mastering welding techniques for a custom fabricated junction piece between a 2.25-inch pipe and a 2.5-inch muffler is essential to guarantee structural integrity and exhaust performance.
You’ll want to use a reducer adapter to ensure a proper fit, minimizing gaps that increase burn-through risk on thin tubing.
Keep weld passes short and controlled, allowing cooling intervals to prevent warping or distortion.
Spot welds or stitch welds effectively manage heat input, preserving metal strength.
Clean, contaminant-free surfaces secure peak weld penetration and reduce defects.
Pay close attention to alignment during tack welding; misalignment compromises sealing and durability.
Ultimately, a smooth, well-executed weld on a tightly fitted reducer maintains exhaust flow and resists stress cracking under thermal cycling, delivering a robust, long-lasting joint.
Adjusting weld current and pressure according to the pipe and muffler material thickness is critical to avoid weak welds or burn-through.
When joining different pipe sizes, improper fitment and welding techniques often lead to leaks, weak joints, and premature failure.
You need to avoid common pitfalls to assure a reliable connection between a 2.25-inch pipe and a 2.5-inch muffler.
Using no adapter or reducer causes poor alignment and gap issues.
Welding thin exhaust tubing continuously risks burn-through.
Neglecting to clean metal surfaces increases contamination.
Overheating the joint leads to distortion and cracks.
Skipping tack welding and pre-fitment checks results in misalignment.
You’ll want to opt for clamps or flanges instead of welding when ease of installation, future disassembly, or minimizing heat exposure is a priority.
Clamps and flanges create secure mechanical joints without applying intense heat. This preserves thin-wall tubing integrity and reduces burn-through risk.
They’re ideal if you anticipate maintenance, repairs, or modifications, allowing quick separation without cutting or grinding.
Additionally, clamps and flanges accommodate minor misalignments and vibration-induced movement better than rigid welds, enhancing joint longevity.
However, make sure the chosen clamp or flange matches the 2.25-to-2.5-inch size difference precisely to avoid leaks.
While welding offers a permanent seal, selecting clamps or flanges improves flexibility and reduces fabrication complexity.
This makes them a practical choice for non-permanent exhaust connections or when heat distortion must be minimized.
In exhaust systems, a smooth changeover between differing pipe diameters markedly enhances flow efficiency by reducing turbulence at the joint.
When you make certain a gradual shift from a 2.25-inch pipe to a 2.5-inch muffler, you limit flow separation and pressure losses. This directly improves exhaust scavenging and engine performance.
A clean, well-formed joint also reduces stress concentrations that can cause cracks or leaks.
Consider these benefits of a smooth shift:
You want reducers made from stainless steel or aluminized steel for exhaust welding, as these materials resist corrosion and handle heat well.
Stainless steel offers superior durability and oxidation resistance, especially in harsh conditions.
Aluminized steel provides a cost-effective balance with decent corrosion resistance.
Choose a material matching your exhaust system’s base metal to guarantee weld compatibility and minimize galvanic corrosion.
Proper metal thickness and clean surfaces also improve weld quality and longevity.
Like a craftsman shaping a key to fit a lock, a professional muffler shop typically takes between one to three hours to fabricate a changeover.
You’ll find that this duration depends on pipe alignment, metal prep, and welding complexity.
They’ll focus on precise measurements, clean cuts, and controlled heat input to guarantee a seamless, durable joint.
This careful process balances speed with quality, delivering a changeover that fits perfectly and performs reliably.
Yes, welding can affect your exhaust sound quality.
When you weld, you alter the pipe’s shape and smoothness, potentially causing turbulence that changes exhaust flow and tone.
Poor welds might create leaks or vibrations, introducing rattles or unwanted noises.
Conversely, clean, precise welds with smooth progression maintain sound integrity and system performance.
Yes, you need specific safety precautions when welding exhaust pipes.
Always wear proper PPE: welding helmet, gloves, and flame-resistant clothing to protect against sparks and UV radiation.
Ensure good ventilation to avoid inhaling toxic fumes from coatings or rust.
Keep a fire extinguisher nearby since sparks can ignite flammable materials.
Clean metal surfaces thoroughly to prevent hazardous fumes.
Finally, work in a well-lit, uncluttered area to reduce risks and maintain precise weld quality.
Temperature cycling can cause welded exhaust joints to experience up to 20% material fatigue over time due to repeated expansion and contraction.
You’ll notice micro-cracks forming as the metal repeatedly heats and cools, which weakens the joint’s integrity.
To minimize this, you need precise welds, controlled heat input, and flexible materials that absorb thermal stress.
Proper design and welding technique help maintain joint durability despite harsh temperature fluctuations.
When welding a 2.25-inch pipe to a 2.5-inch muffler, remember that “measure twice, cut once” applies.
Proper preparation and choosing the right adapter guarantee a secure, leak-free joint that withstands heat and vibration.
While slip-on adapters offer convenience, a welded reducer provides durability and peak flow.
Avoid common mistakes by prepping surfaces correctly and considering clamps or flanges when welding isn’t ideal.
A smooth changeover not only improves fit but enhances exhaust performance and longevity.