Phone:
(701)814-6992
Physical address:
6296 Donnelly Plaza
Ratkeville, Bahamas.
Phone:
(701)814-6992
Physical address:
6296 Donnelly Plaza
Ratkeville, Bahamas.
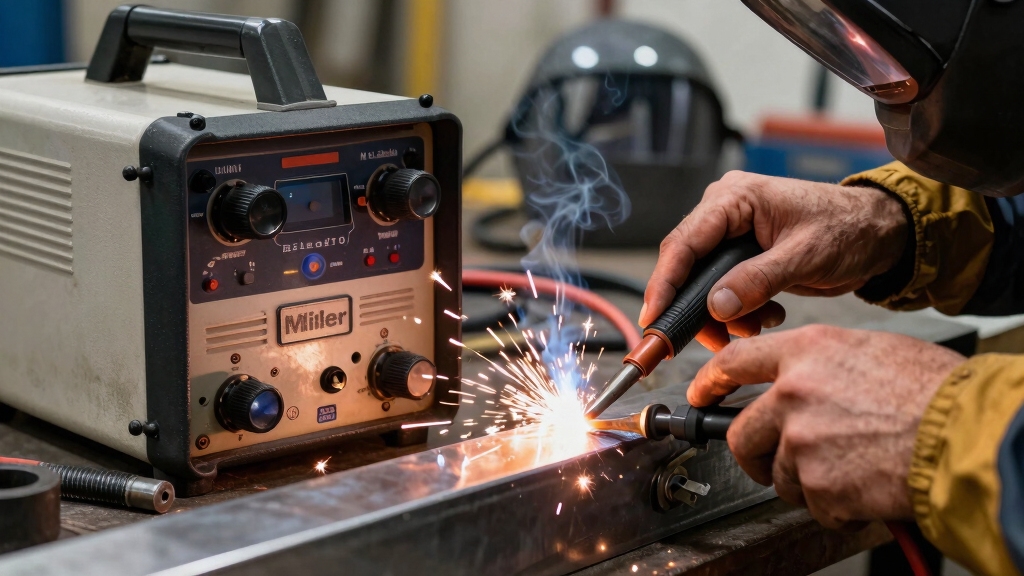
You’ll want to start by selecting the right Miller welding process based on your material type, thickness, and joint configuration. Choose MIG, TIG, or stick accordingly.
For MIG, calibrate voltage, wire speed, and gas flow precisely to guarantee arc stability and penetration. Adjust for welding position.
TIG settings include voltage and amperage tuning with appropriate shielding gas. Stick welding requires correct electrode choice and polarity.
Fine-tuning parameters prevents common defects and optimizes weld quality. Explore position-specific techniques and spool gun setup for aluminum next.
Selecting the right Miller welding process starts by analyzing your project’s material type, thickness, and desired weld quality.
Choosing the ideal Miller welding process begins with assessing your material, thickness, and quality goals.
You’ll first identify whether MIG, TIG, or stick welding suits your application, considering each process’s compatibility with the metal and thickness.
For thin aluminum, TIG or spool gun MIG offers precise control, while thicker steel often favors MIG or stick for penetration.
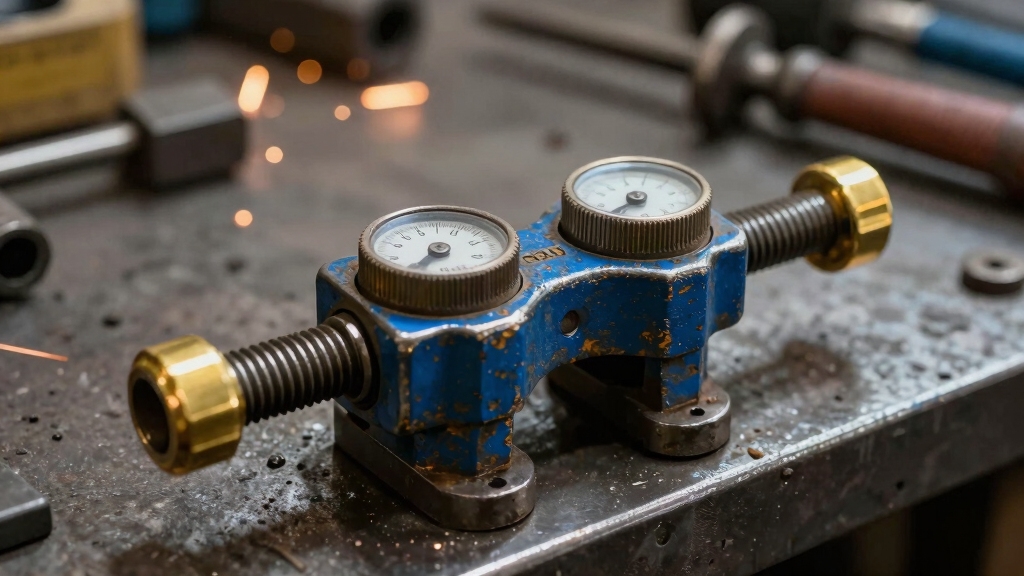
Review welding charts to find initial amperage and voltage settings based on your material’s melting point and tensile strength.
Keep in mind that flux-cored options require DCEN polarity adjustments.
Also, consider the weld type, such as fillet, butt, or lap, as it influences process choice.
Using a multi-process welder can simplify switching between these welding methods and improve overall efficiency.
When setting up your Miller MIG welder, you’ll need to calibrate voltage, wire speed, and gas flow carefully to match the metal type and thickness. Start by referencing Miller’s chart to find initial voltage and wire feed speed based on your material.
Voltage controls arc length and penetration; too high causes burn-through, too low leads to poor fusion. Wire speed governs deposition rate. Set it to balance with voltage for a stable arc and consistent bead.
Gas flow protects the molten weld pool. Typical flow ranges from 20 to 25 cubic feet per hour, but adjust for wind or position. Confirm connections are secure and make sure the ground clamp is properly placed.
Fine-tune parameters after test welds, focusing on bead appearance and spatter reduction for peak performance.
To get the most out of your Miller TIG welding, it’s a good idea to start by picking the right voltage settings. You’ll want to base this on the type of material you’re working with and how thick it is.
Once you’ve got the voltage dialed in, it’s time to adjust the amperage.
Now, fine-tuning the amperage is key. You want to keep that arc stable and ensure you’re applying just the right amount of heat. This will help you achieve the right penetration without risking any burn-through.
Be sure to select the proper current type—DC for steel and AC for aluminum—to optimize welding performance.
Although TIG welding demands meticulous control over amperage, voltage remains equally critical in achieving peak arc stability and weld quality.
Setting the right voltage guarantees a consistent arc length, preventing defects like porosity or undercut.
When you adjust voltage, consider these key factors:
Start with recommended voltage values from the welding chart based on your metal type and thickness.
Then fine-tune for your specific conditions.
Precise voltage adjustment complements amperage settings, optimizing weld integrity and appearance.
Additionally, selecting the appropriate shielding gas, such as pure argon, plays a crucial role in maintaining arc stability and preventing contamination during welding.
Mastering amperage adjustment is essential for achieving ideal penetration and weld bead profile in TIG welding. You need to match amperage precisely to the metal type and thickness to avoid undercut or excessive burn-through.
Start with chart-recommended amperage values, then fine-tune based on weld pool behavior and bead appearance. If the weld puddle is too fluid or wide, reduce amperage. If it’s sluggish or shallow, increase it incrementally.
Remember, amperage directly influences heat input, so adjusting it also affects distortion and penetration depth. Use consistent measurements and maintain steady travel speed to complement current settings.
Always verify your settings against material melting points and welding position. This analytical approach guarantees repeatable, high-quality welds tailored to specific job conditions. Maintaining the proper balance between amperage and voltage is crucial to control heat input and achieve optimal weld quality.
Selecting the correct electrode and setting precise parameters are critical steps when stick welding with Miller welders to guarantee prime arc stability and weld integrity. You must choose electrodes based on metal type, thickness, and welding position to optimize penetration and minimize defects.
Choosing the right electrode and settings ensures optimal arc stability and high-quality welds with Miller welders.
Focus on these key aspects:
Adhering to these secures consistent weld quality and efficient operation. Proper storage and handling of electrodes, especially 7018 rods, is essential to preserve their low-hydrogen flux coating and prevent weld defects caused by moisture absorption.
Adjust amperage and voltage settings carefully to match the specific material type and thickness you’re welding. Begin by referencing the Miller welding chart to identify baseline parameters for your welding process and metal gauge.
For thinner materials, lower amperage prevents burn-through. Thicker metals demand higher amperage for proper penetration. Voltage influences arc stability and bead profile; increasing voltage generally widens the bead and smooths the arc but can reduce penetration if excessive.
Adjust amperage and voltage incrementally, observing weld pool behavior and bead appearance. For example, MIG welding 1/4″ steel typically requires about 456 IPM wire feed speed and 20.9 volts. Ambient conditions may necessitate fine-tuning.
Consistent calibration guarantees peak fusion without compromising weld integrity or causing defects. Maintaining correct shielding gas flow is essential to prevent oxidation and ensure weld quality.
When you’re tackling vertical welding, it’s crucial to tweak your amperage and voltage. This helps prevent that pesky weld sagging and ensures you get good penetration.
Now, let’s talk about some position-specific adjustments. Changing up the wire feed speed or your travel angle can really make a difference. These little tweaks help keep your bead looking consistent and strong.
For vertical stick welding, using an E7018 electrode with a 10–15° uphill angle optimizes penetration and puddle control.
Mastering vertical welding requires careful control of heat input and welding parameters to prevent sagging and guarantee strong, consistent welds. When setting your Miller welder for vertical welding, you must precisely adjust amperage and voltage, as excessive heat causes weld pool drooping.
Use a slightly cooler Auto-Set parameter than flat welding to maintain control.
Focus on these key points:
These adjustments optimize weld bead shape and mechanical strength, ensuring high-quality vertical welds.
Additionally, maintaining a consistent 10–15° gun angle and steady gun handling is essential for controlling the weld puddle and avoiding defects in vertical welding gun handling technique.
Building on the precise control required for vertical welding, position-specific adjustments further refine your technique to accommodate welding in various orientations. You’ll need to modify amperage and wire feed speed slightly.
For example, vertical uphill MIG welding benefits from cooler settings than flat welds to control puddle fluidity and prevent sagging. Adjust your travel angle and stick-out; maintaining a short stick-out stabilizes the arc in overhead and vertical positions.
Use the hitch-and-pause motion to improve puddle control on uphill welds. For overhead welding, increase voltage marginally to secure penetration without excessive spatter. Always recheck ground clamp placement to maintain consistent current flow.
Maintaining consistent torch angle between 10° and 15° is essential for optimal penetration and weld pool control across different positions.
Identifying and addressing common welding defects is essential to achieving strong, reliable welds with your Miller equipment. When defects occur, analyze weld bead characteristics and machine settings systematically to diagnose issues accurately.
Also, maintain a consistent torch angle between 10° and 15° from vertical to promote arc stability and reduce spatter during welding.
Following these steps ensures consistent weld quality and reduces rework, optimizing your Miller welder’s performance.
After addressing common welding defects and fine-tuning your settings manually, you can leverage Miller’s Auto-Set feature to simplify MIG welding setup.
This function automates voltage and wire feed speed based on your input of material thickness and wire diameter, reducing guesswork and setup time.
You enter these parameters, and the machine calculates ideal settings aligned with Miller’s welding charts.
Auto-Set maintains consistent arc stability and weld penetration by dynamically adjusting parameters as you weld, accommodating minor variations in material or position.
While it’s ideal for beginners and repetitive tasks, you should still verify weld quality and fine-tune settings in challenging conditions.
Using Auto-Set enhances efficiency without sacrificing control, making it a powerful tool to achieve precise, defect-free MIG welds quickly.
When welding aluminum with Miller machines, setting up a spool gun correctly is crucial to guarantee smooth wire feeding and consistent arc stability. Aluminum wire is softer and more prone to kinking, so spool guns minimize feed distance and reduce feed issues.
Follow these key steps:
Precise calibration optimizes arc performance, reduces porosity, and guarantees clean welds on aluminum materials.
You need to regularly clean and inspect your Miller welder, focusing on wire feed components, contact tips, and gas nozzles to prevent buildup.
Check cables and connections for wear or damage, ensuring proper grounding.
Replace consumables like liners and tips as needed.
Keep cooling fans and vents clear to avoid overheating.
Calibrate settings periodically and store the machine in a dry, dust-free environment to maintain peak performance and longevity.
Think of your welding consumables as seeds that need the right environment to thrive.
You should store them in a clean, dry place, away from moisture and contaminants, to prevent rust and degradation.
Keep wire spools sealed in airtight containers or bags, and electrodes in their original packaging with humidity control.
Label everything clearly, and maintain consistent temperatures.
This preserves their integrity, ensuring your Miller machines perform reliably every time you weld.
Miller welders are designed primarily for metal materials like steel, aluminum, and stainless steel.
You can’t use them directly on non-metal materials such as plastics, wood, or composites because the welding process relies on melting metals.
For non-metal joining, you’d need specialized equipment like plastic welders or adhesives.
If you want to work on metal-coated or composite materials, make sure you understand the material’s compatibility and adjust settings accordingly to avoid damage or weak bonds.
Think of your Miller welder as a versatile orchestra; compatible accessories are its instruments. You can plug in spool guns for aluminum, foot pedals for TIG control, and gas cylinders with regulators for MIG shielding.
Wire feeders, different electrode holders, and welding helmets with auto-darkening lenses complete the ensemble. Each accessory fine-tunes your machine’s performance, enabling precise control over amperage, voltage, and wire feed speed.
This ensures peak weld quality across applications.
To update firmware on your Miller welding equipment, first visit MillerWelds.com and locate the support or downloads section.
Download the latest firmware file specific to your model. Connect your welding machine to a computer via USB or compatible interface.
Use Miller’s firmware update tool to upload the file, following on-screen instructions carefully.
Make certain stable power during the process, then restart your machine to complete the update. Always back up settings before starting.
Mastering your Miller welder isn’t just a skill; it’s like commanding a welding powerhouse capable of transforming any metal challenge into a flawless masterpiece.
With precise voltage, amperage, and gas flow adjustments tailored to your material, you’ll eliminate defects like a pro.
Whether you’re MIG, TIG, or Stick welding, your Miller’s settings and features, like Auto-Set and spool gun, will make complex welds feel effortless. Get ready to weld with surgical precision every single time.