Phone:
(701)814-6992
Physical address:
6296 Donnelly Plaza
Ratkeville, Bahamas.

Phone:
(701)814-6992
Physical address:
6296 Donnelly Plaza
Ratkeville, Bahamas.

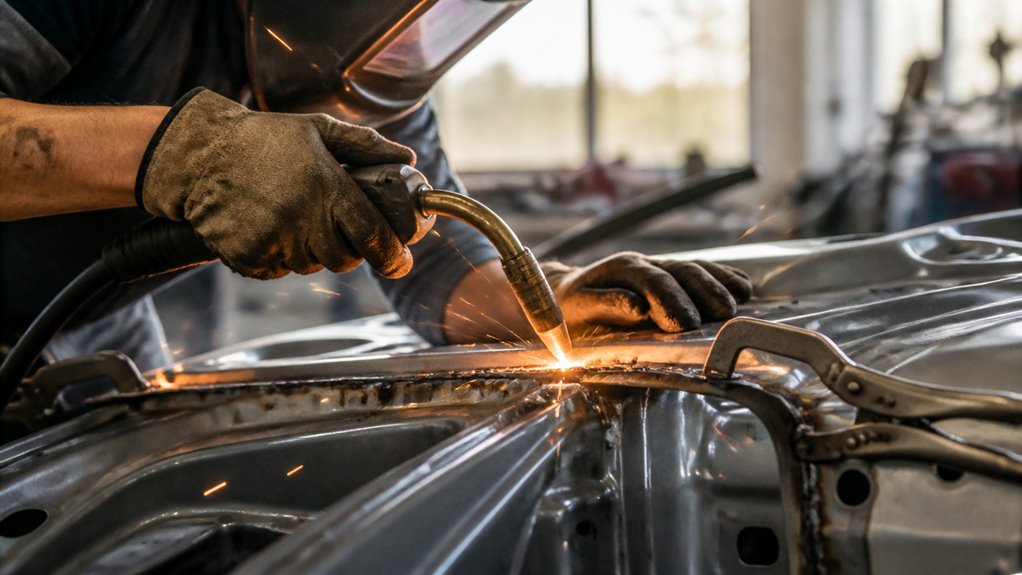
To weld body panels, start by cleaning the repair area to bare metal and applying weld-through primer for corrosion protection.
Use a MIG welder with fine wire and low amperage to minimize heat input.
Precisely align and clamp the panels with minimal gaps.
Then tack weld in short, spaced spots to control heat and avoid distortion.
Allow cooling between passes and monitor temperature.
Finish with a protective coating.
Following these steps guarantees strong, lasting welds. Explore further for advanced techniques.
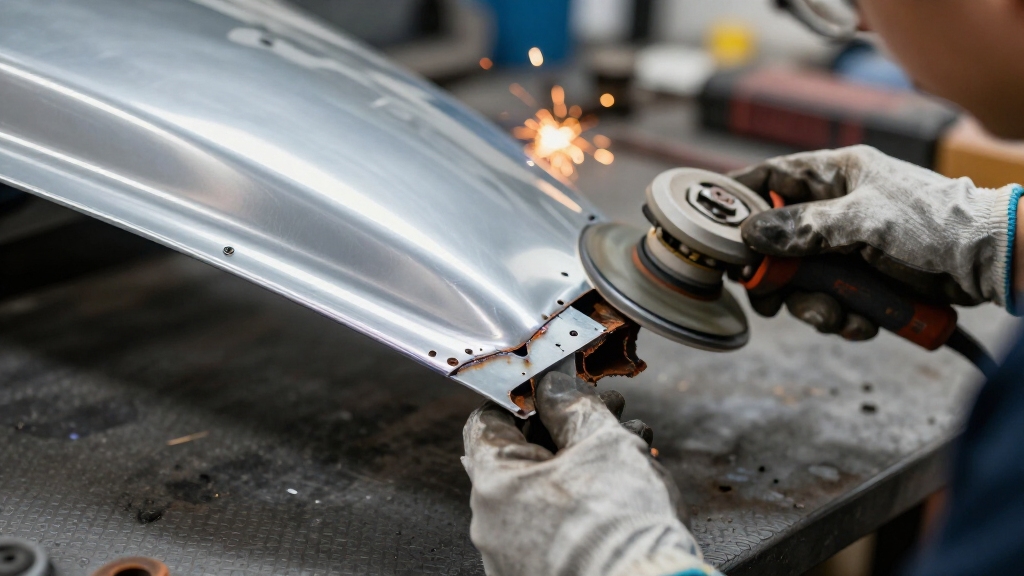
Preparing and cleaning patch panels before welding guarantees a strong, defect-free joint.
First, remove any damaged metal from the repair area to secure a solid base for fitting the new panel. Use a wire wheel, flap disc, or sanding disc to clean both sides of the joint down to bright metal, eliminating paint, rust, dirt, and coatings.
Remove damaged metal and clean joint surfaces to bright metal for a secure, contamination-free panel fit-up.
Focus on at least the immediate weld zone. Next, place your work on a flat, stable surface to achieve precise fit-up without distortion.
When appropriate, apply weld-through or zinc-rich primer to hidden or backside surfaces to enhance corrosion resistance. This preparation assures proper weld penetration and adhesion, setting the stage for a reliable, long-lasting repair.
Skipping these steps risks weak welds and premature failures. Additionally, recognizing the presence of a zinc coating helps ensure that corrosion protection measures are effectively maintained during welding.
Configure your welder specifically for thin auto body panels to guarantee clean, consistent welds without warping or burn-through.
Use a MIG welder with 0.023-inch diameter wire to handle the delicate sheet metal effectively. Set the amperage at the lowest practical level for the panel thickness, minimizing heat input.
Employ a 75/25 argon-CO2 shielding gas mix, flowing between 15 and 20 cubic feet per hour (CFH) to protect the weld pool from contamination.
Adjust wire feed speed to achieve a stable arc without spatter. Confirm all settings before welding to avoid costly errors.
Proper welder setup is essential to control heat and ensure penetrating, defect-free welds while preserving the panel’s structural integrity.
Always ensure thorough surface preparation by removing oxidation and contaminants before welding to improve strength and durability, as recommended in safety precautions.
To ensure a snug fit, it’s essential to trim those replacement panels just right. You want to minimize gaps, after all! So, take your time with the cutting.
Once you’ve got those panels trimmed, it’s time to clamp them down securely. This step is crucial because you don’t want any movement while welding. A solid hold will make all the difference in the final result.
And while you’re working, don’t forget to keep checking the alignment. It’s easy to get off track, and you want to avoid any distortion. Making sure the panel matches the surrounding contours will help everything come together beautifully!
Using fixtures, clamps, and jigs ensures precise alignment and stability during assembly for the best welding outcome.
Clamp the replacement panel firmly in place to guarantee exact alignment before trimming. Use a sharp cutting tool to trim the panel edges precisely along your marked lines. Ensure a tight, even butt joint with about a 1/32-inch gap for ideal weld penetration.
Remove any excess material that prevents flush fit-up, checking the panel contour continuously against the original body lines. Re-trim as necessary to maintain consistent gaps and seamless shift. Clean the trimmed edges thoroughly, removing paint, rust, and coatings down to bare metal to secure a clean weld zone.
Work on a flat, stable surface to maintain panel geometry and prevent distortion. Accurate trimming at this stage is critical to reduce weld defects and minimize heat warping during the welding process. Use clamps and magnets to prevent movement caused by heat distortion during fit-up.
Ensuring the replacement panel is held firmly in position requires precise alignment and secure clamping before welding begins.
Start by fitting the panel on a flat, stable surface to confirm contour matching. Use panel clamps with firm grips to avoid slipping during welding.
Position clamps to maintain a consistent, minimal gap—ideally about 1/32 inch—along the seam for a proper butt weld. Apply even pressure without distorting the metal.
For irregular contours, use adjustable or specialized clamps to hold complex curves. Re-check alignment visually and with measuring tools once clamped.
Proper clamping minimizes movement during tack welding, preventing misalignment and distortion. Secure clamping is essential for maintaining seam integrity and ensuring a clean, strong weld throughout the body panel repair process.
Controlling heat input during welding is also crucial to minimize distortion and maintain frame integrity.
After securing the replacement panel with proper clamping, maintain constant vigilance on its alignment throughout the welding process.
Check the panel’s fit at frequent intervals to detect any shifts caused by heat or clamp movement.
Use straightedges or contour gauges to verify that gaps remain consistent, aiming for roughly 1/32 inch, and that edges align flush without distortion.
If misalignment occurs, pause welding and adjust clamps or trim edges as needed before continuing.
Tack welds should hold the panel firmly but allow slight repositioning to correct fit.
Staying proactive prevents warping and guarantees the final seam is smooth and structurally sound.
Continuous alignment checks save time and improve quality by avoiding costly rework or compromised weld integrity due to panel mismatch or heat-induced distortion.
Monitoring the heat input during welding is crucial, as excessive heat can cause panel warping and misalignment.
Start by placing tack welds strategically to hold the patch panel firmly in position before proceeding with continuous welding. Tack welds should be spaced about 1 inch apart to secure the panel and prevent shifting. Instead of running a long continuous bead, use stitch welding, short, intermittent welds to minimize heat buildup and distortion.
Place tack welds every inch to hold panels firmly, then use short stitch welds to reduce heat and distortion
Keep these key points in mind:
Make each weld brief, around one second, to avoid overheating thin metal. Skip around the panel rather than welding sequentially to control heat distribution. Use a clamp to maintain tight fit-up during welding to guarantee alignment. Monitor weld penetration carefully to prevent burn-through and maintain structural integrity.
This approach gives you strong, precise joints while limiting warping risks. Proper selection of weld length and pitch is essential to balance heat input and joint strength effectively.
To prevent warping in thin panels, it’s really important to manage how you apply heat. For starters, try skipping weld areas and avoid laying down continuous beads. This helps to minimize heat buildup, which is key to keeping everything straight and true.
Instead, go for short welds that are spaced apart. And don’t forget to give the panel some time to cool between passes! This controlled approach not only reduces distortion but also helps maintain the integrity of the panel. It’s all about finding that balance to ensure a smooth finish. Using short, controlled weld passes allows heat to dissipate effectively and prevents localized overheating.
You’ll often need to skip weld areas strategically when working with thin body panels to manage heat and prevent warping. Rather than welding a continuous seam, pause between weld spots and move around the panel. This approach reduces heat buildup and distortion.
To effectively skip weld areas, follow these tips:
Space weld spots evenly to maintain panel integrity and alignment.
Avoid welding adjacent areas consecutively to allow cooling time.
Use clamps or fixtures to hold the panel steady while skipping weld zones.
Monitor panel temperature visually and by touch to prevent overheating.
Additionally, plan welds in segments and allow cooldown periods to stay within the duty cycle limits for optimal welding performance.
Managing heat effectively doesn’t stop at skipping weld areas. Using short weld beads plays a significant role in preventing warping on thin body panels.
By applying brief, controlled welds, you limit heat buildup, reducing distortion risks. Short beads also allow you to move around the panel, dispersing heat evenly.
Aim for welds around one second per spot and avoid continuous seams.
| Weld Bead Length | Heat Input Control |
|---|---|
| 1/2 inch | Moderate |
| 1/4 inch | Low |
| 1/8 inch | Very Low |
| Stitch welds | Intermittent Heat |
| Spot welds | Minimal Heat |
This approach improves weld quality and preserves panel integrity, essential for durable body repairs. Controlling heat input is crucial, as excessive heat can lead to residual stresses that cause distortion and cracking.
Although short welds reduce heat buildup, you must still allow adequate cooling time between welds to prevent distortion in thin panels.
Managing heat is critical to avoid warping and burn-through in sheet metal. Give each weld spot time to cool before moving on, letting the metal stabilize and reducing stress.
To effectively control heat and protect panel integrity:
Following these steps helps maintain the panel’s shape and guarantees a quality, professional repair.
Carefully grinding welds after they cool guarantees a smooth, level seam without compromising the panel’s thickness or strength. Use a fine-grit disc and light pressure to avoid over-grinding, which weakens the repair.
Inspect the backside of the panel for any gaps or incomplete fusion. Seal any voids with additional welds or weld-through primer.
After grinding, clean the entire repaired area of dust and debris. Apply a zinc-rich or weld-through primer on both sides to prevent corrosion, especially in hidden or back surfaces.
Finally, coat the panel with an appropriate automotive primer and finish paint to secure long-term protection against rust. Following these steps maintains structural integrity and prevents corrosion from undermining your weld repair.
You should always wear a welding helmet with the correct shade to protect your eyes from UV radiation.
Use flame-resistant gloves and long sleeves to guard your skin against sparks and heat.
Make certain proper ventilation to avoid inhaling fumes and keep a fire extinguisher nearby.
Work on a stable, non-flammable surface and remove flammable materials from your workspace.
Following these precautions keeps you safe during welding tasks.
Choosing filler material is like picking the perfect puzzle piece. It must match metal type and thickness precisely.
Use mild steel filler for standard steel panels, aluminum filler for aluminum, and stainless steel filler for stainless metals.
Always check compatibility with base metal to ensure strong fusion and minimize corrosion.
Refer to manufacturer specs and consider panel thickness to select wire diameter and alloy. This ensures consistent weld quality and durability.
You can weld body panels without specialized automotive tools, but expect challenges.
Using a basic MIG welder with the right wire and shielding gas helps. Precise panel fit-up, tack welding, and careful heat control remain essential to avoid warping.
Without automotive-specific gear like weld-through primer or thin wire feed, you’ll need to be extra cautious to prevent burn-through and distortion.
Proper preparation and patience make the difference.
If your weld looks like it’s holding on by a thread, you’ve got poor fusion or weak spots. Common signs include cracks, excessive spatter, burn-through holes, and uneven bead appearance.
You’ll also notice warping around the weld or gaps between panels. If the weld isn’t smooth and consistent, corrosion can sneak in later. Always inspect carefully to make sure your work’s solid and ready for the road.
Environmental conditions impact welding by affecting gas shielding and heat control.
You’ll want to avoid windy or dusty areas because drafts can blow away shielding gas, causing contamination and weak welds.
High humidity or moisture can lead to porosity and rust.
Extreme temperatures influence metal expansion and cooling rates, risking warping.
Always work in a controlled, clean environment to maintain weld quality and prevent defects during the process.
By carefully preparing, aligning, and welding your body panels, you ensure a strong, lasting repair.
Remember, over 40% of body panel failures stem from improper heat management.
Controlling heat is vital to prevent warping. Tack and stitch weld strategically to maintain panel integrity.
Finish with corrosion protection to extend your work’s durability.
Following these steps precisely will save you time and money while delivering professional results every time.