Phone:
(701)814-6992
Physical address:
6296 Donnelly Plaza
Ratkeville, Bahamas.

Phone:
(701)814-6992
Physical address:
6296 Donnelly Plaza
Ratkeville, Bahamas.

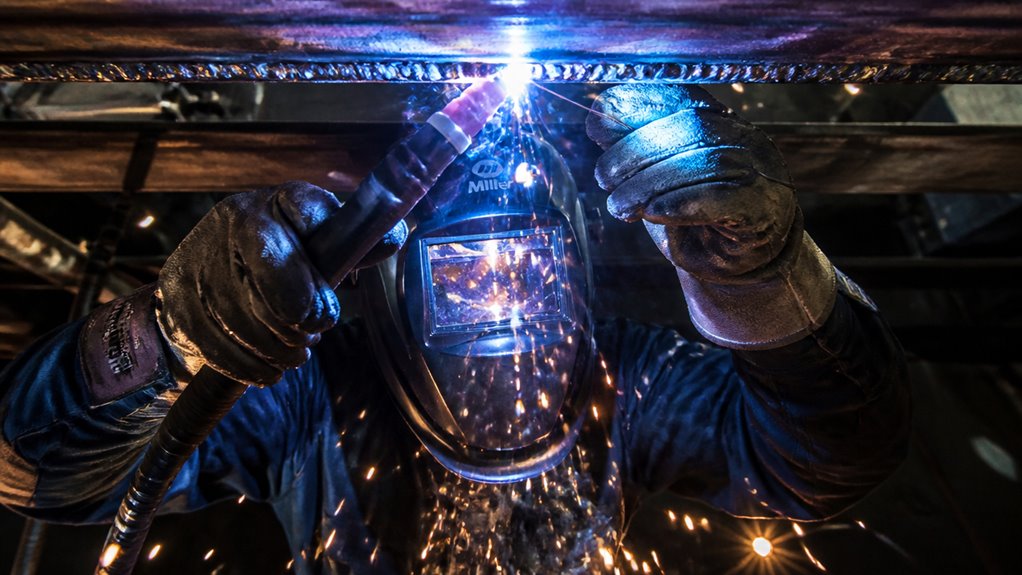
For successful overhead welding, keep your arc length tight, about 1/8 inch, to control the puddle and avoid drips.
Balance your travel speed with this arc length to guarantee even heat distribution and prevent sagging or buildup.
Lower your amperage and voltage from flat welding levels to manage heat input and speed bead freezing.
Use precise rod angles and tight oscillation motions for bead control.
Proper technique and settings reduce defects, and mastering these basics sets the stage for stronger, cleaner welds ahead.
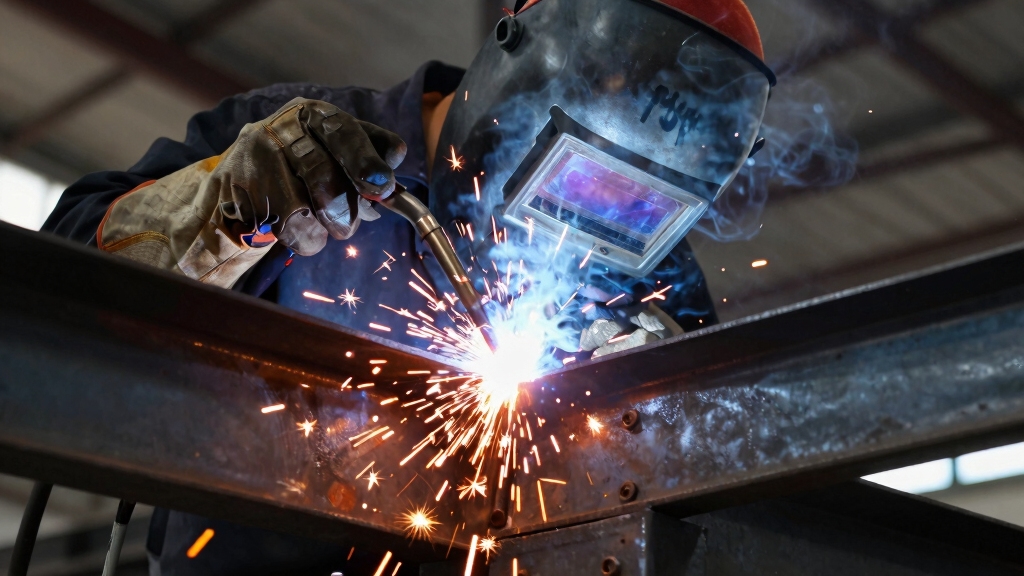
Although overhead welding presents unique difficulties, understanding common challenges allows you to address them effectively and improve weld quality.
One major issue is controlling molten metal, which tends to drip due to gravity. Maintaining a tight arc length of about 1/8 inch prevents excessive puddle size and dripping.
You must also manage heat inputs carefully. Lower amperage and voltage reduce fluidity, leading to faster solidification and less drooping.
Another challenge is maintaining proper rod and work angles. Favor the top plate with a slight drag angle to ensure penetration and bead control.
Travel speed matters too; moving too slow causes buildup, while too fast risks incomplete fusion.
Finally, thorough cleaning and protective gear are essential to avoid contamination and guarantee safety during overhead welding operations.
Mastering overhead welding requires positional welding techniques to maintain weld integrity despite gravity’s effects.
Mastering arc length is critical for producing strong overhead welds. It directly influences puddle control, bead shape, and weld integrity.
Keep your electrode end close, about 1/8 inch or less, to maintain a tight arc that prevents molten metal from dripping. This guarantees a flat, controlled bead.
Avoid long arcs that cause weak welds, excess spatter, and poor fusion. Adjust your technique to pinch the arc and keep the puddle small and manageable.
| Arc Length | Effect on Weld | Recommended Action |
|---|---|---|
| Tight (~1/8″) | Small bead, strong weld | Maintain close electrode gap |
| Medium | Moderate bead size | Adjust for stability |
| Long | Weak weld, spatter | Shorten arc length |
| Excessive | Crowning, contamination | Avoid; reduce voltage |
When setting amperage and voltage for overhead welding, you need to balance heat input carefully to maintain a tight arc without causing the electrode to stick.
Start by setting amperage high enough to sustain the arc, around 165 amps for a 5/32″ 7018 rod. Reduce it slightly from flat welding levels to prevent excessive puddle fluidity and dripping.
Adjust voltage to shorten the arc length, keeping it tight and stable. This means lowering voltage compared to flat welding to reduce spatter and guarantee bead control.
For MIG welding, dial power to about 85–90% of flat welding settings. Fine-tune wire speed and voltage to promote brisk travel without sacrificing weld quality.
This precise balance guarantees you control heat input for strong, defect-free overhead welds. It is also important to reduce amperage in overhead positions to control the weld puddle and minimize defects.
To create smaller beads that freeze quickly and resist sagging, it’s a good idea to lower your amperage settings. This helps reduce heat input, which is crucial for achieving those faster-freezing results.
Now, when you adjust your voltage and wire speed, just be sure to do it carefully. You want to maintain a stable arc without creating too much spatter. Finding that sweet spot is key!
With these precise controls, you can effectively manage bead size and ensure consistent quality in your overhead welds. It’s all about getting those settings just right!
Maintaining the proper stickout length is essential to balance heat input and maintain arc stability during overhead welding.
Lowering amperage plays a critical role in managing heat to produce smaller, faster-freezing weld beads essential for overhead welding.
By reducing amperage, you decrease heat input, which limits molten metal fluidity and prevents dripping. This controlled heat accelerates bead solidification, allowing you to maintain a manageable puddle and consistent bead profile.
For example, set amperage to 85-90% of flat welding values, such as around 140-150 amps for a 5/32″ 7018 rod, to balance arc stability and minimize rod sticking.
Avoid excessive amperage, which causes large, slow-freezing puddles prone to sagging. Keep amperage just high enough to sustain a tight arc, ensuring proper fusion without overheating.
Maintaining a short arc length further stabilizes heat input and improves puddle control during overhead welding.
This precision in amperage adjustment directly improves weld quality and safety during overhead operations.
Fine-tuning voltage and wire speed is crucial for controlling heat input and producing smaller, faster-freezing weld beads in overhead welding.
By adjusting these parameters, you manage puddle fluidity and prevent molten metal from dripping. Lower voltage shortens arc length, reducing heat and spatter, while appropriate wire speed sustains a steady deposition rate without overheating.
To optimize your settings:
Reduce voltage to maintain a tight arc and control bead shape. Set wire speed to match travel speed, guaranteeing consistent, manageable puddle size. Balance both to promote rapid cooling, minimizing bead sag and defects.
Mastering voltage and speed adjustments secures weld integrity and efficiency when working overhead, where heat control is crucial for quality and safety.
When setting rod and work angles for overhead welding, maintaining a consistent electrode position is essential to achieving proper fusion and bead control.
Use a slight drag angle—dead straight or slightly tilted back—to keep the arc stable and control the molten puddle. Position the electrode at approximately 45 degrees up relative to the workpiece, favoring the top plate by turning your wrist accordingly.
Maintain a slight drag angle and position the electrode 45 degrees up for stable arc and puddle control.
Avoid pointing the work angle too far toward the bottom plate, especially during second passes, to ensure thorough fusion without excessive penetration. Consistency in these angles helps direct heat where needed, preventing metal sagging and ensuring a sound, uniform bead.
Mastering these angles will markedly improve your weld’s integrity and appearance in overhead applications. Additionally, for overhead welding, it is important to pause slightly at puddle top without overlapping to control the bead effectively.
To keep your welds looking sharp, it’s super important to maintain a steady travel speed. This helps ensure that your bead forms consistently and keeps those pesky drips at bay.
Now, to help control the weld puddle, try using tight oscillations. This technique can really make a difference in preventing excessive buildup.
And here’s a little tip: pausing briefly and then hitching forward slightly can help eliminate crowning and ensure you get proper penetration. It’s all about finding that rhythm!
Adjusting travel speed also helps balance bead shape and penetration while avoiding defects like burn-through or cold lap, which is key for arc and puddle control.
Maintain a consistent travel speed to control the weld puddle and prevent molten metal from dripping or crowning excessively.
When you maintain steady travel, you ensure uniform heat distribution, stabilizing the puddle and bead profile. Erratic speeds cause irregular bead shapes, undercut, or excessive buildup, compromising weld integrity.
Focus on smooth, continuous movement that matches your amperage and voltage settings.
Keep in mind these key points:
Avoid rushing; maintain a pace that lets the bead freeze quickly to prevent sagging.
Pause slightly at intervals to control bead height and avoid crowning.
Match your travel speed with a tight arc length to keep the puddle manageable and consistent.
Steady travel is essential to producing strong, defect-free overhead welds.
Using short-circuit transfer mode can help deliver intermittent heat, allowing the weld area to cool and reducing the risk of burn-through.
Control your travel speed by employing tight oscillations to manage the weld puddle size and shape effectively.
This technique helps you maintain a smaller, faster-freezing bead that resists dripping.
Move the electrode in a controlled, tight circular motion, which compensates for the reduced bead size and prevents the puddle from sagging or crowning.
Keep your oscillations consistent and avoid wide swings that increase bead width and fluidity.
Tight oscillations also promote even heat distribution, ensuring uniform penetration and a flat bead profile.
By controlling puddle geometry precisely, you minimize the risk of molten metal falling and reduce spatter buildup.
Mastering this technique is essential for overhead welding success, as it directly influences bead integrity, weld strength, and overall appearance.
This method aligns with controlling the weld pool size, which affects bead height, width, and profile for optimal load distribution.
Keep your travel speed in check by incorporating deliberate pauses and small forward hitches during overhead welding. This technique prevents excessive molten metal buildup, which causes drips and crowning.
By momentarily pausing, you allow the weld puddle to solidify slightly, reducing sagging. Then, a controlled forward hitch advances the bead precisely, maintaining proper penetration and bead shape.
To optimize this method, focus on:
Using pause and hitch effectively enhances bead quality, reduces defects, and improves overall weld strength in overhead positions. Maintaining a steady travel speed is essential to ensure proper fusion and prevent molten metal sagging during overhead welding.
By employing tight oscillation patterns, you can effectively manage the weld puddle’s size and shape during overhead welding.
Oscillating in a controlled, narrow arc helps you maintain a compact puddle, reducing the risk of molten metal dripping.
This technique allows you to evenly distribute heat and filler material, ensuring consistent bead formation and avoiding irregularities.
Keep your oscillation tight and steady, moving in small circles or figure-eights to prevent puddle sagging.
Avoid wide swings that can elongate the puddle and increase fluidity, leading to poor bead profile and potential defects.
Mastering oscillation patterns complements your control over arc length and travel speed, enabling you to produce clean, uniform overhead welds with precise penetration and minimal spatter.
Proper adjustment of oxygen and fuel ratios is essential to sustain proper flame characteristics and achieve optimal weld quality.
Although overhead welding demands a smaller bead size to prevent dripping, stacking multiple beads strategically markedly enhances weld strength and integrity.
You’ll want to overlap beads by about two-thirds to three-quarters on subsequent passes. This ensures each new bead centers on the toe of the previous weld without excessively favoring the bottom plate.
This technique reinforces the joint by fusing layers thoroughly, compensating for the limited bead size overhead welding requires.
Additionally, re-welding over arc stripes smooths the surface, which is critical for inspection standards.
Focus on these key points when stacking beads:
Stacking beads properly strengthens your weld. However, guaranteeing your safety and preparing your gear is just as important when working overhead.
Protect yourself with flame-resistant clothing, gloves, and earplugs to guard against sparks and molten metal. Keep your helmet’s lens clean and hood down for peak visibility.
Increase shielding gas flow to compensate for upward gas loss. Clean the base metal thoroughly and apply anti-spatter spray to the nozzle to maintain equipment efficiency.
| Gear Element | Safety Purpose |
|---|---|
| Helmet | Protects eyes, guaranteeing visibility |
| Flame-resistant gloves | Shields hands from burns |
| Earplugs | Prevents spatter ear injuries |
| Anti-spatter spray | Reduces nozzle buildup |
Prioritize these measures to maintain both weld quality and personal safety.
You’ll want to use low-hydrogen electrodes like E7018 for overhead welding because they provide strong, crack-resistant welds with minimal spatter.
Their flux coating helps control the arc and prevents molten metal from dripping.
Also, use a 5/32″ diameter rod at around 165 amps to maintain a tight arc and manageable puddle.
Avoid electrodes that produce excessive slag or spatter, as they compromise weld quality and safety overhead.
Humidity increases the risk of weld defects by introducing moisture into the weld area. This can cause hydrogen-induced cracking and porosity.
You must control humidity levels to prevent moisture absorption in electrodes and base metal. Wet surfaces degrade fusion quality.
Use dry, conditioned rods and store consumables in sealed containers with desiccants. Maintaining low humidity secures consistent arc stability and reduces spatter.
This significantly improves weld integrity, especially critical for overhead welding conditions.
You might think overhead welding’s complexity resists automation, but you can automate it effectively with precise control systems.
By maintaining tight arc lengths, adjusting amperage, and managing travel speed, automated machines replicate skilled welders’ techniques.
The key is programming consistent rod angles and bead overlap while compensating for gravity’s effect on molten metal.
With proper equipment and parameter control, automation guarantees repeatable, high-quality overhead welds, improving safety and productivity.
In confined overhead spaces, maintain a tight arc length of around 1/8 inch to control the weld puddle and prevent dripping.
Use reduced amperage and voltage to create a smaller, faster-freezing bead, minimizing molten metal fallout.
Position the rod with a slight drag angle and favor the upper plate to guarantee proper fusion.
Move steadily with tight oscillations, overlapping beads about two-thirds to maintain strength.
Always wear full protective gear for safety.
Different base metals impact your overhead welding by altering heat input, technique, and settings.
For example, aluminum requires higher amperage and increased travel speed due to its high thermal conductivity.
Stainless steel demands precise voltage control to avoid distortion.
Steel alloys may need adjustments in rod angle and bead stacking for proper fusion.
Always adapt your arc length and heat to the metal’s melting point and thermal properties to guarantee sound, drip-free welds overhead.
Mastering overhead welding isn’t just a skill; it’s your secret weapon against gravity itself. By controlling arc length, amperage, and travel speed with surgical precision, you transform challenging welds into flawless masterpieces.
Proper angles, oscillation, and bead stacking cement your work’s integrity beyond doubt. Neglecting these details? You might as well weld in zero gravity.
Equip yourself with knowledge and safety gear, and you’ll dominate overhead welding like a true professional. Nothing less than perfection will do.