Phone:
(701)814-6992
Physical address:
6296 Donnelly Plaza
Ratkeville, Bahamas.
Phone:
(701)814-6992
Physical address:
6296 Donnelly Plaza
Ratkeville, Bahamas.
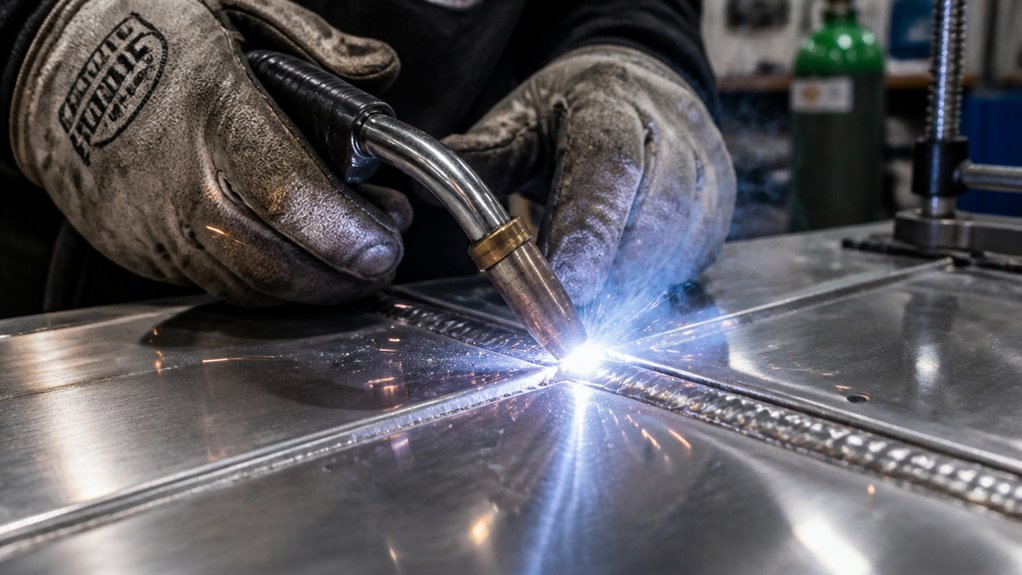
To weld aluminum with a MIG, use a spool gun or push-pull system to feed the soft aluminum wire smoothly.
Set your polarity to direct current electrode positive (DCEP) and supply 100% argon shielding gas at 20–30 cfh.
Clean the surface thoroughly to remove oxide layers, adjust voltage and wire feed for stable spray transfer, and maintain a 10–15° push angle with steady travel speed.
Proper heat control prevents burn-through. Understanding these basics lays the foundation for mastering precise aluminum MIG welds.
Although MIG welding steel is a straightforward process, welding aluminum with a MIG setup requires special attention due to aluminum’s unique properties.
MIG welding aluminum demands extra care and technique compared to the simpler process of welding steel.
You must use spray transfer mode and direct current electrode positive (DCEP) polarity to achieve stable arc performance.
Unlike steel, aluminum forms a tenacious oxide layer that impedes fusion; you’ll need to clean this thoroughly before welding.
Also, aluminum wire is softer, so feeding it consistently demands specialized equipment like a spool gun or Teflon-lined liner with knurled drive rollers.
You should use 100% argon shielding gas at a higher flow rate than steel to prevent porosity and contamination.
Finally, your technique must adapt: maintain a 10- to 15-degree push angle and control heat carefully to avoid burn-through and feeding instability common with aluminum.
Using a spool gun or push-pull system with aluminum-specific liners and drive rolls helps prevent bird-nesting issues and ensures consistent wire feed during welding.
Understanding how aluminum thickness affects MIG welding is key to achieving sound welds and avoiding common issues like burn-through or feeding problems.
You should focus on aluminum 14 gauge (approximately 1.9 mm) and thicker for MIG welding. This range provides sufficient material mass to manage heat input effectively.
Thinner aluminum tends to overheat rapidly, causing burn-through and inconsistent wire feeding due to soft wire deformation. If you’re working with thinner sheets, TIG welding is often more suitable.
For thicker sections, MIG welding offers better penetration and easier heat control. Always match your wire feed speed and amperage settings to the material thickness.
This ensures stable spray transfer mode and reliable fusion without compromising weld integrity or causing excessive distortion.
Using a spool gun is essential for smooth feeding of aluminum wire during MIG welding to prevent feeding problems.
Before you dive into welding, it’s super important to clean the aluminum surface really well.
You want to get rid of oils, dirt, and any other contaminants that might mess with the weld quality.
A dedicated stainless-steel wire brush works best for this.
Just remember to use it at low RPM and apply light pressure—this helps strip away that stubborn oxide layer without embedding any debris.
Once you’ve cleaned the surface, make sure to protect it from new contaminants.
Store it in a dry area, and if there’s a delay before you start welding, give it another quick clean.
Keeping everything in tip-top shape will help ensure your welds turn out great!
Also, be sure to use acetone or MEK with a lint-free rag for thorough degreasing before mechanical oxide removal to maximize weld quality.
Cleaning aluminum surfaces thoroughly guarantees strong, defect-free welds by removing oxides and contaminants that interfere with arc stability and fusion.
Before welding, start by degreasing the aluminum to eliminate oils and lubricants that hinder weld quality. Use a stainless-steel wire brush dedicated solely to aluminum to avoid cross-contamination and assure oxide removal after degreasing.
When using power tools, apply low RPM and light pressure to prevent smearing oxides back onto the surface. Finally, assemble joints promptly and protect them from dirt or grit to maintain cleanliness until welding begins.
Proper shielding gas coverage is also critical to prevent oxidation during welding, so maintaining continuous argon shielding gas flow is essential for weld integrity.
After removing oils and surface contaminants, you’ll need to tackle aluminum’s persistent oxide layer. This layer can severely impair arc stability and weld fusion.
Use a dedicated stainless-steel wire brush exclusively for aluminum to mechanically strip oxides. This helps avoid embedding contaminants.
Apply low RPM and light pressure when using power brushes. This prevents smearing oxides across the surface.
Alternatively, you can use chemical cleaners formulated for aluminum oxide removal. Ensure they’re fully rinsed and dried before welding.
Avoid abrasive methods that damage the base metal or create uneven surfaces. Thorough oxide removal secures consistent arc initiation and penetration during MIG welding.
Prepare joints immediately before welding to minimize oxide reformation. Aluminum oxide forms rapidly upon air exposure.
Proper oxide removal is critical to achieving sound, defect-free welds. Using acidic solutions like vinegar or lemon juice can effectively dissolve light oxidation without damaging the metal.
Maintaining a clean aluminum surface after oxide removal is essential to prevent recontamination that can compromise weld quality. After you remove oxides with a stainless-steel wire brush, avoid touching the surface with bare hands. Oils and dirt quickly degrade cleanliness. Keep parts covered or in a dry storage area if welding is delayed. Before welding, re-clean the surface to remove any new contaminants.
To prevent surface contamination effectively:
Use a stainless-steel wire brush dedicated exclusively to aluminum.
Degrease with a suitable solvent before brushing.
Avoid high RPM or heavy pressure when brushing to prevent oxide smearing.
Store prepared parts in a clean, dry environment until welding.
Following these steps guarantees peak arc performance and fusion during MIG welding aluminum. Proper surface preparation also helps reduce the risk of arc strikes caused by unstable arc initiation and contamination.
When it comes to choosing filler wire for aluminum, it’s essential to pick one that matches your base aluminum alloy and the specific service conditions.
This ensures you get proper fusion and the right mechanical properties.
Now, let’s talk about shielding gas. You’ll want to stick with 100% argon, which is ideal for aluminum welding.
Aim for a flow rate between 20 and 30 cubic feet per hour to ensure you have good coverage.
It’s all about finding the right balance.
Adjusting your gas flow and wire choice carefully can help you avoid issues like porosity, making sure you end up with a clean, strong weld.
For aluminum thicker than 1/4 inch, consider using argon-helium blends to increase heat input and improve weld penetration.
Selecting the correct filler wire alloy is critical to achieving a strong, durable weld when MIG welding aluminum. You need to match the filler wire to the base metal’s alloy and intended service conditions to guarantee compatibility and mechanical integrity.
Consider these factors:
Use 4045 or 4047 wire for heat exchanger applications due to good corrosion resistance.
Select 5356 alloy for general-purpose welding of 5000-series aluminum with good strength.
Choose 4045 or 5356 to match 3000-series alloys, balancing ductility and strength.
Avoid mismatched alloys that can cause cracking or reduced corrosion resistance.
Proper cleaning and removal of oxide layers before welding is essential to avoid porosity and defects.
Several key factors influence the choice of shielding gas when MIG welding aluminum.
100% argon is the industry standard due to its excellent arc stability and penetration characteristics.
Argon’s inert nature prevents oxidation and stabilizes the spray transfer mode needed for clean, strong welds.
Alternatives like argon-helium mixes can increase heat input but complicate control.
| Gas Type | Arc Stability | Application Notes |
|---|---|---|
| 100% Argon | Excellent | Standard for most aluminum welds |
| Argon-Helium | Higher heat input | For thicker sections |
| Argon-CO2 | Not recommended | Causes porosity and spatter |
| Argon-Oxygen | Not recommended | Oxidizes aluminum surface |
| Pure Helium | Poor arc stability | Limited use, higher cost |
Stick to 100% argon for reliable results and avoid contamination risks. Its ability to provide a stable arc characteristic makes it ideal for achieving precise and clean aluminum welds.
When setting gas flow rates for MIG welding aluminum, maintaining consistent shielding coverage is critical to preventing weld contamination and porosity. You’ll typically use 100% argon as your shielding gas, setting the flow rate between 20 and 30 cubic feet per hour (cfh).
Aluminum often requires a slightly higher flow than steel to guarantee proper coverage, especially with push travel angles. Improper flow risks allowing atmospheric gases to infiltrate the weld pool, causing defects.
Keep these points in mind:
Proper gas flow is essential for clean, strong aluminum welds. For thicker aluminum sections, consider adding helium to argon to increase heat input and penetration for improved weld quality.
Start by preparing your MIG welder specifically for aluminum by installing a spool gun or a push-pull gun to handle the soft aluminum wire without feeding issues.
Make certain the liner is made of Teflon and correctly sized to minimize friction and prevent wire deformation.
Swap out standard drive rollers for knurled rollers designed to grip aluminum wire firmly.
Set the polarity to direct current electrode positive (DCEP) to optimize arc stability and penetration.
Confirm your shielding gas supply is 100% argon and adjust the regulator to deliver a flow rate between 20 and 30 cubic feet per hour.
Double-check all connections for tightness and proper insulation to avoid electrical faults.
This precise setup forms the foundation for smooth aluminum MIG welding performance.
Feeding aluminum wire smoothly requires specialized equipment designed to handle its softness and tendency to deform. You want to avoid common feeding problems like birdnesting or wire crushing by using the right tools and setup.
Start with a spool gun or push-pull gun, both engineered to deliver consistent wire feed without binding. Equip your MIG welder with a Teflon liner to reduce friction inside the liner. Select knurled drive rollers sized specifically for aluminum wire diameter. Regular inspection and replacement of liners and rollers are critical to maintain smooth feeding.
Key tips include:
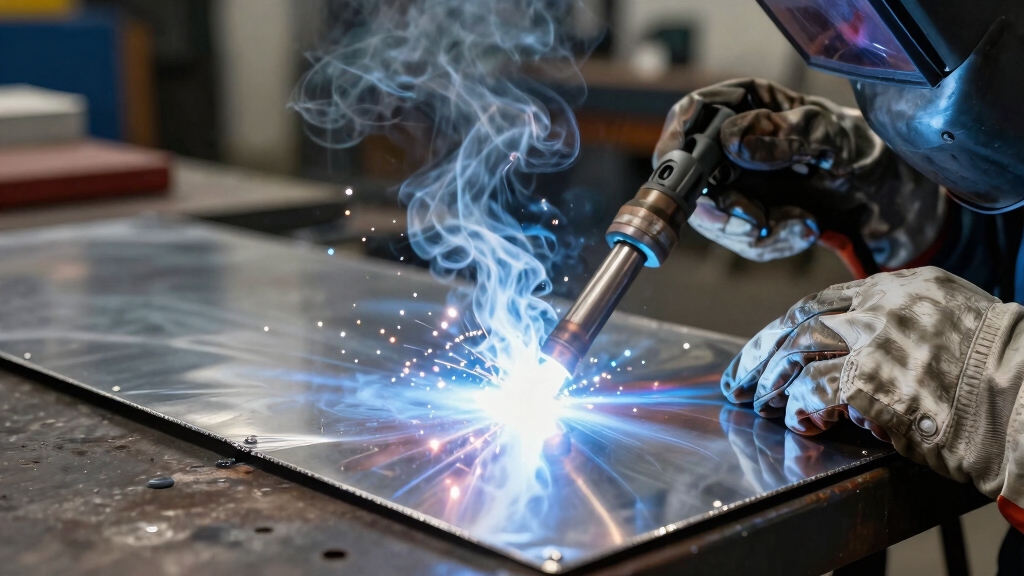
Mastering the proper welding angle and travel speed markedly influences the quality of your aluminum MIG welds.
Maintain a push angle between 10 and 15 degrees to guarantee peak gas coverage and minimize porosity. Avoid drag angles, which encourage oxide entrapment and inconsistent fusion.
Keep the gun’s tip-to-work distance steady, typically around 3/8 inch, to prevent burnback or wire feeding issues.
Adjust your travel speed to match material thickness and heat input; move too slowly, and you risk excessive heat buildup, causing weld defects.
Conversely, traveling too fast leads to poor fusion and weak beads.
For thicker sections, a moderate speed with steady, straight beads works best. Thin aluminum demands slightly faster travel and controlled motion to maintain weld integrity without overheating.
Because thin aluminum dissipates heat quickly and has low melting tolerance, controlling heat input is critical to prevent burn-through during MIG welding.
You need to carefully balance voltage, wire feed speed, and travel speed to avoid overheating the workpiece. Use these techniques:
Lower your voltage and wire feed speed settings to reduce heat input.
Increase your travel speed slightly to limit heat buildup in one spot.
Employ a stitch or whip-and-pause motion to allow cooling between welds.
Maintain a consistent 10- to 15-degree push angle to promote stable arc and proper bead shape.
When welding thicker aluminum sections, using multi-pass techniques markedly improves both the strength and cleanliness of the weld. You’ll deposit multiple layers, controlling heat input and minimizing distortion. Each pass fuses cleanly to the previous bead, reducing porosity and ensuring full penetration. Proper interpass cleaning removes oxide and impurities, vital for aluminum’s reactive surface.
| Pass Number | Purpose |
|---|---|
| 1 | Root pass: establishes penetration and fusion |
| 2 | Fill pass: builds weld volume, controls heat |
| 3 | Cap pass: smooths surface, enhances appearance |
Maintain a consistent push angle and travel speed to avoid defects. Use a stainless-steel wire brush between passes to remove oxides. This methodical layering yields strong, visually clean welds essential for structural integrity.
You can weld aluminum MIG without a spool gun, but it’s challenging.
Standard MIG guns often struggle feeding soft aluminum wire, causing jams or inconsistent feed. If you proceed, use a Teflon liner and knurled drive rollers to reduce friction.
Keep your wire feed consistent and watch for burnback. However, for reliable feeding and better control, a spool gun or push-pull system is strongly recommended when welding aluminum with MIG.
They say, “An ounce of prevention is worth a pound of cure.” To prevent warping in aluminum welds, control heat input carefully.
Use multiple short passes with cooling intervals instead of one long bead. Maintain a steady travel speed and a 10-15° push angle to guarantee even heat distribution.
Clamp and backstep weld to minimize distortion. Also, pre-clean surfaces and avoid excessive weld bead size to reduce residual stresses causing warping.
You should watch for porosity, caused by inadequate shielding gas or surface contamination, which weakens welds.
Cracking is common, often from rapid cooling or improper heat control.
Lack of fusion results from incorrect travel angle or insufficient heat.
Burn-through happens if your heat input is too high, especially on thin aluminum.
Also, watch for spatter and wire feeding issues, which can disrupt bead consistency and cause defects.
Yes, you can MIG weld aluminum outdoors, but you have to control shielding gas coverage carefully.
Wind can blow away the argon shielding, causing porous, weak welds. Use windshields or welding tents to protect the gas envelope.
Increase the gas flow rate slightly, typically between 20 to 30 cubic feet per hour, to compensate for minor drafts.
Always maintain consistent travel speed and technique to guarantee proper fusion despite outdoor conditions.
You should let aluminum welds cool for at least 15 to 30 minutes before handling to avoid distortion or burns.
Cooling time depends on the weld size and material thickness; thicker pieces need longer.
Always allow the weld to reach near ambient temperature for safe handling and to maintain weld integrity.
Using forced cooling methods can cause thermal shock, so let it cool naturally unless specific procedures dictate otherwise.
Welding aluminum with a MIG welder isn’t rocket science, but it demands precision and care.
By mastering surface preparation, selecting the right wire and shielding gas, and fine-tuning your settings, you’ll avoid common pitfalls like burn-through and porosity.
Remember to control your heat and maintain steady travel speed for consistent, strong welds.
With practice, your aluminum welds will be so flawless, they’ll practically shine brighter than the sun on a summer day.