Phone:
(701)814-6992
Physical address:
6296 Donnelly Plaza
Ratkeville, Bahamas.
Phone:
(701)814-6992
Physical address:
6296 Donnelly Plaza
Ratkeville, Bahamas.
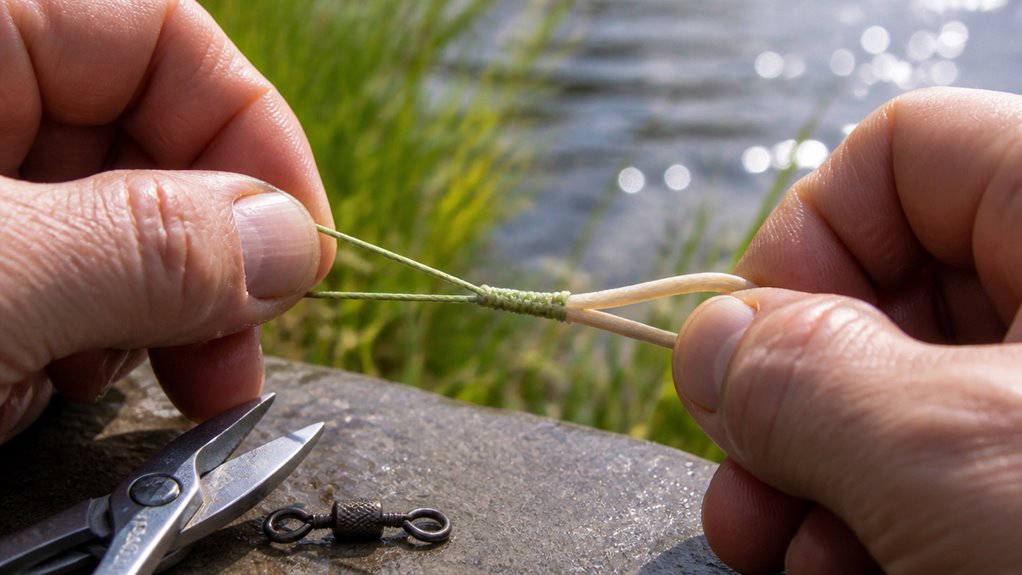
To tie backing to a fly line with a welded loop, start by doubling your backing line and tie a strong triple surgeon’s knot to form a large, sturdy backing loop.
Slip this loop through the fly line’s welded loop, then pass the fly line spool through the backing loop if needed.
Pull both loops snug, orienting them in opposite directions to prevent twists and maintain smooth casting.
Keeping loops aligned helps secure a reliable, slip-free connection.
Learn how to optimize this setup and handle various backing types for the best results.
When you tie backing to a fly line using a welded loop, you make changing leaders and backing quick and hassle-free.
Tying backing to a fly line with a welded loop makes leader and backing changes fast and effortless.
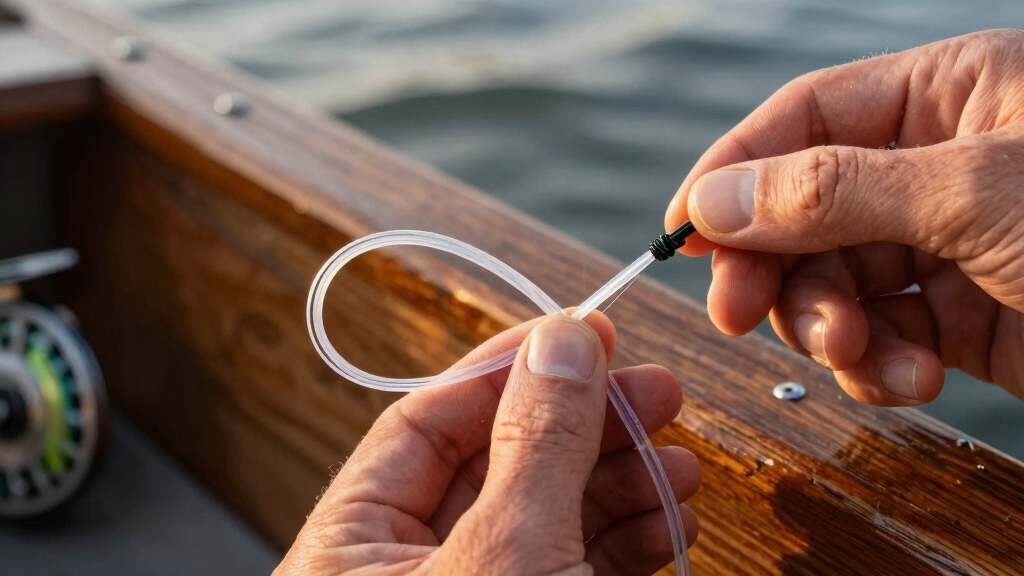
The welded loop on your fly line creates a strong, reliable connection point for a loop-to-loop setup with your backing.
This setup lets you connect and disconnect your backing without cutting or retying, saving time on the water.
The loop also matches perfectly with a loop you tie into your backing, ensuring a secure, slip-free junction.
Plus, since the backing loop is large enough, you can easily slip your fly line spool through it during installation.
This method reduces line twists and maintains smooth casting performance, making it a preferred choice for many experienced anglers who value efficiency and reliability.
For maximum strength and durability, the welded loop technique benefits from precise control similar to that required in specialized welding processes.
Creating a secure loop in your backing is the next step to take full advantage of the welded loop on your fly line.
Start by doubling the end of your backing line, ensuring the loop is large enough for the fly line spool to pass through easily.
To tie the triple surgeon’s knot, overlap the doubled lines and make three consecutive overhand knots, carefully tightening each without twisting the strands.
This triple knot creates a strong, reliable loop that resists slipping under tension.
Leave a short tag end for visual reference and to help dress the knot properly.
Once finished, this loop will provide a sturdy, easy-to-use connection point for your fly line’s welded loop, allowing quick, secure loop-to-loop attachment without compromising line strength.
Creating a large backing loop is pretty straightforward, and it’s key for easy attachment.
First off, you’ll want to double the backing line before tying your knot. I find that a triple surgeon’s knot usually does the trick. It offers great strength and keeps the size just right.
Now, don’t skimp on the loop size! Making it generous helps avoid any tight threading, which can be a real hassle.
Plus, it speeds up your setup, making things much smoother when you’re out there fishing.
For tasks requiring precision and safety, using gloves made from Kevlar can provide excellent protection and durability during handling.
A properly sized backing loop makes attaching your fly line much easier and more efficient. When you tie the loop, make certain it’s large enough to let the fly line spool pass through without hassle.
This prevents tight threading issues and speeds up installation, especially when you want to connect or disconnect quickly in the field. Double the backing end before tying your loop to create extra strength and space.
A loop that’s too small can cause trouble feeding the fly line through the welded loop, wasting time and risking line damage. Remember, a large, well-formed loop not only simplifies attachment but also reduces twisting and strain on the connection.
This makes your setup more reliable and easier to manage on the water. Just as controlling heat input is crucial for strong aluminum welds, managing tension and loop size ensures a durable and efficient fly line connection.
Start by doubling the end of your backing line before tying the loop. This adds strength and guarantees the loop is large enough for easy attachment.
Form the loop using a Triple Surgeon’s Knot: tie an overhand knot with the doubled line, then pass the loop through again to create a second overhand knot. This builds a secure, robust loop that won’t slip under tension.
Make sure the loop is big enough to easily slip the fly line’s welded loop through and to pass the fly line spool if needed. Leave a short tag end visible as a reference point at the junction.
Dress the knot tightly and trim excess tag to prevent snagging. This technique assures a reliable, easy-to-use loop-to-loop connection every time.
When connecting your backing loop to a welded loop on the fly line, slip the backing loop through the fly line’s welded loop first. Then, pass the fly line spool through the backing loop, making sure the loop is large enough to accommodate it easily.
Once both loops are linked, pull them snug to form a secure loop-to-loop connection. This method keeps your setup strong and allows for quick changes without cutting line. Avoid twisting by keeping the loops aligned as you tighten, but more on that in the next section. Properly maintaining wire feed components ensures reliable performance when using welding equipment to create strong, consistent loops.
When you’re connecting the backing loop to the welded fly line loop, it’s important to orient them in opposite directions. This little trick really helps minimize line twist while you’re casting and retrieving.
Once you’ve got them aligned, just pull both loops tight. This will give you a strong, twist-free connection that keeps everything running smoothly.
To keep your fly line from twisting at the junction, make sure to orient the backing loop and the welded loop on the fly line in opposite directions before tightening.
This simple step prevents the loops from spinning around each other, which can cause line twist and tangles during casting.
Before pulling the loops snug, visually check their alignment.
Here’s how to do it effectively:
Ensuring proper alignment and tension during this process helps maintain smooth line operation and prevents damage.
Although tying the loops securely is essential, you’ll want to orient them carefully to prevent line twist at the junction.
When connecting the backing loop to the welded loop on the fly line, align each loop so they face opposite directions.
This opposing orientation naturally counteracts torque that causes twisting during casting or retrieval.
Before tightening, verify the loops aren’t overlapping or coiling around each other.
As you snug the connection, keep tension steady and maintain this alignment.
If you notice any initial twist forming, gently adjust the loops’ position before fully tightening.
Proper orientation reduces line memory and tangling, helping your setup perform smoothly on the water.
Taking this small extra step guarantees a durable, twist-free link between backing and fly line.
Additionally, regular inspection for white rust formation can help detect early signs of corrosion that might affect the durability of your connection.
Secure the loops firmly by aligning them in opposite directions before tightening to prevent line twist. This simple step keeps your connection smooth and durable, reducing the chance of tangles during casting.
To do this effectively:
Slip the backing loop through the fly line’s welded loop.
Rotate one loop so it faces away from the other.
Pull both loops snug slowly, watching for any twisting.
Adjust orientation if you feel resistance or see twists forming.
For additional strength and durability, consider using welding techniques to ensure a precise and secure welded loop connection.
When your fly line lacks a welded loop or you prefer a knot-based connection, using alternative knots like the Nail Knot or Albright Knot becomes necessary.
You’ll want to choose the Nail Knot for standard monofilament fly lines since it forms a neat, secure connection. The Albright Knot works best if you’re using gel-spun backing, as it handles slippery materials better.
Sometimes anglers cut off welded loops to switch to these traditional knots for added control or convenience. Use 5 to 7 turns when tying the Nail Knot to assure strength.
For best results, maintaining a consistent knot tension during tying ensures a strong and reliable connection.
Properly spooling backing onto your fly reel is essential for smooth casting and preventing line twists.
Start by ensuring the backing spool rotates freely to avoid tension or snarls. Pull the line off the bottom of the backing spool to minimize twists as you wind it onto your reel.
Keep the backing tight but not overly stretched to maintain consistent tension. Wind evenly across the spool’s width to avoid uneven layers that can cause jams later.
Here’s how to do it right:
Position the reel so the spool sits horizontally for level winding.
Feed backing from the bottom of its spool to reduce twists.
Maintain steady tension while wrapping to keep backing snug.
Spread the backing evenly, covering the entire spool surface.
Wearing proper protective gloves can ensure safety when handling your gear and prevent injuries.
Following these steps will keep your setup smooth and ready for action.
Handling gel-spun backing demands extra attention to knot tying because its slick, slippery texture can cause connections to loosen under pressure.
To secure it effectively, use knots known for strong grip on slick lines, like the Albright Knot or a well-dressed Triple Surgeon’s Knot.
When tying, keep the loops large enough to avoid strain but tight enough to prevent slippage.
Dress each knot meticulously—moisten the line and snug it firmly while assuring no twists remain.
Avoid excessive tag ends; a short, neat tag helps monitor the connection without adding bulk.
Before finalizing, gently test the knot’s security by pulling firmly.
Taking these steps guarantees a reliable, durable link between your gel-spun backing and the welded loop of your fly line.
Additionally, understanding the effects of oxidation on material connections can help improve knot longevity and reliability.
Although your backing connection might seem secure after tying, regular inspection is essential to catch any wear or loosening before it causes failure.
Regularly check your backing connection to prevent wear or loosening from causing unexpected failure.
Check your loop-to-loop junction thoroughly, especially after each fishing trip or when storing your gear.
Look for any signs of abrasion, fraying, or slippage in the backing loop or welded fly line loop.
Maintain the connection by keeping it clean and dry, and retighten the loops if needed to guarantee a snug fit.
Focus on these key steps:
Routine care keeps your setup reliable on every cast.
You’ll want to use standard monofilament backing for welded loop connections because it’s easier to tie secure loops that hold well.
Gel-spun backing can be slippery, so if you choose it, make sure you tie a tighter, well-dressed knot to avoid slippage.
You’ll want to leave a backing loop tag end about 1 to 2 inches long for good visibility. This length gives you a clear visual reference at the junction without getting in the way during casting or spooling.
It helps you quickly check the connection’s integrity and guarantees you don’t accidentally mistake the loop for a knot failure. Keep it neat and trim, but visible enough to spot easily on the water.
Yes, you can reuse welded loops after multiple fishing trips, but you should inspect them carefully each time.
Look for any signs of wear, fraying, or damage around the loop.
If the loop remains intact and strong, it’s fine to reuse.
However, if you notice any weakening, it’s safer to replace the fly line or the loop to avoid failure during a fight with a fish.
Always prioritize safety.
If your loop-to-loop connection starts auditioning for a horror flick—fraying lines, slipping loops, or unexpected unraveling, you’re witnessing failure’s debut.
You’ll notice looseness when tightening or uneven tension that feels like your fly line’s plotting an escape.
Don’t ignore these signs; they scream for attention.
Check for worn backing loops, damaged welded loops, or twisting that can weaken the knot.
Fixing this early saves your gear and sanity on the water.
Water temperature affects the flexibility and strength of your backing and fly line knots.
In cold water, lines become stiffer and less pliable, making knots harder to tighten properly.
You’ll want to dress them carefully to avoid slippage.
Warm water softens the lines, allowing knots to cinch more securely but increasing the chance of over-tightening.
Always inspect knots after exposure to temperature changes to verify they hold strong during fishing.
Tying your backing to a welded loop correctly boosts your fly fishing efficiency. Did you know that nearly 70% of anglers lose fish due to poor knot connections?
Using a triple surgeon’s knot and orienting loops properly cuts line twist and strengthens your setup. Always inspect your knots before casting, and consider alternative knots if your line type demands it.
Mastering these steps guarantees a reliable, smooth fishing experience every time you hit the water.