Phone:
(701)814-6992
Physical address:
6296 Donnelly Plaza
Ratkeville, Bahamas.
Phone:
(701)814-6992
Physical address:
6296 Donnelly Plaza
Ratkeville, Bahamas.
A lift TIG welder lets you start an arc by touching the tungsten electrode to the workpiece, then lifting it off to ignite a clean, stable arc without contaminating the weld.
This method completes the circuit to trigger gas flow and arc initiation, ideal for thin metals or when high-frequency start isn’t available.
You maintain continuous shielding gas to protect the weld zone. Understanding its setup and operation will enhance your precise welding control and results.
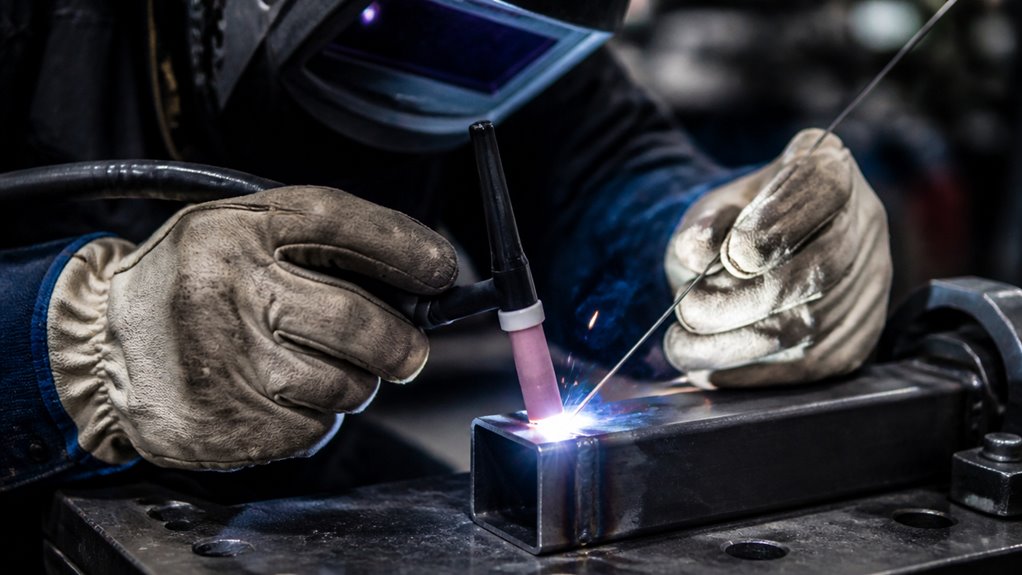
Lift TIG welding is a precise arc initiation method where you start the arc by physically touching the tungsten electrode to the workpiece and then lifting it slightly to strike the arc.
Lift TIG welding starts by touching the tungsten electrode to the workpiece, then lifting to ignite the arc cleanly.
This action completes the electrical circuit, allowing the torch trigger or machine control to activate the arc start sequence. As you lift the tungsten, the arc ignites cleanly without dragging across the surface, reducing contamination risks.
Shielding gas, typically argon, flows continuously to protect the weld zone from oxidation.
You’ll find this method common on inverter and multi-process welders, especially when high-frequency start isn’t available or practical.
Lift TIG produces stable, controlled arcs with low heat input, making it ideal for precise welds on thin materials while avoiding electromagnetic interference with sensitive electronics nearby.
Proper tungsten electrode preparation is essential for optimal arc stability and weld quality when using Lift TIG welding.
The controlled arc initiation method described earlier suits specific welding scenarios where precision and minimal tungsten contamination are priorities.
You should use lift TIG welding when working on thin materials that demand low heat input to prevent warping or burn-through.
It’s also ideal when high-frequency start is unavailable or undesirable, such as near sensitive electronic equipment where interference could cause malfunctions.
Lift TIG welding gives you better control over arc initiation compared to scratch start, reducing tungsten degradation and improving weld quality.
Additionally, it’s effective for portable or multiprocess welders lacking high-frequency capability.
You’ll find it valuable in precision fabrication tasks where a clean, stable arc start is essential to maintain weld integrity and appearance without contaminating the weld pool or electrode.
This method benefits from the use of a non-consumable tungsten electrode, which maintains arc stability and weld quality during initiation.
Setting up your TIG welder for lift arc operation requires a machine equipped with lift-start functionality and a properly configured torch trigger system.
Make certain your TIG unit supports lift arc initiation, as conventional scratch-start models won’t work.
Ensure your TIG welder features lift arc start; traditional scratch-start units are incompatible.
Install a sharp tungsten electrode, connected to the negative terminal for DC welding. Ensure its tip is clean to prevent contamination.
Attach the TIG torch with a trigger mechanism capable of controlling gas flow and arc initiation precisely.
Connect a high-purity argon cylinder with a flow regulator, set to deliver consistent shielding gas before and during welding.
Prepare filler rods if the joint requires additional metal.
Confirm all electrical connections and gas lines are secure.
Then adjust amperage and travel speed settings according to material thickness for peak welding conditions.
Before beginning, inspect all components for damage or contamination to ensure flawless welds.
Once your equipment is configured with a sharp tungsten electrode and stable argon flow, you can initiate the lift TIG arc by touching the electrode tip lightly to the workpiece.
Press the torch trigger or activate the welder control to start the gas flow and circuit.
Then, lift the tungsten electrode steadily away from the metal surface; this action breaks the contact and creates the arc.
Maintain a consistent lift distance, typically a few millimeters, to assure stable arc initiation without contamination.
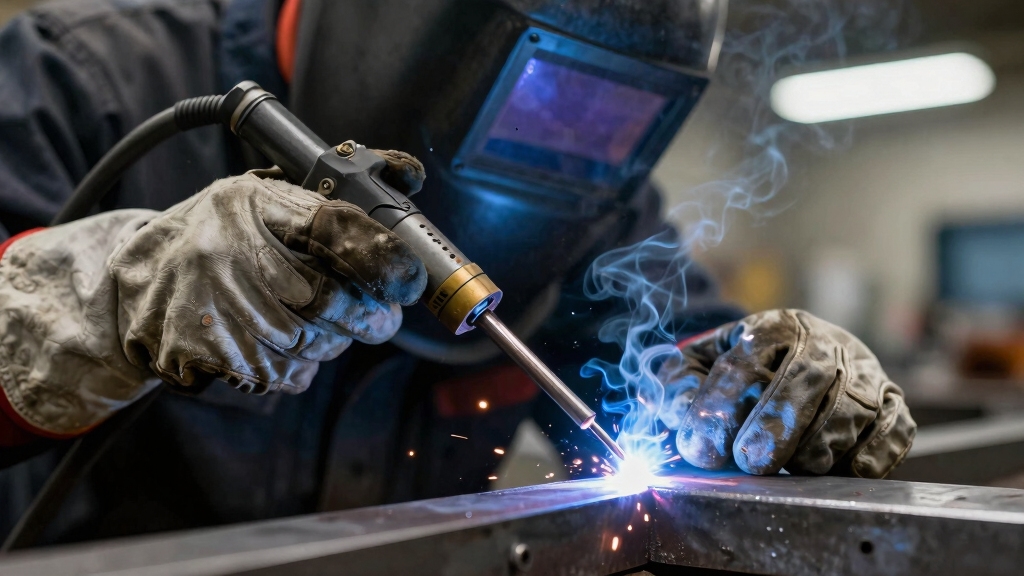
Keep the shielding gas flowing continuously to protect the weld area from oxidation.
Once the arc stabilizes and the weld pool forms, you can add filler rod if required.
Control your torch angle, travel speed, and amperage carefully to achieve a precise, clean weld bead.
Precise arc intensity control, often managed with a foot pedal, allows for better shaping of the weld pool and improved weld quality.
Frequently, mastering lift TIG welding on thin materials demands meticulous control of heat input and arc stability to prevent warping or burn-through.
You need to balance amperage, travel speed, and torch angle precisely.
Here are key tips to help you:
Additionally, proper tungsten electrode grinding is essential for maintaining arc stability and producing high-quality welds on thin materials.
Yes, you can use lift TIG welding on stainless steel effectively. It provides precise arc control and reduces tungsten contamination, which is vital for stainless steel’s corrosion resistance.
By initiating the arc cleanly without high-frequency interference, you’ll avoid damaging sensitive electronics nearby. Just make sure your shielding gas flow is consistent and your amperage is set correctly to manage heat input.
This will help prevent warping or discoloration of the stainless steel during welding.
Lift TIG welding costs less upfront than high-frequency TIG, acting like a budget-friendly gatekeeper for precise welds.
You don’t need the expensive high-frequency start circuitry, so machines are simpler and cheaper.
However, you might spend more time mastering torch control to avoid tungsten contamination.
If you work around sensitive electronics, lift TIG saves you from costly interference shielding.
This makes it a smart, economical choice in many practical welding setups.
Lift TIG welding isn’t typically suitable for underwater applications because it relies on shielding gas flow, which underwater environments disrupt.
You’d struggle to maintain a stable gas shield, leading to contamination and poor weld quality.
Underwater welding generally uses specialized techniques like wet or dry hyperbaric welding with different equipment.
If you try lift TIG underwater, the arc stability and gas coverage will be compromised, making it impractical for reliable underwater welds.
You must avoid contaminating the tungsten by carefully lifting the electrode without dragging it.
Make sure the torch trigger is fully controlled to prevent accidental arc starts. Since lift TIG uses contact to start the arc, always wear insulated gloves and maintain dry conditions to prevent electric shock.
Keep shielding gas flowing before and during arc initiation to avoid tungsten oxidation.
Also, carefully manage torch angle to maintain arc stability and avoid tungsten inclusion in the weld.
Think of welding aluminum without AC mode like trying to tune a piano with only half the keys. It’s just not right.
You can’t effectively use lift TIG welding without AC mode for aluminum because AC provides the cleaning action essential to remove aluminum oxide.
Without AC, your welds will suffer from poor fusion and contamination.
Now that you understand lift TIG welding, you can apply it precisely in delicate projects.
For example, a technician repairing aerospace components used lift TIG to avoid burn-through on thin aluminum panels. This ensured structural integrity without excess heat.
By mastering equipment setup and controlled arc initiation, you’ll achieve clean, high-quality welds on thin metals.
Keep practicing these techniques, and you’ll enhance both your precision and efficiency in critical welding tasks.