Phone:
(701)814-6992
Physical address:
6296 Donnelly Plaza
Ratkeville, Bahamas.

Phone:
(701)814-6992
Physical address:
6296 Donnelly Plaza
Ratkeville, Bahamas.

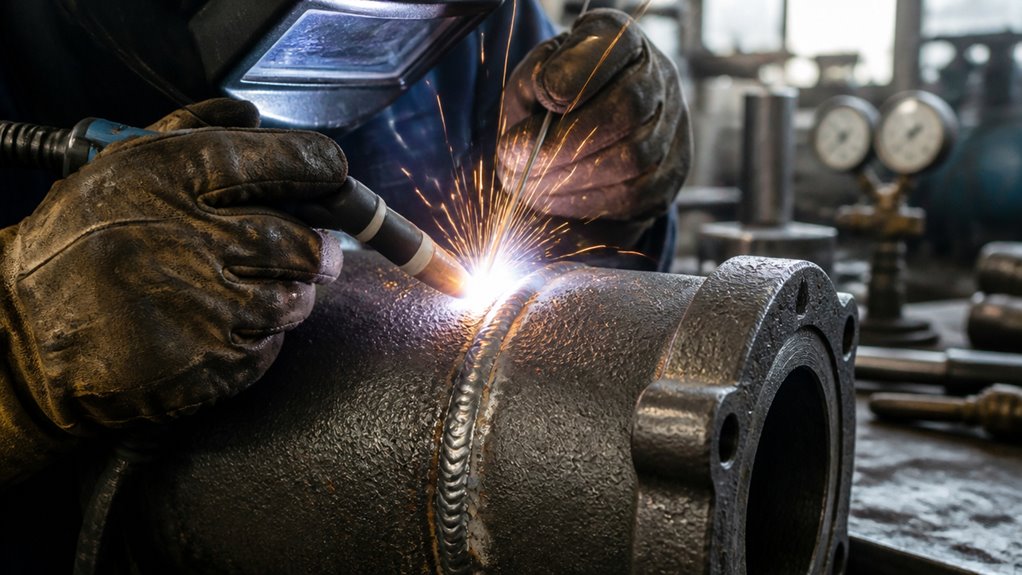
You can weld ductile iron, but you must control preheating, cooling, and filler selection precisely to avoid brittleness and cracking.
Avoid welding highly stressed parts or areas exceeding 20% thickness, as these increase failure risk.
Proper surface cleaning and groove preparation ensure strong joints, while nickel-based filler materials help match mechanical properties.
Slow cooling and post-weld heat treatment minimize residual stresses.
Understanding these steps is essential to maintain ductile iron’s integrity and performance under load.
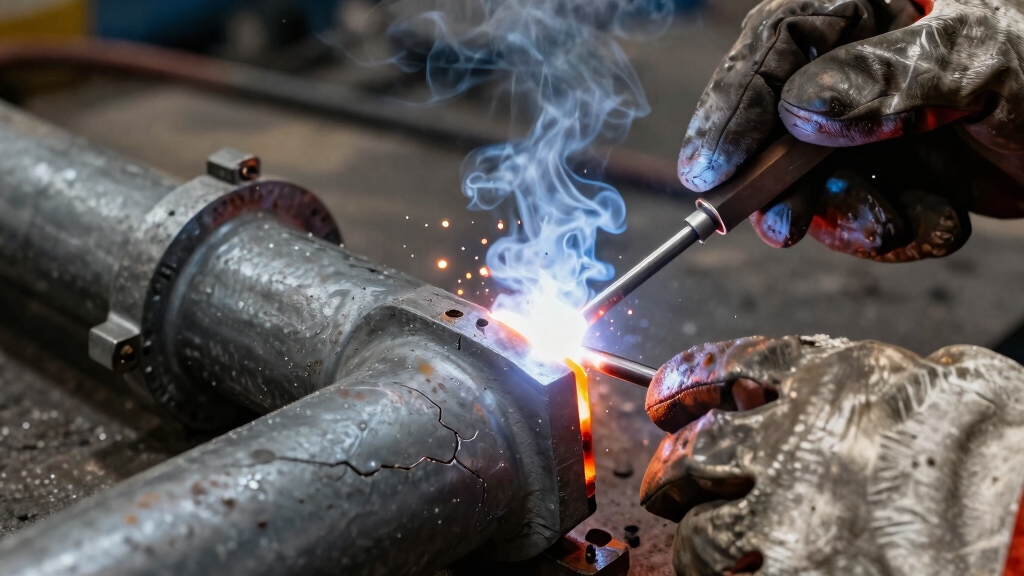
Although ductile iron is weldable, you’ll face significant challenges due to its high carbon content. This promotes the formation of hard, brittle phases that increase susceptibility to cracking during welding and cooling.
Ductile iron’s high carbon content forms brittle phases, raising the risk of cracks during welding and cooling.
You must carefully control heat input and preheat temperatures to minimize thermal gradients that cause stress concentration. The metal’s inherent brittleness demands precise filler material selection; nickel-based fillers are essential to match mechanical properties and reduce crack risk.
Additionally, you’ll need to prepare surfaces meticulously, removing casting skin and contaminants to guarantee proper fusion. The material’s increased sensitivity to welding stresses means improper technique or insufficient preheat can result in fractures.
Consequently, understanding these metallurgical and procedural constraints is critical to achieving durable, crack-free welds in ductile iron. Preheating between 250–450°F and using nickel alloy fillers helps accommodate thermal expansion differences and reduces cracking risks.
When it comes to welding ductile iron parts, there are some key situations you really want to steer clear of.
For starters, if the parts are under high stress, welding is a no-go. Why? Because the process can introduce cracks from thermal and mechanical strain, and that’s the last thing you want.
Also, keep an eye on the size of the weld area. If it exceeds 20% of the total thickness, it’s best to avoid welding altogether. Bigger welds can lead to increased brittleness and a higher chance of failure—definitely not what you’re aiming for.
And here’s another important point: if you can’t control the cooling rates during the welding process, it’s better to pass. Rapid cooling can lead to hard, brittle phases in the iron, which can cause cracking.
Proper preheating between 400°F and 1200°F is essential to reduce thermal stresses and prevent white cast iron formation during welding.
Avoid welding ductile iron on highly stressed parts, as the material’s inherent brittleness and susceptibility to cracking markedly increase failure risk under load. The high carbon content induces hard, brittle phases that promote crack initiation during welding and cooling.
When you weld these critical components, residual stresses and microstructural changes compromise structural integrity, making failure almost inevitable.
Consider these factors before attempting a weld on stressed parts:
In applications where structural reliability is non-negotiable, alternative repair methods or part replacement prove safer and more effective than welding ductile iron under high stress conditions. Proper preheat temperature management and controlled cooling are essential to minimize thermal stresses and reduce cracking risks in ductile iron welding.
Welding ductile iron over excessive areas compromises the integrity of the entire component, markedly increasing the risk of cracking and joint failure.
When the weld area exceeds 20% of the total metal thickness, you greatly amplify residual stresses and microstructural changes. This promotes brittle phase formation and weakens the heat-affected zone.
This heightened susceptibility to cracking negates the weld’s purpose, undermining durability and load-bearing capacity. You must limit weld size to maintain metallurgical stability and mechanical performance.
Excessive welds also challenge preheating and post-weld heat treatment uniformity, vital for stress relief.
Consequently, avoid welding large sections of ductile iron parts. Instead, consider alternative repair methods or part replacement when damage spans extensive areas to guarantee component reliability and safety.
Proper thermal control, including preheating and maintaining post-weld heat treatment below 400°F, is critical to minimizing residual stresses and preventing brittleness in welded areas.
Although ductile iron can be welded successfully under controlled conditions, subjecting it to rapid cooling immediately after welding markedly increases the risk of cracking and structural failure.
You must avoid rapid cooling because it promotes the formation of brittle microstructures that compromise weld integrity.
To prevent this, follow these critical guidelines:
Ignoring these precautions increases residual stresses and microcracking, undermining the ductility and toughness of the weld joint.
Consequently, rapid cooling conditions represent a scenario when you shouldn’t weld ductile iron parts. Additionally, controlled cooling methods such as burying the weld in dry sand help minimize thermal shock and prevent cracking during the cooling phase.
Sure! Here’s a more conversational version of the text:
—
When you’re getting ready to weld ductile iron, the first step is to make sure the surface is super clean. You want to get rid of any rust, oil, or other contaminants—this is really important for ensuring a solid weld fusion.
Don’t forget to strip away that casting skin! It can create an oxide layer that resists melting, which makes it tough for the weld to bond properly.
And, to wrap things up, make sure you prepare a nice “V” or “U” groove. This will help with consistent penetration and ensure you have strong joints during the welding process.
Additionally, controlling the heat input during welding is crucial to prevent cracking and ensure the integrity of the joint.
—
Before initiating the welding process, you must make certain the ductile iron surface is impeccably clean, free from rust, oil, and any contaminants. Any residue compromises weld quality and increases cracking risk.
Use a stainless steel wire brush to meticulously clean the area before preheating. Continue brushing once the temperature reaches 150–250°F to remove oxidation formed during heating.
Focus on these critical cleaning steps:
Strict adherence to cleaning protocols directly impacts weld integrity and reduces the likelihood of defects during the procedure. Additionally, using local exhaust ventilation during cleaning and welding helps minimize exposure to harmful fumes and ensures a safer work environment.
Maintaining a clean surface during preheating sets the stage for effective removal of the casting skin, a stubborn oxide layer that forms during the iron’s solidification.
This layer resists melting and hinders proper fusion with the weld metal, so you must remove it diligently.
Use a stainless steel wire brush to clean the surface before and repeatedly during preheating, targeting temperatures between 150°F and 250°F to optimize cleaning efficiency.
Removing the casting skin guarantees the weld deposit bonds properly without contamination or inclusions.
Neglecting this step increases the risk of defects and weak welds.
It is essential to avoid delays between cleaning and welding to prevent rapid re-oxidation that can compromise weld quality.
Create a precise groove geometry to guarantee ideal weld penetration and fusion when joining ductile iron components. Proper groove preparation secures the weld pool adequately penetrates and bonds with the base metal, reducing defects and cracking risks.
Typically, you’ll form a “V” or “U” shaped groove, depending on thickness and welding position. Follow these key steps:
Accurate groove preparation is critical for sound, crack-resistant welds in ductile iron. Ensuring proper groove geometry facilitates complete root penetration and optimal weld strength.
Controlling the preheating temperature plays a critical role in preventing cracking when welding ductile iron.
Proper preheating temperature control is essential to prevent cracking in ductile iron welding.
You need to preheat the material to between 300°F and 500°F, or up to 550–650°F for more demanding applications, to reduce thermal gradients and slow cooling rates.
Raise the temperature gradually, about 100°F per hour, and hold it for one hour per inch of thickness to guarantee uniform heat penetration.
Maintaining a constant temperature within this range throughout welding minimizes residual stresses that cause cracking.
During preheating, clean the surface repeatedly with a stainless steel wire brush to remove oxides.
Avoid rapid temperature changes, as they increase brittleness.
Proper preheating between these temperatures is essential to reduce thermal shock and improve weld quality.
Because ductile iron‘s high carbon content complicates fusion, selecting the correct filler material is essential to achieving both mechanical compatibility and weld integrity. You need a filler that minimizes cracking risk while matching the base metal’s properties.
Nickel-based fillers are your best choice, as they reduce brittleness and produce welds equivalent to ductile iron. When selecting filler materials, consider these critical factors:
Choosing the right filler is fundamental to durable, crack-resistant ductile iron welds.
Mastering welding techniques for ductile iron requires strict adherence to process parameters and careful handling to prevent cracking.
Successful ductile iron welding demands precise control of parameters and meticulous technique to avoid cracks.
Use shielded metal arc welding (SMAW) with nickel-based filler rods to guarantee weld compatibility and mechanical strength equivalent to the base metal.
Prepare the joint by creating a defined “V” or “U” groove and maintain a clean surface free of oxides and contaminants throughout welding.
Apply stringer beads with consistent travel speed and angle, avoiding weaving to minimize residual stress.
Strike the arc on the weld deposit to promote stable arc conditions.
Control welding current by reducing it 10 to 20 amps below manufacturer recommendations for smoother operation.
Remove slag between passes by chipping and wire brushing.
Peen the weld while cooling to introduce compressive stress and reduce cracking risk.
Once you’ve completed welding with careful control of parameters and proper bead techniques, your focus shifts to managing the thermal stresses induced by the process.
Post-weld heat treatment is essential to relieve residual stresses and enhance joint durability. You must cool the component slowly to prevent brittle microstructures and cracking.
To guarantee effective post-weld treatment:
These methods minimize cracking risks and improve weld integrity.
Although welding ductile iron demands meticulous technique, rigorous quality control checks are equally critical to guarantee weld integrity and longevity.
You must inspect welds visually for cracks, undercuts, slag inclusion, and gas bubbles. Remove slag between passes by chipping and wire brushing.
Peening the weld while cooling introduces compressive stress, reducing cracking risk. Additionally, keep welding current 10-20 amps below recommended values to prevent defects.
| Check Type | Method | Purpose |
|---|---|---|
| Visual Inspection | Crack, undercut detection | Identify surface defects |
| Slag Removal | Chipping, wire brushing | Assure clean weld layering |
| Peening | Ball peen hammer | Induce compressive stress |
| Current Adjustment | Lower amperage | Minimize overheating |
| Weld Size Limitation | Max 20% metal thickness | Prevent excessive heat input |
Perform these checks consistently to ensure durable, crack-free ductile iron welds.
Ensuring weld quality through inspection and proper technique doesn’t eliminate the inherent risks and limitations involved in welding ductile iron.
Weld quality checks alone cannot remove the inherent risks of welding ductile iron.
You must recognize that ductile iron’s high carbon content increases brittle phase formation, making it prone to cracking under thermal stresses. Additionally, welding on highly stressed parts is ill-advised due to crack susceptibility.
Be mindful of these critical limitations:
You must strictly control preheat, maintain slow cooling, and avoid welding stressed regions to mitigate these risks.
Failure to observe these constraints can cause weld defects, structural weaknesses, and catastrophic failures.
You should use shielded metal arc welding (SMAW) primarily for ductile iron, as it offers precise control and compatibility.
MIG welding with nickel-based filler wires also works well, providing consistent, high-quality welds.
Flux-cored arc welding with nickel-based consumables suits certain applications too.
Always select filler materials designed specifically for ductile iron to guarantee mechanical property compatibility and reduce cracking risks during welding and cooling.
Welding ductile iron can reduce long-term durability if not done correctly, as its high carbon content increases cracking risk by up to 30% during cooling.
You need precise preheating between 300°F and 550°F and use nickel-based fillers to maintain strength equivalent to the base metal.
Post-weld heat treatment and slow cooling are essential to relieve stresses, prevent brittleness, and guarantee the joint’s longevity under service conditions.
Welding ductile iron underwater or in extreme conditions is highly challenging and generally not recommended.
You’ll face increased risks of cracking due to rapid cooling and contamination.
Maintaining precise preheat and post-weld heat treatment becomes nearly impossible, compromising weld integrity.
If you must weld in such environments, guarantee rigorous surface cleaning, controlled heating, and slow cooling.
Even then, expect limited success and higher failure risk compared to controlled conditions.
You might think standard welding gear suffices, but welding ductile iron demands extra caution.
You’ll need a high-quality welding helmet with auto-darkening to protect against intense UV rays.
Wear flame-resistant gloves and a jacket to guard against sparks and hot metal.
Respiratory protection is critical since fumes from nickel-based fillers can be hazardous.
Don’t forget safety boots and eye protection underneath the helmet.
Always guarantee proper ventilation and keep a fire extinguisher nearby.
When welding thin ductile iron, you’ll use lower preheat temperatures (around 300–400°F) and reduce welding current to avoid burn-through and distortion.
For thick sections, increase preheat to 550–650°F and maintain it throughout welding to minimize cracking risk.
You’ll also extend heating and cooling times, applying post-weld heat treatment gradually.
Adjust your travel speed and filler deposition accordingly to guarantee consistent fusion without overheating or inducing stress.
You might think welding ductile iron is a straightforward fix, but it’s anything but simple.
Despite its strength, ductile iron demands meticulous preparation, precise filler choices, and controlled heat treatments to avoid cracking.
This is a true test of your welding skill. So, if you’re after an easy weld, ductile iron isn’t your friend.
Ironically, its toughness that makes it so valuable also turns welding it into a technical challenge you can’t afford to underestimate.