Phone:
(701)814-6992
Physical address:
6296 Donnelly Plaza
Ratkeville, Bahamas.
Phone:
(701)814-6992
Physical address:
6296 Donnelly Plaza
Ratkeville, Bahamas.
You can fix small, non-structural cracks by thoroughly cleaning and drying the rim.
Then scuff the cracked area with 80-grit sandpaper to guarantee adhesion.
Mix a two-part epoxy or metal-filled putty and press it firmly into the crack, shaping it flush with the surface.
Let it cure for at least 24 hours at room temperature before reinflating the tire slowly.
This method is temporary, so if your crack is in a load-bearing area or worsens, professional repair may be necessary.
More details can guide you through each step effectively.
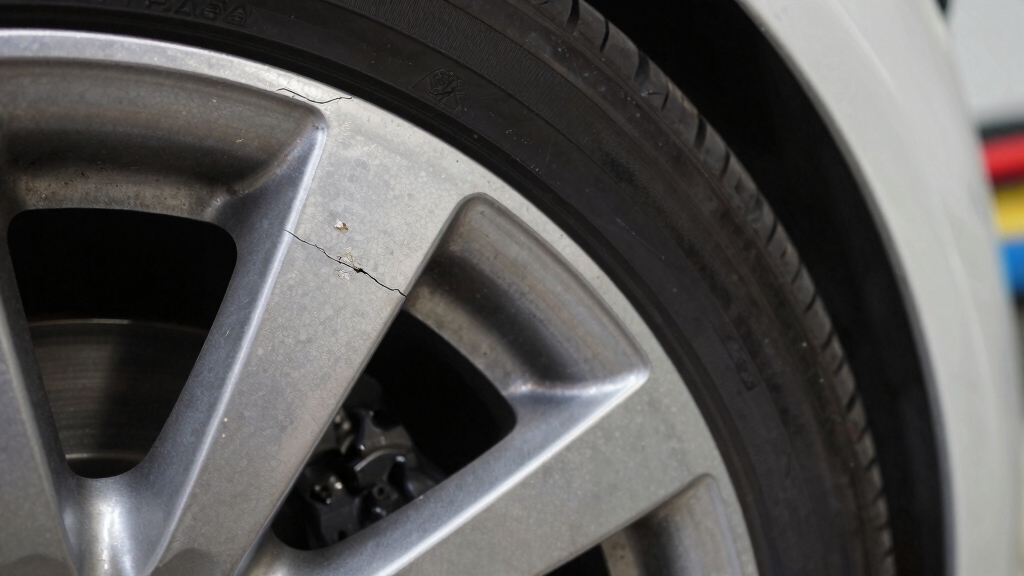
When you spot a crack on your rim, the first step is to assess its severity carefully, since not all cracks pose the same risk.
Begin by inspecting the crack’s length, width, and location.
Start by carefully examining the crack’s size and exact position on the rim.
Cracks near the bead seat or spoke holes usually indicate structural compromise and higher risk.
Use a bright light and magnification to check for hairline fractures extending beyond the visible crack.
Tap the rim gently with a metal object.
Listen for dull sounds that suggest internal damage.
Avoid driving on rims with cracks exceeding a few millimeters or those that cause air leaks.
Document all findings and consider professional evaluation for cracks in load-bearing areas.
This precise assessment helps determine whether a non-welding repair is feasible or if the rim requires full structural restoration.
Remember that the location and direction of the crack play a crucial role in deciding if welding or replacement is necessary.
You can actually fix a cracked rim without welding, but it mostly works for small, non-structural cracks or minor leaks. So, if the damage is pretty minimal, you might be in luck!
What you’ll want to do is focus on sealing up any air loss. This can be done using metal-filled epoxy or putty, but make sure you properly clean and prepare the surface first. It’s a crucial step that can make a big difference.
Just a heads-up, though—this method mainly addresses leaks. It won’t really restore the rim’s full structural integrity, so keep that in mind as you decide on your repair options.
For best results, ensure you follow the surface preparation steps carefully before applying any epoxy or putty.
Small cracks located on the outer edge or non-structural areas of a rim are the primary candidates for repair without welding. You can address these minor damages using epoxy or metal-filled putty. Structural cracks demand professional welding. Suitable crack types include:
Avoid attempting non-weld repairs on cracks that affect the wheel’s load-bearing sections or those that visibly deform the rim. Always inspect carefully. If the crack threatens structural integrity, welding or professional replacement is necessary for safety. Proper surface preparation and curing with epoxy putty are essential for a durable repair.
Addressing minor cracks on non-structural areas opens the possibility of sealing leaks without welding.
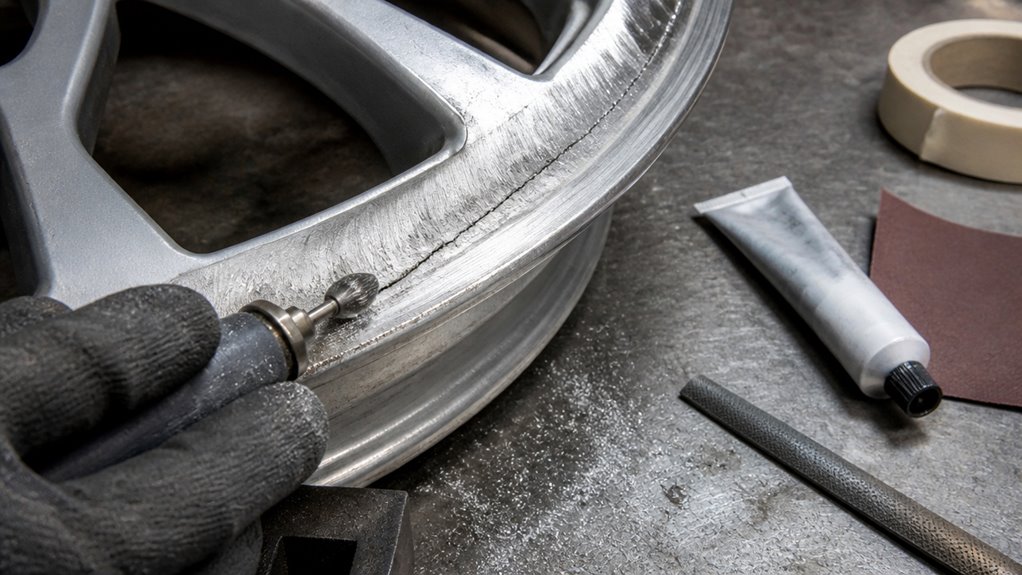
First, thoroughly clean the rim using brake cleaner to remove grease and residue.
Next, scuff the cracked area with 80-grit sandpaper to promote adhesion.
Then, mix a two-part epoxy putty like JB Weld or Quick Steel and apply it directly into the crack, ensuring full penetration.
Shape the compound flush with the rim surface and allow it to cure for at least 24 hours at room temperature.
After curing, remove any excess material to maintain wheel balance.
Remember, this method only stops air leaks temporarily and doesn’t restore structural integrity.
Always monitor the repair closely and consider professional evaluation for safety before continued use.
For best results, ensure you mix the epoxy putty with equal parts resin and hardener to achieve a strong, durable bond.
When serious damage compromises a rim’s structural integrity, welding provides a reliable method to restore strength and durability. Unlike surface-level fixes, welding fuses the cracked metal, reestablishing the rim’s original load-bearing capacity.
You’ll want welding when a crack affects safety, not just leaks.
Here’s why welding works best for serious rim damage:
For critical rim damage, welding is the only repair method that guarantees structural integrity and long-term reliability.
Gathering the right tools and materials is essential for a non-welding cracked rim repair to be effective as a temporary seal.
You’ll need brake cleaner or degreaser to remove grease and brake dust thoroughly. Use 80-grit sandpaper or a metal file to scuff the crack area, ensuring better adhesion for the repair compound.
For filling, select a two-part epoxy putty like JB Weld or Quick Steel, which offers metal-filled strength and cures hard. Prepare a mixing surface and applicator tools such as a putty knife or disposable spatula.
Keep gloves handy to protect your skin from chemicals. After curing, you might need a rasp or fine sandpaper to remove excess material, preventing wheel imbalance.
Accurate preparation of these materials sets the foundation for a reliable, though temporary, rim repair. Proper surface preparation and curing time are critical to achieving maximum strength and durability in the repair.
Before applying any repair compound, you’ll need to thoroughly clean and prepare the cracked rim to guarantee peak adhesion and effectiveness.
Proper preparation makes certain the repair material bonds well and seals the crack efficiently.
Follow these steps:
This precise preparation is critical before moving on to applying epoxy or metal putty. For optimal results, consider using surface profiling techniques like abrasive blasting or sanding to enhance adhesion further.
Since you’ve thoroughly cleaned and prepped the cracked rim, you can now apply the epoxy or metal putty to seal the damaged area.
Mix the two-part epoxy or metal repair compound precisely according to the manufacturer’s instructions.
Carefully mix the two-part epoxy or metal repair compound exactly as the manufacturer directs for best results.
Use a putty knife or applicator to press the mixture firmly into the crack, ensuring it fills the entire gap without air pockets.
Shape the compound flush with the rim surface to minimize excess buildup that could affect wheel balance.
Focus on complete coverage, extending slightly beyond the crack edges for better adhesion.
Avoid contamination by working in a dust-free environment and wearing gloves to prevent oils from your skin weakening the bond.
Once applied, leave the repair undisturbed to set fully before proceeding to curing or further steps.
For best results, ensure the epoxy is allowed to fully cure according to the product’s recommended time to achieve maximum strength and durability.
Sure! Here’s a more conversational version of your text:
You’ll want to give that epoxy or metal putty plenty of time to cure—about 24 hours is usually best. It’s important to check that the material feels hard and is firmly bonded to the crack. This way, you can be sure it’ll hold up under pressure.
Now, don’t rush into reinflating the tire just yet! It’s really crucial to wait until the repair has fully cured. Doing this will help you avoid any issues with the seal or risking further damage. Patience is key!
For best results, make sure the surface was thoroughly cleaned and dried before applying the epoxy, as proper surface preparation significantly improves adhesion and durability.
When sealing a cracked rim with epoxy or metal putty, allowing the repair material to fully cure is essential for effectiveness and safety. Curing guarantees the compound hardens properly, restoring a basic seal and minimizing air leaks.
Follow these guidelines for recommended cure time and reinflation:
Adhering to these steps helps maximize the temporary repair’s effectiveness and safety. For best results, apply the epoxy in thin layers to accelerate curing and ensure a strong bond.
Confirming the epoxy’s hardness is critical before reinflating the tire to guarantee a reliable seal and prevent further damage.
After the recommended cure time, usually around 24 hours, check the epoxy by pressing gently with a fingernail or a small tool. It should feel solid, without any tackiness or flexibility.
If it still gives under slight pressure, allow additional curing time in a dust-free, dry environment at room temperature. Avoid rushing this step; premature inflation can break the seal and let air escape, compromising your repair.
Once the epoxy is fully hardened, you can proceed cautiously with reinflation. Keep in mind, this epoxy fix is temporary, so monitor the repair for any signs of failure. Consult a professional if you notice persistent leaks or structural concerns.
Typically, allowing the epoxy to cure for at least 24 hours guarantees sufficient hardness and adhesion before reinflating the tire. Rushing this process can compromise the seal and lead to air leaks or repair failure.
To time reinflation correctly, follow these steps:
Although sealing a cracked rim with epoxy or metal putty can stop air leaks, you’ll still need to check and correct the wheel balance to avoid vibrations and uneven tire wear.
After the repair material cures and any excess is trimmed, mount the wheel on a balancing machine. Spin the wheel to detect any imbalance caused by added weight or uneven material distribution.
Use wheel weights to counterbalance heavy spots precisely. Be sure to place weights opposite the repair area if it has added mass.
Recheck balance after applying weights to confirm correction. Proper balancing guarantees smooth rotation and extends tire life.
Skipping this step risks vibration issues that can mask underlying wheel integrity concerns and cause premature wear or driver discomfort.
If your wheel shows signs of a large or deep crack, or if the damage extends into the structural areas, you should seek professional repair or consider replacement immediately.
Attempting DIY fixes on severe damage risks safety and may worsen the issue. You should consult a specialist when:
Professional repair involves precise crack preparation, welding, machining, and balancing. These steps guarantee structural integrity and safety.
If these conditions arise, don’t rely on non-welding fixes. Prioritize expert assessment or rim replacement to avoid hazardous failure.
No, non-weld repairs typically can’t withstand high-speed driving conditions reliably.
You might stop air leaks temporarily, but these fixes don’t restore full structural integrity.
At high speeds, forces on the rim increase, making epoxy or metal-filled putty insufficient.
You risk further damage or failure.
Always consider these repairs as short-term solutions and have a professional inspect serious cracks before driving at speed to guarantee your safety.
Of course, you can just pick any epoxy and hope for the best, right?
In reality, JB Weld works well on steel rims, while Quick Steel or metal-filled epoxies suit aluminum better. They bond to different metals more effectively.
You’ll want to match the epoxy’s metal compatibility and curing properties to your rim material for a stronger seal.
Always clean and prep thoroughly to maximize adhesion and durability.
Temperature directly influences the curing time and strength of metal putty.
If it’s too cold, you’ll notice the putty cures slower and may not reach full hardness, compromising the repair’s durability.
Conversely, higher temperatures speed up curing but can reduce working time, making application tricky.
Aim for moderate room temperature, around 70°F (21°C), to guarantee ideal bonding and curing.
Always follow manufacturer guidelines for temperature ranges.
Yes, you can paint non-weld repairs to match your rim color.
After the epoxy or metal putty fully cures and you sand it smooth, apply a primer designed for metal surfaces.
Once dry, use a paint that matches your rim’s finish, typically automotive wheel paint.
Finish with a clear coat to protect the repair and blend it with the rest of the rim.
Proper preparation guarantees better adhesion and a cleaner look.
Don’t count your chickens before they hatch with a repaired rim on rough terrain. Using a rim fixed without welding in off-road conditions isn’t safe.
Non-weld repairs mainly stop leaks temporarily but don’t restore full structural strength. Off-road stress can worsen cracks, risking failure.
If you must use one, keep speeds low and inspect frequently. Ideally, get a professional weld repair or replacement to guarantee safety and durability on tough trails.
Fixing a cracked rim without welding is like patching a small leak in a dam. You can manage minor damage effectively with the right tools and careful preparation.
By cleaning the crack, applying epoxy or metal putty, and ensuring proper curing and wheel balance, you can restore functionality temporarily.
But remember, serious damage demands professional welding or replacement to maintain safety and performance. Always prioritize precision and caution in your repair process.