Phone:
(701)814-6992
Physical address:
6296 Donnelly Plaza
Ratkeville, Bahamas.
Phone:
(701)814-6992
Physical address:
6296 Donnelly Plaza
Ratkeville, Bahamas.
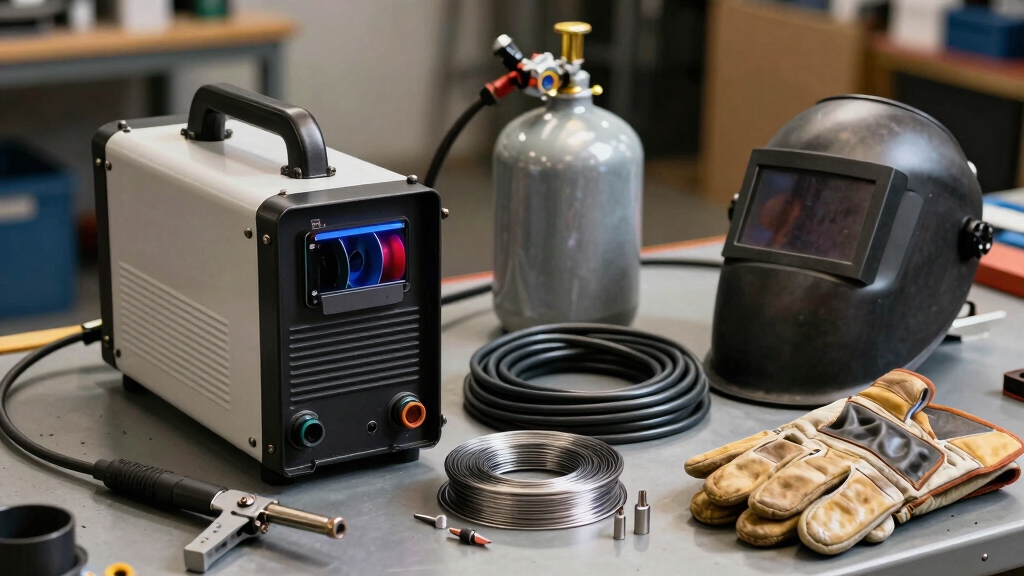
A basic semiautomatic welding system includes a welding power source set to constant voltage and DCEP polarity.
It also features a wire feed mechanism controlling consistent electrode delivery and a flux-cored wire electrode matched to your metal and welding position.
You’ll need a welding gun with consumables and a workpiece lead with a ground clamp for reliable circuit completion.
Shielding gas is necessary for gas-shielded wires. Proper setup and connections guarantee stable operation and quality welds. Explore how these components precisely interact for peak results.
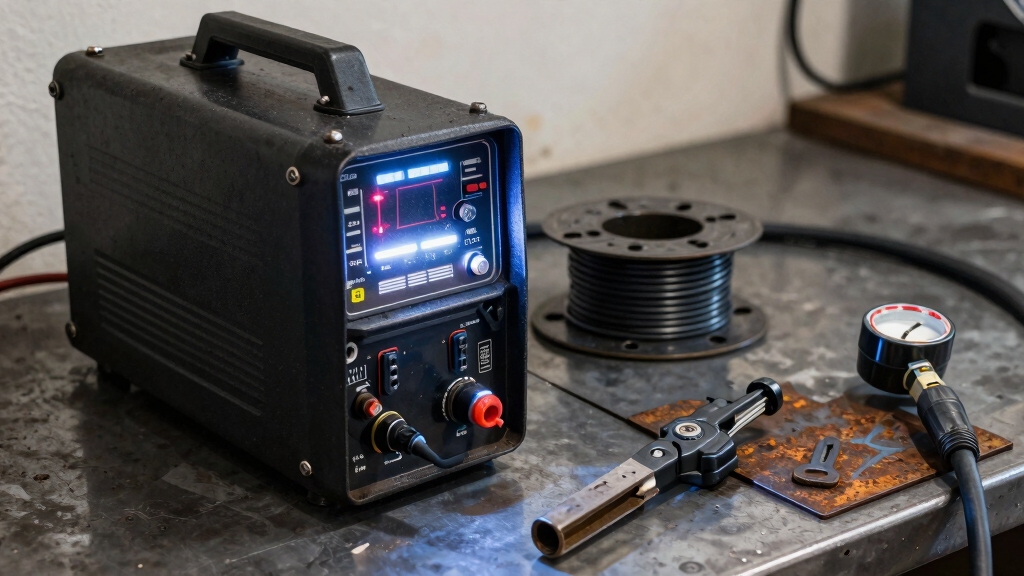
Although every component in a semiautomatic welding system plays a role, the welding power source stands as the core element that drives the entire operation.
The welding power source is the essential core that powers and controls the entire semiautomatic welding system.
It supplies the essential electrical energy needed to establish and sustain the arc between the electrode and the workpiece.
You must set the power source to constant voltage mode for stable arc conditions, which is critical in most semiautomatic applications.
Proper voltage and amperage settings depend on machine duty and power supply. Light-duty machines use 110 volts, while medium-duty require 220 volts.
Additionally, configuring the power source to direct current electrode positive (DCEP) polarity is crucial for flux-cored arc welding.
All other system components connect to the power source, making it the centralized hub that guarantees integrated, efficient operation.
Modern inverter power sources use high-frequency inverter technology to deliver precise arc control and improved weld quality.
When you operate a semiautomatic welding system, the wire feed mechanism controls the precise delivery of the flux-cored or solid wire electrode into the weld pool.
This maintains a consistent feed rate essential for stable arc conditions. It uses an electric motor to drive feed rollers that propel the wire from the spool to the welding torch at a constant speed.
This constant-speed feeding eliminates manual wire manipulation, ensuring uniform deposition and arc stability.
Proper connection of the power cable from the machine’s positive terminal to the feed unit is critical for synchronized operation.
Many modern systems feature a tool-less drive roll design that allows for quick and easy maintenance, minimizing downtime during welding tasks.
Selecting the right flux-cored wire electrode directly impacts the quality, strength, and efficiency of your welds. You need to consider the wire’s composition, diameter, and flux type to match your base metal and welding position.
Choose a wire with compatible alloying elements to guarantee proper mechanical properties and corrosion resistance. The diameter influences penetration and deposition rate; larger diameters increase deposition but require higher amperage.
Additionally, decide between self-shielded and gas-shielded flux-cored wires based on whether you use an external shielding gas system. Self-shielded wires simplify setup but limit weld quality on certain metals.
Lastly, verify that your wire electrode matches the polarity and voltage settings of your power source to maintain stable arc conditions and consistent wire feeding. This ensures peak welding performance.
Proper flux shielding helps prevent atmospheric contamination and improves weld integrity.
When you’re welding, the welding gun plays a crucial role. It feeds the wire electrode into the weld pool at just the right speed, which helps keep the arc conditions stable. This consistency is super important for a good weld.
But that’s not all! The welding gun also transfers the welding current through the contact tip straight to the filler metal. This is what allows you to start and maintain the arc effectively.
Additionally, ensuring the correct polarity setting on your welding machine is essential for optimizing heat distribution and achieving a strong, clean weld.
The welding gun plays a crucial role in semiautomatic welding by directing shielding gas and guiding the wire electrode precisely into the weld pool.
Integral to this process is the wire feeding mechanism, which automatically delivers flux-cored or solid wire at a controlled, constant speed via a motor-driven feed roller.
This precise feeding guarantees stable arc conditions and consistent weld quality by eliminating manual wire manipulation.
You’ll find the mechanism connected through a properly sized power cable from the machine’s positive terminal to the feeder unit, enabling smooth wire propulsion from the spool to the contact tip inside the gun.
Selecting the appropriate shielding gas is essential to enhance arc stability and minimize spatter during the welding process.
Alongside feeding wire steadily into the weld pool, the welding gun plays a key role in transferring electrical current from the power source to the electrode.
You rely on the gun’s contact tip to conduct current efficiently, energizing the filler metal as it passes through. This precise current transfer enables a stable arc essential for consistent weld quality.
The gun’s cable assembly integrates power delivery, gas flow, and control signals, ensuring synchronized operation. When you press the trigger, it simultaneously initiates wire feeding and current flow, streamlining the welding process.
Proper maintenance of the contact tip and cable assembly is essential to minimize resistance and prevent overheating. Ultimately, the welding gun functions as the critical interface that directs electrical energy to the weld zone, supporting effective and reliable arc welding.
Additionally, selecting the appropriate torch angle during operation directly influences gas shielding efficiency and weld bead quality.
You really can’t underestimate the importance of the workpiece lead and ground clamp when it comes to welding. They play a crucial role in completing the electrical circuit that’s essential for stable welding. If you’ve ever had issues with your welds, you might want to check those connections.
Making sure that the connection is secure and has low resistance is key. This helps prevent any interruptions and keeps the current flowing smoothly. Nobody wants their welds to be inconsistent because of a poor connection, right?
Also, don’t forget about the positioning of the clamp. Getting it right can make a big difference! It minimizes interference and really optimizes arc stability throughout your operation. So, take a minute to set things up properly—it’s worth it in the long run!
For optimal performance, ensure that all connections are inspected and maintained regularly to avoid damage or contamination that can affect welding quality.
Two critical roles define the workpiece lead and ground clamp in semiautomatic welding: completing the electrical circuit and ensuring operator safety.
You rely on the ground clamp to connect the negative terminal of your welding machine directly to the workpiece, establishing a continuous electrical path.
This connection allows current to flow seamlessly from the power source, through the electrode and arc, and back via the workpiece lead.
Proper clamping is essential; it guarantees consistent conductivity, prevents voltage drops, and maintains stable arc conditions.
If the clamp is loose or poorly positioned, you risk erratic current flow, which compromises weld quality and safety.
Ensuring proper connection and maintenance of the workpiece lead and ground clamp is critical for stable electrical output in mobile welding rigs.
Because secure grounding directly affects both weld quality and operator safety, you must guarantee the workpiece lead and ground clamp maintain a solid, uninterrupted connection to the base metal.
This connection completes the electrical circuit, allowing current to flow efficiently from the power source through the electrode and workpiece.
Any looseness or contamination at the clamp site increases resistance, causing arc instability, spatter, and inconsistent weld penetration.
Additionally, a poor ground raises the risk of electrical shock to the operator.
Properly securing the clamp on clean, bare metal assures stable current flow and maintains the integrity of the weld.
You should routinely inspect and reposition the ground clamp during welding sessions to prevent interruptions and maintain ideal circuit performance.
Unstable grounding or corroded contacts can cause current to stray, increasing the likelihood of arc strikes at unintended locations.
Maintaining a secure and stable connection with the workpiece lead and ground clamp depends heavily on their correct positioning. You need to clamp the ground firmly onto a clean, bare metal surface near the weld area to ensure minimal resistance and consistent current flow.
Positioning the clamp too far from the weld can cause voltage drops, unstable arc conditions, and inconsistent penetration. Avoid placing the clamp on painted, rusty, or oily surfaces, as these impede electrical continuity.
Additionally, make sure the workpiece lead doesn’t obstruct your welding operation or create safety hazards. Proper placement guarantees an uninterrupted circuit from the power source through the electrode and back, promoting stable arc characteristics and weld quality.
Attention to these details is critical in maintaining welding system efficiency and operator safety. Working in well-ventilated areas is also essential to minimize exposure to hazardous fumes generated during welding.
When should you opt to use shielding gas in flux-cored arc welding (FCAW)?
You choose shielding gas primarily in FCAW-G (gas-shielded FCAW) to protect the weld pool from atmospheric contamination. This prevents defects such as porosity and oxidation.
Shielding gas, commonly argon and carbon dioxide mixtures or pure CO₂, ensures a stable arc and high-quality welds. It also improves bead appearance and mechanical properties.
In contrast, FCAW-S (self-shielded) uses flux within the wire to generate gas. This eliminates external gas needs but often sacrifices weld cleanliness and penetration control.
Using shielding gas is essential when working on critical structural components or where weld integrity and aesthetics are paramount.
Proper gas flow rates and uniform distribution across the weld pool optimize shielding effectiveness. This is a critical consideration for precise, reliable FCAW operation.
In assembling a semiautomatic welding system, each component must integrate precisely to guarantee reliable and efficient operation.
You start by connecting the welding power source, which acts as the core, providing necessary electrical energy.
The wire feed mechanism links directly to the power source via a power cable, ensuring consistent wire delivery to the welding gun.
The welding gun itself interfaces with the wire feeder and delivers both power and shielding gas to the weld pool.
Meanwhile, the workpiece lead and ground clamp complete the electrical circuit by attaching securely to the base metal.
Finally, if required, the external shielding gas system connects through hoses to the torch to protect the weld area.
Key connection steps are:
To guarantee peak performance and longevity of your semiautomatic welding system, you need to carefully set up each component and follow a routine maintenance schedule.
Begin by connecting the power source to the correct voltage circuit: 110V for light-duty and 220V for medium-duty. Set polarity to DCEP for flux-cored arc welding.
Securely attach the ground clamp to the workpiece to complete the electrical circuit. Calibrate the wire feed mechanism for consistent speed, ensuring smooth wire delivery through the welding gun.
If using shielding gas, verify flow rates and inspect delivery lines for leaks. Regularly clean contact tips and nozzles to prevent buildup that disrupts arc stability.
Inspect cables for wear and test control triggers for responsiveness. Routine checks preserve system integrity, optimize arc quality, and reduce downtime caused by component failure.
You need essential safety gear like a welding helmet with a proper shade lens to protect your eyes from intense arc radiation and sparks.
Wear flame-resistant gloves and a long-sleeve jacket to shield your skin from heat and spatter.
Use safety boots to protect your feet and guarantee proper ventilation or respiratory protection against fumes.
Don’t forget ear protection if you’re in a noisy environment.
Staying fully protected reduces injury risks markedly.
Imagine you’re welding outdoors on a windy day; the shield gas gets blown away, causing porosity in the weld.
Environmental conditions like wind, humidity, and temperature directly affect welding quality by disrupting shielding gas coverage, altering arc stability, and causing uneven cooling rates.
You must control these factors to maintain consistent arc conditions and prevent defects such as oxidation, cracking, or weak welds.
This ensures strong, reliable joints every time.
You can use semiautomatic welding on many metal types, including steel, stainless steel, and some aluminum alloys. However, it’s not universally effective for all metals.
Metals like copper or magnesium may require specialized techniques or equipment. You’ll need to select the proper wire electrode, shielding gas, and machine settings tailored to each metal’s properties to guarantee peak weld quality and avoid defects like porosity or weak fusion.
To fix common wire feed issues, first check for wire tangling or spool jams and clear them.
Inspect the drive roller for wear or improper tension and adjust accordingly. Make certain the liner is clean and free of obstructions.
Verify the wire diameter matches the drive rolls and contact tip. Also, check the wire feed speed setting and power cable connections.
Regular maintenance of these components prevents feed interruptions and maintains stable arc conditions.
Think of flux-cored wire as a delicate thread that hates moisture.
To prevent damage, you must store it in a dry, temperature-controlled environment, ideally sealed in airtight containers or plastic bags with desiccants.
Avoid exposure to humidity and contaminants since they can cause rust and degrade wire quality.
Keep the spool off the floor and away from chemicals.
Proper storage maintains wire integrity, ensuring consistent feed and peak weld quality.
You might think setting up a basic semiautomatic welding system is complicated, but once you understand each component’s role, you’ll see how they work together seamlessly.
From the power source to the wire feed and shielding gas, proper selection and maintenance guarantee consistent, quality welds with minimal downtime.
Don’t let initial complexity deter you. Mastering these essentials boosts both your efficiency and weld precision, making your investment well worth the effort.