Phone:
(701)814-6992
Physical address:
6296 Donnelly Plaza
Ratkeville, Bahamas.
Phone:
(701)814-6992
Physical address:
6296 Donnelly Plaza
Ratkeville, Bahamas.
You analyze blueprints to identify weld types, sizes, and precise locations. Then, you prepare and align materials according to specs.
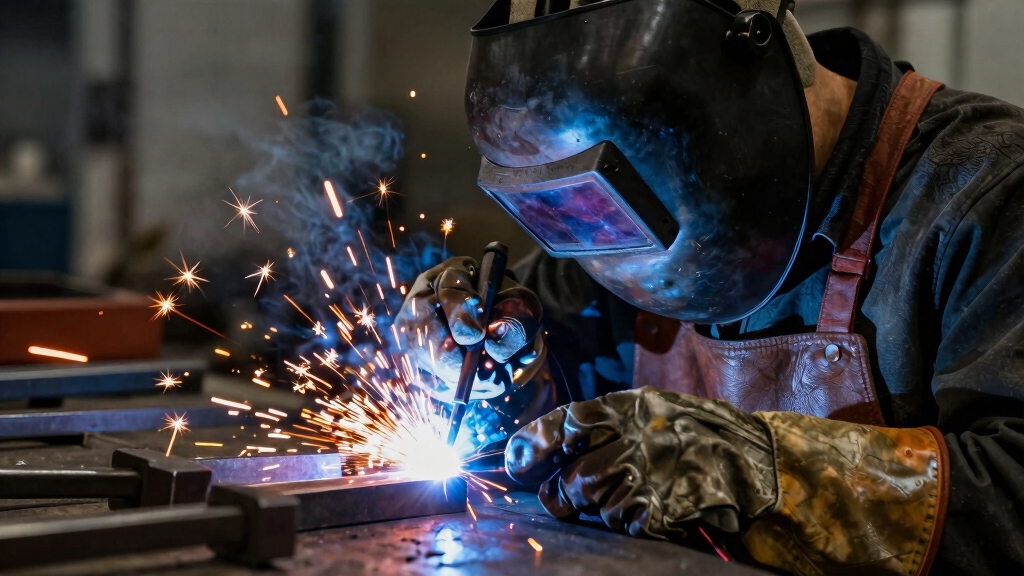
You set up and adjust MIG, TIG, or arc welding equipment. You control parameters like amperage and gas flow, and weld in multiple positions with accuracy.
You inspect welds for compliance and troubleshoot defects to maintain structural integrity. Additionally, you follow strict safety protocols and maintain all tools and equipment.
Explore next steps to master welding techniques and quality control.
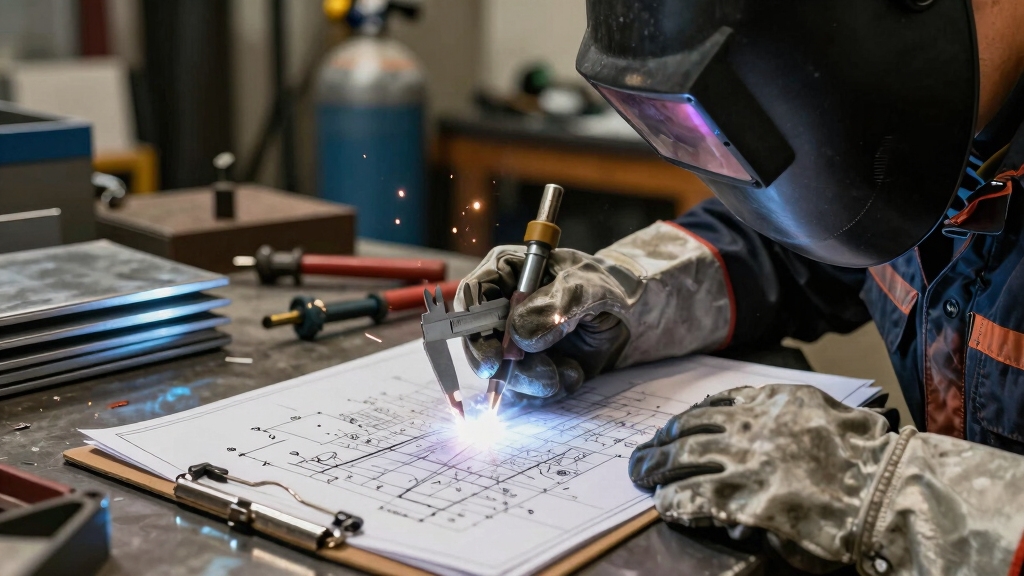
Mastering how to read welding blueprints is essential for accurately interpreting the specifications and requirements of any welding project.
You’ll need to analyze construction drawings and specifications carefully to identify weld types, sizes, and locations.
Pay close attention to weld form symbols and fillet sizes indicated on the blueprints, as these dictate the exact welding technique and joint preparation.
Use precise measurements from the drawings to plan your layout and welding procedure.
Understanding engineering plans and sketches allows you to anticipate challenges and guarantee compliance with design tolerances.
You must interpret all notations and dimensional data accurately to avoid errors.
This skill assures that every weld meets structural and safety standards, maintaining the integrity and strength of the final assembly as specified by the project requirements.
Additionally, following a qualified Welding Procedure Specification (WPS) ensures consistency and compliance with industry codes during fabrication.
Before starting any welding task, you’ll need to correctly set up your MIG, TIG, or arc welding equipment to guarantee peak performance and safety.
Begin by selecting the appropriate machine based on the job’s requirements. Connect the power supply and adjust the amperage to match material thickness and type.
Choose the right welding machine, connect power, and set amperage for your material’s thickness and type.
For MIG welding, install the correct wire spool and set the wire feed speed. Adjust the shielding gas flow rate using the regulator to assure adequate coverage.
In TIG welding, secure the tungsten electrode, adjust gas flow, and set the pedal control for precise heat management.
For arc welding, select the proper electrode, attach the ground clamp firmly, and adjust the current settings.
Always inspect connections and cables before igniting to prevent faults or hazards.
Ensure the ground clamp is secured to clean, bare metal close to the weld area to maintain a solid electrical ground.
Prepare materials thoroughly to guarantee strong, defect-free welds. You begin by cutting metal components to exact measurements using powered saws, assuring they match the blueprint specifications.
Next, align parts precisely with calipers, rulers, and clamps to maintain accurate fit-up. Clean all metal surfaces by grinding or buffing to remove rust, scale, oil, and contaminants that could weaken weld integrity.
In some cases, apply chemical cleaning agents for stubborn residues. Proper surface preparation secures optimal weld penetration and fusion.
You also lay out components systematically for efficient assembly and welding.
Accurate preparation minimizes defects such as porosity or inclusions and ensures compliance with design tolerances. Failing to prepare materials correctly can lead to weak joints, costly rework, or safety hazards.
Additionally, selecting the correct groove design based on material thickness is essential to achieve full penetration and strong welds.
To get the hang of welding in flat, vertical, and overhead positions, it’s key to master some specific techniques. This way, you can ensure your joints are strong and free of defects.
Now, overhead welding can really throw some unique challenges your way. For instance, controlling that molten metal and keeping a consistent bead placement while working against gravity can be tricky!
And let’s not forget about safety. It’s super important to always wear your heat-resistant gear. Plus, think about your positioning to keep yourself safe from sparks and fumes. Staying aware of these factors can really make a difference in your welding experience!
For vertical welding, using the correct electrode angle of 10–15° uphill can improve heat control and weld quality.
Mastering welding in flat, vertical, and overhead positions requires precise control over your technique and equipment settings to guarantee consistent, high-quality welds. You’ll adjust travel speed, electrode angle, and heat input based on the position to prevent defects.
In flat welding, maintain a steady, fast travel speed and a shallow electrode angle. For vertical welding, control upward or downward progression with a moderate travel speed and an angle that directs the weld pool. Overhead welding demands slower travel speed and tighter control to avoid slag and molten metal falling.
Key techniques include:
It is also crucial to balance amperage and voltage appropriately to optimize fusion and avoid defects such as burn-through or incomplete fusion.
While controlling travel speed, electrode angle, and heat input helps manage weld quality across all positions, overhead welding presents unique difficulties that demand heightened attention.
You must counteract gravity’s effect on molten metal, which tends to drip or sag, risking inclusions or incomplete fusion.
Maintaining a tight, consistent puddle requires precise manipulation of the electrode angle, often steeper than flat welding, and careful amperage adjustment to prevent overheating.
Proper positioning is critical; you’ll frequently weld from awkward angles, which challenges steady hand control and visibility.
Additionally, slag removal becomes more complex overhead, demanding thorough cleaning between passes to avoid defects.
Mastering overhead welding means adapting your technique to maintain uniform bead shape, penetration, and fusion despite these physical and positional challenges.
This ensures structural integrity in critical applications.
Using short, controlled arc lengths is essential to prevent weld pool sagging, especially in overhead segments.
Consistently applying rigorous safety measures during welding in flat, vertical, and overhead positions minimizes risks associated with heat, molten metal, and fumes.
You must make sure your protective gear fits correctly and remains intact throughout the job. Position yourself to avoid direct exposure to spatter and fumes, using ventilation systems where necessary.
Maintain awareness of your body posture to reduce strain and prevent accidents. Here are critical safety considerations:
Wear heat-resistant gloves, a welding helmet with the appropriate filter lens, and flame-retardant clothing.
Use respiratory protection when ventilation is insufficient.
Securely clamp and support workpieces to prevent movement.
Keep fire extinguishers accessible in the welding area.
Inspect equipment for damage or leaks before starting.
Regular training and adherence to safety protocols significantly reduce the risk of injury by enhancing hazard recognition and safe practices through proper training and supervision.
Fabricating and assembling metal structures requires you to accurately join components according to detailed specifications.
You begin by laying out parts using precise measurements and aligning them with clamps or fixtures to ensure exact positioning.
You select the appropriate welding method, such as GMAW or GTAW, based on material type and project requirements.
Tack welding holds components temporarily before final welding, guaranteeing structural integrity during assembly.
Throughout the process, you maintain proper equipment settings, including amperage and gas flow, to achieve consistent weld penetration and bead shape.
You also bolt or clamp parts as needed to maintain alignment during welding.
Your role demands strict adherence to engineering drawings and specifications to ensure the fabricated assembly meets dimensional and functional criteria without deviation.
Welding acts as a crucial step within the overall fabrication workflow, providing permanent, load-bearing joints that secure assembled components.
– Utilizing appropriate visual inspection tools such as fillet weld gauges and magnifiers to accurately detect surface discontinuities.
When you encounter defects such as porosity, cracking, or incomplete fusion during welding, it’s crucial to diagnose the root cause promptly to maintain structural integrity and meet specifications.
Start by reviewing your welding parameters. Incorrect amperage or travel speed often causes porosity.
Check shielding gas flow to prevent contamination.
For cracking, assess the base material, preheat conditions, and cooling rate. Thermal stresses or improper joint design can induce fractures.
Incomplete fusion usually results from inadequate heat input or poor joint preparation. Make certain surfaces are clean and correctly aligned.
Use visual inspection and non-destructive testing to identify flaws early.
Adjust your technique, equipment settings, or material handling as needed.
Systematic troubleshooting minimizes rework and guarantees weld quality, keeping your work compliant with engineering standards.
Implementing effective non-destructive inspection ensures that welds meet design specifications and safety requirements.
Taking care of your welding tools and equipment is super important. You’ll want to make it a habit to check them regularly for any signs of wear or damage. Catching issues early can save you a lot of trouble down the road!
Also, don’t forget to clean and lubricate moving parts. This helps ensure everything runs smoothly and keeps corrosion at bay. If you notice any components showing signs of failure, it’s best to repair or replace them right away.
Keeping things in tip-top shape is key for both safety and efficiency.
Although regular equipment inspections may seem routine, they play a critical role in maintaining welding tools and ensuring operational safety and efficiency. You must systematically check all equipment components before use to prevent malfunctions and accidents.
Focus on identifying wear, damage, and calibration issues that could compromise weld quality or operator safety. Key inspection tasks include:
Verifying the integrity of welding cables and connectors for fraying or corrosion.
Checking gas hoses and regulators for leaks or blockages.
Inspecting electrode holders and torch tips for wear or deformation.
Confirming that gauges and meters display accurate readings.
Ensuring power supplies and controls respond correctly and consistently.
Maintaining welding tools and equipment through regular cleaning and lubrication guarantees peak performance and extends their lifespan.
You need to remove slag, dust, and metal residues from welding torches, nozzles, and contact tips to prevent blockages and ensure consistent gas flow.
Clean electrode holders and grounding clamps to avoid poor electrical conductivity and overheating. Lubricate moving parts like hinges and adjustment screws with manufacturer-recommended lubricants to reduce friction and wear.
Pay special attention to wire feeders and drive rolls by clearing debris and applying light oil to secure smooth wire feeding.
Regularly inspect and clean cooling fans and filters to maintain peak operating temperatures.
Since welding tools and equipment endure intense heat and mechanical stress, regular repair and timely replacement of worn or damaged parts are essential to guarantee peak functionality and safety.
You must routinely inspect all components, identifying cracks, worn cables, or faulty connections. Promptly replace consumables like nozzles and electrodes to maintain weld quality.
Make certain calibration of gauges and controls to prevent operational errors. Maintain a detailed log of repairs and part replacements to track equipment history.
Focus on these critical maintenance tasks:
Welders consistently prioritize safety protocols to prevent accidents and injuries in hazardous work environments.
You must wear heat-resistant gloves, welding helmets with appropriate shading, flame-retardant clothing, and respiratory protection to guard against sparks, ultraviolet radiation, and toxic fumes.
Always inspect equipment for damage or malfunctions before use, assuring proper grounding and ventilation.
Maintain clear work areas free of flammable materials and use fire-resistant barriers when necessary.
Follow lockout/tagout procedures during maintenance to prevent accidental startups.
Be vigilant about monitoring equipment temperature and gas flow rates to avoid overheating and leaks.
Additionally, comply with OSHA regulations and company safety standards, participate in safety training, and report hazards immediately.
Adhering to these protocols minimizes risks and assures a safe welding environment.
You’ll need certifications like the AWS Certified Welder credential, which proves your ability to interpret blueprints and perform various welding processes correctly.
Depending on your specialization, you might pursue certifications in MIG, TIG, or stick welding.
Many employers also require OSHA safety training and sometimes specific endorsements for pipeline or structural welding.
Continual recertification guarantees you maintain high standards and comply with industry regulations, keeping your skills current and reliable.
Training as a welder typically takes about six months to two years, like crafting a perfect weld bead layer by layer.
You’ll master blueprint reading, equipment setup, material prep, welding techniques, inspection, and safety protocols.
Vocational schools or apprenticeships offer hands-on experience and technical knowledge, ensuring you can handle MIG, TIG, and arc welding proficiently.
The duration varies depending on your program intensity and specialization focus.
You’ll most commonly work with carbon steel, stainless steel, and aluminum due to their versatility and weldability.
Mild steel is frequent for structural applications, while stainless steel suits corrosion-resistant projects.
Aluminum requires precise heat control because of its high thermal conductivity.
You might also encounter cast iron, copper, and brass occasionally, but steel alloys dominate welding tasks.
This is especially true in construction, automotive, and manufacturing industries, where strong, durable joints are critical.
You can’t weld outdoors in every weather condition. It’s like trying to weld in a hurricane!
Rain, snow, and strong winds disrupt the arc and contaminate welds, causing weak joints.
You need dry conditions or proper shelter to maintain weld quality. Extreme cold or heat demands adjustments in technique and equipment settings.
Always protect both the weld and yourself by monitoring weather and using tents, windbreaks, or heaters when necessary.
You can advance to roles like welding inspector, supervisor, or quality control specialist, leveraging your expertise in blueprint interpretation and inspection techniques.
You might specialize in high-demand areas such as underwater welding or pipeline welding, requiring additional certifications.
Pursuing welding engineering or fabrication management opens doors to design and project leadership positions.
Continuous skill upgrades and certifications will boost your career trajectory and increase your earning potential substantially.
By mastering blueprint reading, equipment setup, and welding in various positions, you guarantee precision and safety in every project.
Imagine fabricating a critical pipeline section where your accurate welds prevent costly leaks and hazards.
Regular inspection and maintenance keep your tools reliable, while troubleshooting sharpens your problem-solving skills.
Following strict safety protocols protects you and your team. These responsibilities aren’t just tasks; they’re essential to delivering lasting, high-quality welds in any demanding environment.