Phone:
(701)814-6992
Physical address:
6296 Donnelly Plaza
Ratkeville, Bahamas.
Phone:
(701)814-6992
Physical address:
6296 Donnelly Plaza
Ratkeville, Bahamas.
To TIG weld successfully, start by selecting the right tungsten electrode for your material and amperage. Grind its tip longitudinally to about 2.5 times the electrode diameter using a dedicated 200-grit wheel.
Set up your torch with proper collet insertion and pure argon shielding gas. Position the tungsten close to the workpiece, initiate the arc smoothly, and maintain a steady torch angle.
Control amperage with a foot pedal. Master these fundamentals, and you’ll build a solid foundation for precise, high-quality welds.
Start by grinding your tungsten electrode to a sharp point using a 200-grit wheel specifically designed for tungsten.
Grind longitudinally to create a pointed tip about 2.5 times the electrode’s diameter, guaranteeing precise arc control.
Insert the ground tungsten into the collet, leaving 1/8 to 1/4 inch protruding.
Assemble the torch by installing the collet, nozzle, and securely tightening the back cap to prevent slippage.
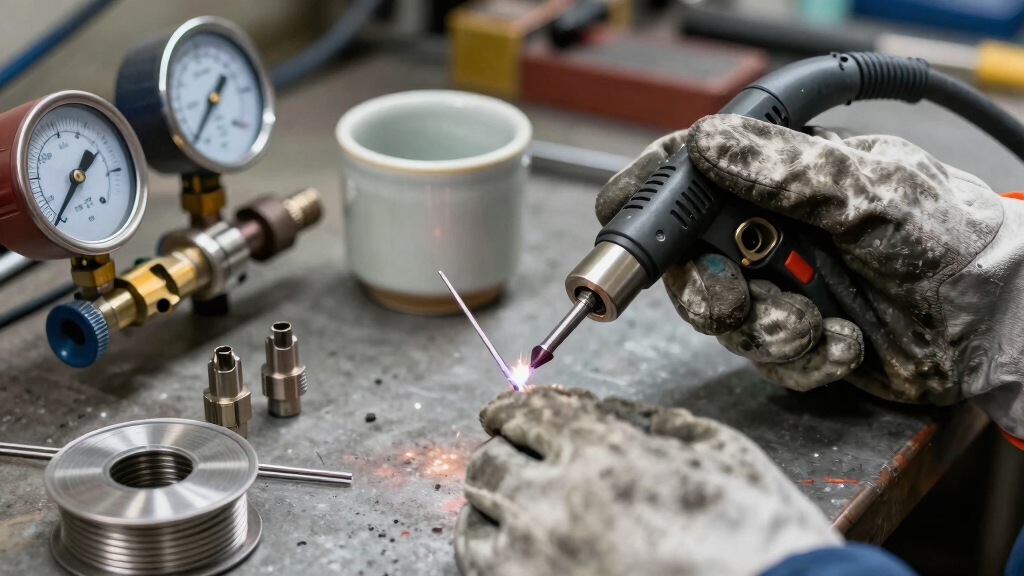
Select your shielding gas, pure argon is standard for most applications, and connect it to the torch.
Adjust gas flow rates, setting appropriate pre-flow and post-flow times to shield the tungsten and weld pool from oxidation.
Verify all connections are tight and gas is flowing smoothly before powering on your welder to secure consistent, contamination-free operation.
Ensure the ceramic cup is properly fitted over the collet body to provide effective gas shielding and heat protection during welding.
When selecting a tungsten electrode, you’ll need to match the alloy type to the material and thickness you plan to weld. This ensures peak arc stability and weld quality.
Matching tungsten alloy type to your material and thickness ensures optimal arc stability and weld quality.
For steel, use 2% thoriated (red) or 2% ceriated (grey) tungsten, which perform well at moderate amperages on 2-3mm thickness. For aluminum and magnesium, choose 2% lanthanated (blue) or pure tungsten (green), as these provide a stable arc and ball formation.
Electrode diameter also matters: thinner electrodes (1.6mm) suit lower amperage and thin materials, while thicker ones handle higher amps and thicker stock.
Selecting the correct tungsten guarantees consistent arc start, stable arc length, and proper heat distribution. These factors are critical for clean, defect-free welds.
Always verify electrode compatibility with your welding current type, AC or DC. Proper sharpening with precise grinding angles and matching tip shape ensures optimal weld quality and electrode life.
Master grinding your tungsten electrodes by using a 200-grit wheel specifically designed for tungsten. Always grind the electrode longitudinally, not around the circumference, to maintain a consistent, pointed tip.
Aim for a tip length about 2.5 times the electrode diameter; for example, a 1.6mm tungsten should have a tip roughly 4mm long. This sharp point directs the arc precisely and improves arc stability.
Avoid overheating the tungsten. Grind with light pressure and keep the electrode cool to prevent contamination and brittleness. After grinding, clean the electrode to remove any debris.
Insert the tungsten into the collet so it protrudes 1/8 to 1/4 inch (around 6mm) from the torch, ensuring proper arc initiation. Proper grinding boosts weld quality and arc control.
Use a dedicated tungsten grinder and wheel to maintain electrode integrity and optimal sharpening results.
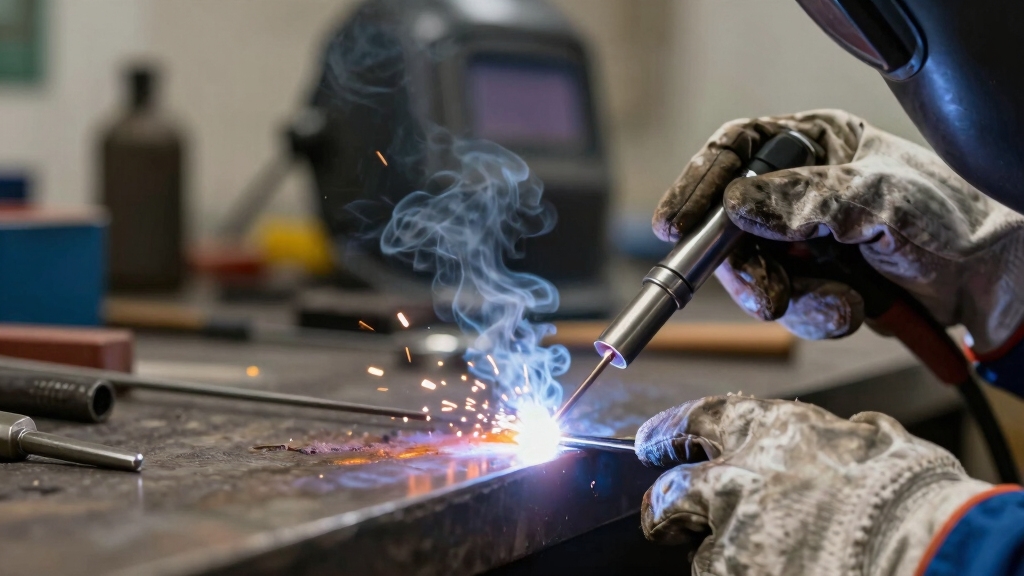
Although initiating the TIG welding arc may seem challenging at first, understanding the proper technique guarantees a clean and stable arc.
Begin by turning on the shielding gas to protect the tungsten and workpiece. Position the tungsten 1-2mm from the metal surface, ensuring the distance matches the tungsten diameter for consistent arc length.
Use a high-frequency start or gently tap the tungsten like striking a match to initiate the arc.
To maintain control, keep a steady hand and hold the torch at a 35-45 degree angle.
Use a sweeping motion to stabilize the arc and prevent sticking. Adjust the foot pedal to control amperage, managing heat input precisely.
Mastering these steps secures a smooth, controllable arc for quality welds. Maintaining the proper electrode-to-work distance is crucial to ensure arc stability and consistent penetration.
Developing consistent TIG welding skills requires focused practice on securing workpieces and controlling the weld puddle. Start by clamping your pieces firmly and tack welding key points to prevent movement.
Consistent TIG welding starts with firmly securing workpieces and controlling the weld puddle through focused practice.
Work progressively: begin with welding dots, then beads, and finally complete joints. Maintain a constant amperage setting; use the foot pedal to adjust amperage smoothly during welding.
Keep your filler rod moving quickly enough to avoid bulges, aiming for smooth, uniform beads. Always make certain your shielding gas flows before and after welding to protect the tungsten and weld area.
Practice maintaining a steady torch angle and consistent tungsten-to-work distance, about the tungsten’s thickness. These deliberate steps will develop your muscle memory and improve your precision in TIG welding over time.
Mastering controlled current management is key to shaping flawless seams and achieving professional-quality welds.
You need essential safety gear for TIG welding: a welding helmet with a proper shade to protect your eyes from UV rays, flame-resistant gloves to shield your hands from heat and sparks, and a long-sleeve flame-resistant jacket or shirt to protect your skin.
Always wear closed-toe leather boots and keep a respirator nearby to avoid inhaling fumes. Make sure good ventilation in your workspace to maintain safe air quality throughout your welding session.
To troubleshoot TIG weld defects, first check your tungsten tip. Grind it to a sharp point for stable arc.
If porosity appears, guarantee proper gas flow and nozzle cleanliness.
For tungsten contamination, adjust electrode angle and prevent contact with filler or workpiece.
Uneven beads often mean inconsistent travel speed or amperage. Maintain steady movement and correct foot pedal control.
Finally, verify proper shielding gas coverage to avoid oxidation and weld cracking.
Yes, you can automate TIG welding using robotic systems.
These robots precisely control torch angle, arc length, and filler rod feeding, ensuring consistent weld quality.
You’ll program parameters like amperage and travel speed, then let the robot execute repetitive tasks accurately.
Automation suits complex or high-volume production but requires skilled setup and monitoring.
You’ll still need to fine-tune shielding gas flow and electrode condition to maintain peak weld integrity during robot-assisted TIG welding.
Imagine trying to write with a fountain pen on oily paper. It just won’t work.
Similarly, metals like lead, cast iron, and certain zinc-coated steels aren’t suitable for TIG welding because they don’t form stable arcs or produce poor weld quality.
Also, highly porous or contaminated metals fail to maintain the inert gas shield, leading to oxidation.
Stick to clean, thin, non-ferrous metals for best TIG welding results.
You’ll maintain your TIG equipment by regularly cleaning the tungsten electrode with a dedicated grinding wheel and replacing it when worn.
Inspect and clean the torch collet, nozzle, and gas lens to guarantee proper gas flow and prevent contamination.
Check hoses and fittings for leaks or damage, tightening or replacing as needed.
After welding, purge the gas lines with argon to clear moisture and debris, extending component life and guaranteeing consistent weld quality.
Mastering TIG welding takes practice. Did you know that welders who consistently grind their tungsten electrodes correctly reduce arc instability by up to 30%?
By preparing your equipment properly and controlling the arc with precision, you’ll improve weld quality and consistency. Keep refining your skills with focused practice, and you’ll see noticeable progress.
Remember, attention to detail in every step from electrode choice to arc control makes all the difference in your TIG welding results.