Phone:
(701)814-6992
Physical address:
6296 Donnelly Plaza
Ratkeville, Bahamas.
Phone:
(701)814-6992
Physical address:
6296 Donnelly Plaza
Ratkeville, Bahamas.

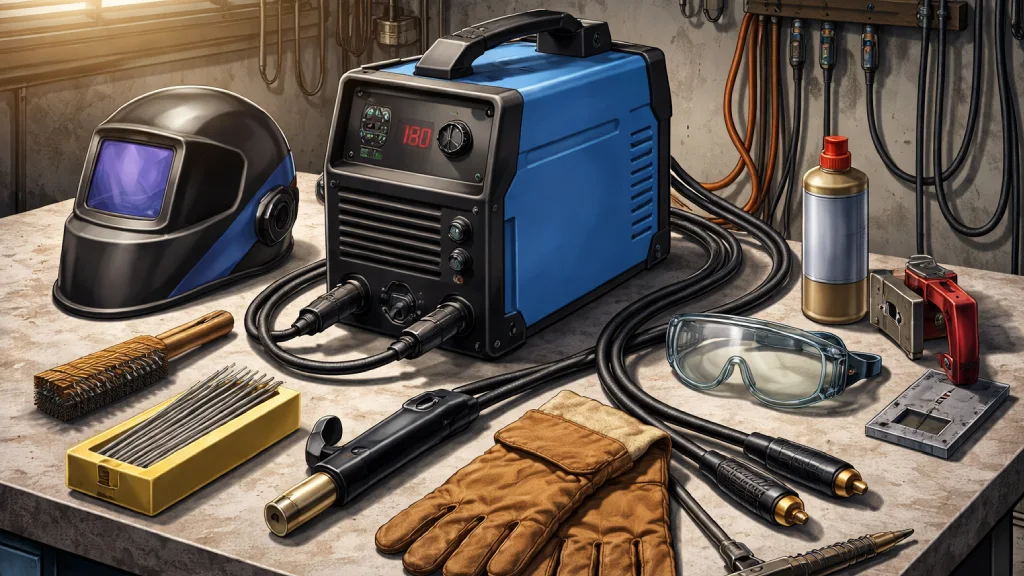
To strike an arc in stick welding, hold the electrode holder firmly with the electrode tip perpendicular to a clean, bare metal surface.
Quickly tap or drag the electrode tip like striking a match, then lift it about 1/8 to 1/4 inch to establish a stable arc. Maintain the arc length equal to the electrode diameter and keep your wrist flexible for control.
Make certain metal cleanliness and correct amperage settings to avoid sticking or spatter. Mastering these basics sets the stage for advanced welding techniques.
Begin by setting up your welding machine to the correct amperage based on the metal thickness and electrode type you’ll be using.
This guarantees stable arc initiation and consistent penetration. Next, clean the metal surface thoroughly with a wire brush or grinder to remove rust, paint, and contaminants that could compromise weld integrity.
Secure the ground clamp firmly to the workpiece, completing the electrical circuit and preventing arc interruptions. Hold the electrode holder at a 90-degree angle to the workpiece initially, providing optimized control for striking the arc.
Confirm your electrode is clean, dry, and free of defects, but avoid discussing electrode selection details here, as that’s covered separately.
Precise equipment setup lays the foundation for a strong, defect-free weld and safe operation. Proper storage and handling of electrodes is essential to maintain their low-hydrogen coating and ensure weld quality.
When it comes to welding, picking the right electrode is super important. You want to choose one that matches the composition of your base metal and the position you’re welding in. This way, you can ensure you get the best fusion and mechanical properties possible.
Oh, and don’t forget to check the condition of your electrodes! It’s really vital to use clean, dry rods that are free from any cracks or moisture. If you don’t, you might run into issues like arc instability and porosity. Trust me, that’s something you want to avoid!
Using electrodes with a cellulose-based flux can provide a forceful arc and excellent cleaning action, especially useful for root passes on carbon steel.
Choosing the right electrode is critical to achieving a strong, clean weld that suits your metal type and welding position. You’ll encounter several common electrode types, each designed for specific metals and applications.
For mild steel, E6011 and E6013 rods offer good penetration and smooth arcs. E6011 excels on rusty or dirty surfaces, while E6013 provides a cleaner finish. E7018 is a low-hydrogen electrode ideal for structural steel, delivering strong, crack-resistant welds with minimal spatter.
For cast iron or stainless steel, specialized electrodes like nickel- or chromium-based rods are necessary. You must also consider electrode diameter and coating, as these affect arc stability and slag formation.
Selecting an electrode that matches your material and welding position guarantees peak penetration, bead profile, and overall weld integrity. For cast iron repairs, using nickel-based electrodes is crucial to reduce cracking and achieve a durable weld.
Understanding electrode types lays the foundation for selecting the right electrode material tailored to your specific welding task. You need to match the electrode composition to the base metal to guarantee peak fusion and mechanical properties.
For mild steel, use E6010 or E6011 for deep penetration or E6013 for smoother, lighter welds. Stainless steel requires electrodes with compatible alloys, like E308L, to prevent corrosion and cracking.
For cast iron, special nickel-based electrodes offer better ductility and crack resistance. Consider electrode coating as well: cellulose coatings promote deep arc penetration, while rutile coatings yield smoother beads and easier slag removal.
Always check the manufacturer’s specifications and welding codes to align electrode selection with material thickness, joint type, and welding position. This precision guarantees a durable, defect-free weld.
When welding dissimilar metals like carbon steel to stainless steel, choosing the correct filler metal such as ER309L is crucial to control thermal expansion and maintain corrosion resistance.
Make sure your electrode is clean, dry, and free from defects before beginning any welding task, as its condition directly influences arc stability and weld quality.
Moisture absorption in electrodes causes hydrogen inclusion, leading to weld porosity and cracking. Inspect rods for cracks, chips, or damaged flux coating.
Compromised flux reduces slag formation, impairing weld protection and bead appearance. Store electrodes in a dry, temperature-controlled environment to prevent moisture uptake.
If electrodes absorb moisture, bake them following manufacturer specifications to restore performance. Using properly conditioned electrodes guarantees consistent arc initiation, stable arc length, and uniform metal deposition.
Neglecting electrode condition can cause sticking, erratic arc behavior, and weak weld joints. Always select and maintain electrodes according to the welding job’s material, position, and amperage requirements to achieve peak results.
To maintain certification validity, welders must perform qualifying welds at least once every six months to ensure continued proficiency and compliance with certification continuity requirements.
Preparing the metal surface properly guarantees a strong, clean weld and prevents defects caused by contaminants.
Begin by removing rust, paint, oil, and dirt using a wire brush or grinder. Residual debris can cause porosity and weak fusion.
Make certain the base metal is dry and free of moisture, which disrupts arc stability.
After cleaning, position the workpiece securely on a non-conductive surface or welding table to avoid movement.
Attach the ground clamp firmly to the metal near the weld area to complete the electrical circuit, minimizing resistance and ensuring consistent current flow.
Verify the metal edges are smooth and fit tightly if joining pieces, as gaps or irregularities affect arc initiation and bead quality.
This meticulous preparation sets the foundation for a controlled, defect-free welding process.
Additionally, wearing proper heat-resistant gloves during preparation protects your hands from burns and sharp edges, ensuring safety throughout the setup.
To strike the arc effectively, you’ll want to hold the electrode firmly with a steady hand. Grip the holder at a 90-degree angle to the workpiece—this is super important! Position the electrode tip perpendicular to the base metal.
Doing this helps ensure you have consistent contact during that initial strike. Proper electrode positioning is essential to achieve strong seam formation and prevent defects in pipe welding.
Grip the electrode holder firmly at a 90-degree angle to the workpiece when striking the arc. This guarantees a stable electrical contact and reliable arc initiation.
When holding the electrode, consider these key points:
Mastering this grip technique helps you initiate consistent arcs and sets a solid foundation for quality welds. Using an inverter welding machine can further improve arc stability thanks to its precise current control and rapid output adjustments.
Maintaining the correct electrode angle when striking the arc directly influences arc stability and weld quality. Hold the electrode perpendicular (90 degrees) to the workpiece surface for the initial strike to guarantee a stable arc.
After establishing the arc, tilt the electrode 5 to 15 degrees forward in the direction of travel for a drag technique, which promotes proper slag coverage and penetration. For flat or horizontal positions, use a backhand drag with a 10 to 20-degree angle from vertical to prevent slag buildup on the rod.
In vertical welding, a slight forehand push angle helps control the molten pool. Always position your body to clearly see the puddle, maintaining electrode angle consistency to avoid arc instability or slag interference during the weld. Proper electrode handling and angle control are critical factors in producing defect-free welds and ensuring consistent bead placement.
Steadily holding the electrode is essential when striking the arc, as any unintended movement can disrupt arc initiation and cause instability.
To maintain control, you must grip the electrode holder firmly but not rigidly, allowing subtle adjustments during strike. Position your body to support your arm, minimizing shake and fatigue.
Focus on these three key points:
Additionally, using the correct welding shade when striking the arc helps protect your eyes from intense UV and IR radiation while maintaining clear visibility.
Mastering the arc strike starts with positioning the electrode holder at a 90-degree angle to the workpiece. Next, tap the electrode tip sharply against the base metal, then immediately lift it about 1/8 to 1/4 inch to establish the arc.
You can also drag it like striking a match or scratch it forward and backward to expose the core. Hold the arc steady for 1-2 seconds to heat the rod before moving. Practice on scrap metal to perfect your wrist action and avoid embedding the rod.
| Step | Action |
|---|---|
| 1 | Position electrode holder |
| 2 | Tap or drag electrode tip |
| 3 | Lift to proper arc length |
| 4 | Hold arc steady briefly |
Once you’ve successfully struck the arc and established a stable arc length, focus on keeping that gap consistent throughout the weld.
Maintaining an arc length equal to the electrode diameter—typically 1/8 to 1/4 inch—is critical to weld quality.
Too short causes sticking; too long results in spatter and weak fusion.
To control this, remember to:
Position the electrode carefully to maintain control and optimize weld quality.
Initially hold it perpendicular to the joint, then tilt the top 5 to 15 degrees in your travel direction for a drag technique.
For flat, horizontal, or overhead welding, use a backhand drag motion; in vertical-up positions, employ a forehand push with the electrode angled 10 to 20 degrees from vertical.
This prevents slag from overtaking the rod. Adjust your body position to maintain a clear view of the weld puddle and ensure stable manipulation.
Always keep the electrode holder at a 90-degree angle when striking, then modify the angle for travel based on position and joint type.
Precise electrode angle and position control reduces defects and enhances penetration, creating a consistent, strong weld.
Move the electrode steadily using controlled motions like circular, side-to-side, or weaving patterns to create smooth, uniform weld beads.
Maintaining consistent speed and arc length guarantees proper fusion and bead appearance.
Follow these techniques:
To keep your electrode from sticking, try striking the arc with a quick, controlled motion.
It’s also important to maintain that ideal arc length, which should be around 1/8 to 1/4 inch.
And don’t forget about the surface you’re welding on! Make sure it’s thoroughly cleaned of any rust, paint, or other contaminants.
This little step really helps in getting a stable arc started.
When you strike the arc, you need to avoid sticking the electrode to the workpiece. This interrupts the weld and can damage both the rod and the metal surface.
To prevent sticking, follow these key steps precisely:
Maintaining a consistent arc length is essential for producing a strong, clean weld and preventing common mistakes like sticking or excessive spatter.
You should keep the arc length equal to the electrode diameter, typically 1/8 to 1/4 inch. If the arc is too short, the electrode will stick to the workpiece, disrupting the weld.
Conversely, a too-long arc creates unstable arcs, causing spatter and weak bead formation. After striking, quickly reduce the initial bright arc to this optimal short gap.
Monitor the bright arc light closely to adjust your electrode distance, ensuring steady heat input and controlling the molten pool. This precision prevents overheating or warping.
Consistently maintaining this gap throughout the weld is key for arc stability and quality bead formation.
Before striking the arc, make sure the metal surface is thoroughly cleaned of rust, paint, oil, and other contaminants using a wire brush or grinder.
A clean surface guarantees stable arc initiation and strong weld fusion.
Follow these key steps to avoid common arc striking mistakes:
To get the arc started smoothly, you’ll want to practice striking it on scrap metal first. This lets you refine your wrist action and arc length control without risking damage to your actual workpiece.
Begin by holding the electrode holder at a 90-degree angle and tap the electrode end sharply against the scrap surface. Then, immediately lift it about 1/8 to 1/4 inch to establish the arc.
Avoid burying the rod into the molten pool; practice the “strike and lift” method until you can consistently create a stable arc. Focus on maintaining an initial long arc for 1-2 seconds to heat the rod, then quickly reduce the gap.
Repeating this on clean scrap metal builds muscle memory essential for precise arc starts during real welds.
You must wear a welding helmet with a proper shade lens to protect your eyes from intense UV and infrared rays.
Use flame-resistant gloves and a long-sleeve welding jacket to shield your skin from sparks, heat, and molten metal.
Don’t forget safety boots with steel toes and non-slip soles.
Respiratory protection is essential in confined areas to avoid harmful fumes.
Always keep ear protection handy to guard against noise hazards.
You might think outdoor welding is unaffected, but weather conditions markedly impact arc stick welding.
Wind can blow away shielding gases, causing porosity and weak welds.
Moisture, from rain or humidity, leads to electrode contamination, increasing spatter and cracking risk.
Cold temperatures slow metal cooling, altering bead shape and penetration.
To maintain weld quality, you must shield the area, dry electrodes thoroughly, and adjust machine settings to compensate for environmental changes.
Besides arc length, electrode sticking often happens because your amperage setting is too low for the electrode or metal thickness, causing insufficient heat.
Also, dirty or contaminated metal surfaces lead to unstable arcs and sticking. Holding the electrode at an incorrect angle or dragging too slowly can cause molten metal to freeze on the rod.
Finally, using moist or damaged electrodes can cause sticking due to improper flux action and arc instability.
Imagine trying to spark a flintlock pistol. If your arc’s inconsistent, first check your electrode’s condition and amperage settings; both must match metal thickness precisely.
Make sure your ground clamp’s secure and metal surface clean. Adjust your electrode angle and maintain correct arc length (1/8 to 1/4 inch).
If problems persist, gently crush flux coating for better contact and practice striking on scrap.
Consistent technique stabilizes ignition, so refine your wrist motion for sharp contact and lift.
You shouldn’t weld directly on rusty or painted metals because contaminants disrupt arc stability and weld quality.
Always clean the surface with a wire brush or grinder to remove rust, paint, and dirt before welding. This guarantees proper electrical contact, stable arc initiation, and strong fusion.
Welding on unclean surfaces leads to porosity, weak welds, and slag inclusion, so thorough preparation is essential for sound stick welding results.
Striking an arc in stick welding is like lighting a match: quick, precise, and deliberate. By preparing your equipment, choosing the right electrode, and mastering the correct angle and motion, you guarantee a stable arc every time.
Remember, cleanliness and steady control are key to creating strong, uniform welds. Keep practicing on scrap metal to refine your technique and avoid common mistakes. With patience and precision, you’ll consistently achieve professional-quality welds.