Phone:
(701)814-6992
Physical address:
6296 Donnelly Plaza
Ratkeville, Bahamas.
Phone:
(701)814-6992
Physical address:
6296 Donnelly Plaza
Ratkeville, Bahamas.
To set up a welder, start by wearing all essential safety gear, including a welding helmet with the correct shade and heat-resistant gloves.
Secure your well-lit workspace, removing flammable materials and clamping the workpiece firmly.
Choose the right wire diameter and material, then install the wire spool properly with correct feed rollers.
Connect your shielding gas with the proper flow rate, select the correct polarity for your process, and adjust voltage and wire feed speed.
Test on scrap metal to confirm a stable arc. Detailed steps will help you optimize every setting effectively.
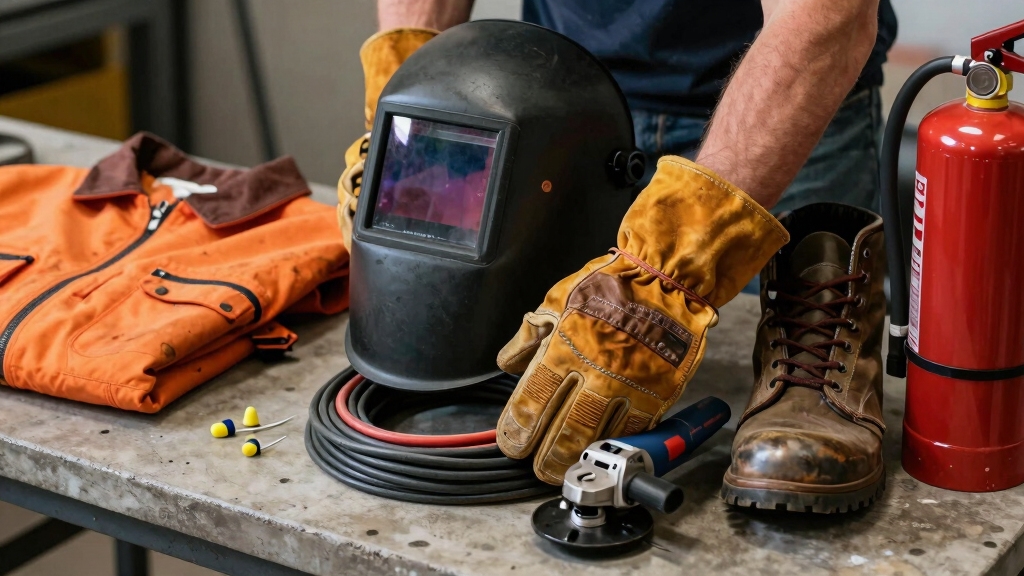
Always prioritize your personal protective equipment before starting any welding task.
Personal protective equipment is essential to ensure safety before beginning any welding work.
Equip yourself with a welding helmet featuring a proper shade lens to protect your eyes from UV and infrared rays.
Wear leather gloves and a welding jacket made of heat-resistant material to shield your skin from sparks and molten metal.
Use heat-resistant clothing and sturdy work boots to prevent burns and injuries.
Keep a fire extinguisher and a water bucket accessible within your workspace for immediate use on accidental fires or cooling hot welds.
Make certain all protective gear fits well to enable dexterity and safe operation.
Regularly inspect and maintain your PPE equipment to ensure it remains effective and safe to use.
You should routinely make certain your welding workspace is organized for safety and efficiency before starting any project.
Position a fire extinguisher and a water bucket within easy reach to quickly address sparks or hot welds.
Make sure the area is well-lit, using bright, stable lighting to clearly see the weld puddle and detect defects.
Remove all flammable materials and maintain a clean floor to prevent tripping hazards.
Secure your workpiece with a C-clamp to stabilize it during welding.
Confirm proper ventilation, as welding gases can accumulate and pose health risks.
Avoid outdoor setups since shielding gas disperses too quickly.
Keep tools and consumables orderly, giving you quick access and reducing clutter, which enhances safety and workflow precision throughout your welding session.
Ensure you use flame-resistant jackets and other appropriate safety gear to protect against sparks and molten metal.
When it comes to choosing the right welding wire for your project, it’s essential to pick a wire diameter that suits the thickness of your metal. For lighter gauge sheets, go for a thinner wire, while thicker plates call for a heavier gauge.
But that’s not all! You also need to consider the wire material. It should be compatible with the base metal you’re working with. This ensures proper fusion and strength in your welds.
Getting these choices right is crucial. It not only optimizes the quality of your welds but also helps minimize defects. So, take your time and make those selections carefully!
Additionally, selecting the appropriate wire type—whether solid or flux-cored—based on your welding environment and application can significantly improve weld performance and durability, especially under outdoor or heavy-duty conditions.
Selecting the correct wire diameter is essential for achieving strong, clean welds tailored to your project’s metal thickness. Using too thin a wire on thick metal weakens penetration, while too thick a wire on thin metal risks burn-through and poor control.
Typically, you’ll choose:
Match wire diameter with your power settings and feed rollers to maintain consistent feed and stable arc. Proper diameter selection reduces spatter and improves bead quality.
This helps you weld efficiently and reliably every time. For welding thicker metals like 1/2 inch steel, using a .045 inch wire paired with a 300-amp or higher machine is crucial for achieving proper penetration and weld integrity.
Match the welding wire material carefully to the base metal and project requirements to guarantee peak fusion and mechanical performance. Using the appropriate wire prevents weld defects and assures strength.
For mild steel, use ER70S-6 wire; for stainless steel, choose ER308L or ER316L. Aluminum welding requires 4043 or 5356 alloy wires. Flux-cored wires suit outdoor or dirty metal conditions.
| Base Metal | Recommended Wire |
|---|---|
| Mild Steel | ER70S-6 |
| Stainless Steel | ER308L / ER316L |
| Aluminum | 4043 / 5356 |
| Dirty/Outdoor | Flux-cored wire |
Select wire type based on metal composition and environment to maintain weld integrity and performance. Proper consumable-parent metal compatibility is essential to avoid defects that compromise weld quality.
Start by positioning the wire spool so the wire feeds off the underside toward the drive roller, ensuring even tension and smooth feeding. This orientation prevents wire twisting and reduces feed jams.
Next, confirm you’ve installed the correct drive roller type: V-groove for solid wire or W-groove for flux-cored wire to maintain consistent wire grip.
Follow these steps for precise installation:
Proper installation optimizes arc stability and prevents wire feed interruptions during welding. Ensuring the wire feed mechanism links properly to the power source via the power cable connection is critical for consistent wire delivery.
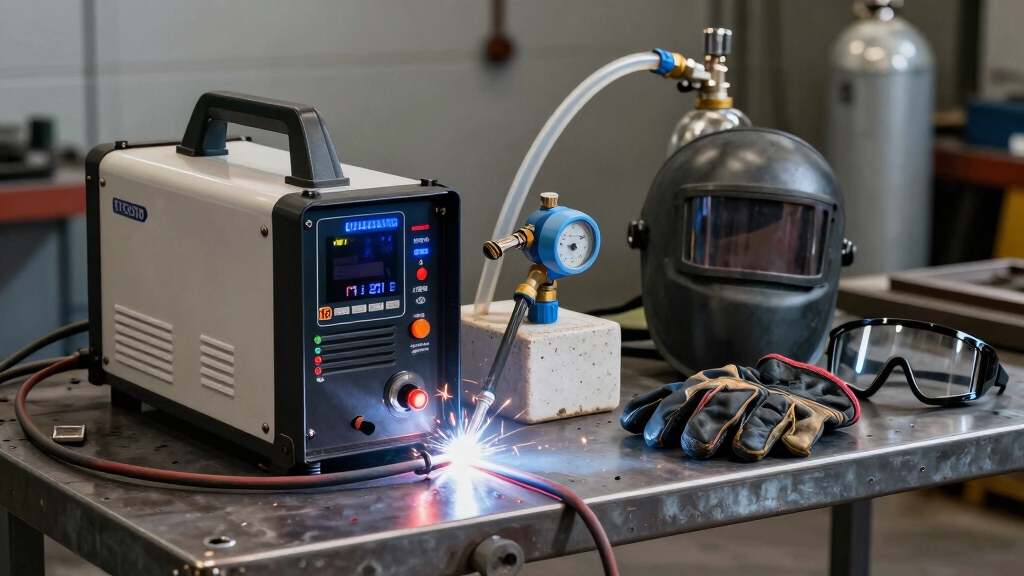
Before beginning welding, connect the shielding gas system to guarantee proper protection of the weld pool.
Attach the gas hose securely from the regulator to the welder’s gas inlet, ensuring no leaks.
Securely attach the gas hose from the regulator to the welder’s inlet, checking carefully for leaks.
Open the cylinder valve slowly, then adjust the flowmeter to 10-15 cubic feet per hour (CFH) using the handwheel.
Use a 75/25 Argon-CO2 mix for mild steel or pure Argon for aluminum, matching your metal type.
Check all fittings for tightness and inspect the hose for any damage.
Confirm the flow rate is steady and consistent to prevent porosity in the weld.
Never exceed recommended flow rates to avoid turbulence.
Proper gas shielding stabilizes the arc and protects the molten metal from atmospheric contamination, ensuring clean, strong welds.
Selecting the correct shielding gas blend is critical to balance arc stability, heat input, and weld quality.
Sure! Here’s a more conversational version:
When it comes to welding, picking the right polarity is super important. It really depends on the welding process and the type of metal you’re working with. Getting this right ensures you have great arc stability and proper penetration.
Once you’ve got the polarity sorted, the next step is to connect your welding cables. Make sure they’re hooked up securely! It’s essential to check that the electrode and work leads are attached correctly to the machine terminals.
Doing this helps prevent any equipment damage and boosts the quality of your welds. So, take a moment to double-check everything! Always confirm the electrode lead connects to the positive terminal and the work clamp to the negative terminal for correct polarity.
When setting up your welder, selecting the correct polarity is essential for peak arc stability and weld quality. Polarity affects penetration, bead shape, and spatter levels. Choosing the right one based on metal type and wire guarantees ideal results.
Here’s what to take into account:
DC Electrode Positive (DCEP): Provides deeper penetration and is common for solid wire welding on mild steel.
DC Electrode Negative (DCEN): Produces a softer arc with less penetration, suitable for thin materials or flux-cored wires.
AC Polarity: Typically used for aluminum welding with TIG, balancing cleaning action and penetration.
Always consult your welder’s manual or polarity chart to match settings with electrode and material type. Selecting polarity before attaching cables prevents damage and guarantees consistent arc performance. DCEN is preferred for most TIG welding applications due to its energy-efficient heat concentration on the workpiece.
Choosing the correct polarity sets the stage for connecting your welding cables properly. For most MIG welding on mild steel, use DCEP (Direct Current Electrode Positive). Connect the electrode cable to the positive terminal and the work clamp to negative.
For flux-cored welding, select DCEN (Direct Current Electrode Negative). Make certain cables are firmly attached to avoid resistance and overheating.
| Polarity | Electrode Cable | Work Clamp Cable |
|---|---|---|
| MIG (DCEP) | Positive (+) | Negative (–) |
| Flux-cored (DCEN) | Negative (–) | Positive (+) |
| Aluminum (AC) | Not used | Not used |
| TIG (DCEP) | Positive (+) | Negative (–) |
| TIG (DCEN) | Negative (–) | Positive (+) |
Double-check connections before welding to guarantee safety and peak arc stability. Using an inverter welding machine allows for precise arc control, which enhances weld quality when polarity is correctly set.
Fine-tune the voltage and wire feed speed to achieve a stable arc that produces consistent penetration and bead appearance. Start with the manufacturer’s recommended settings for your metal thickness, then adjust incrementally.
Too low voltage causes a weak arc, while too high voltage leads to excessive spatter. Similarly, incorrect wire feed speed affects the wire’s melting rate and weld quality.
Increase wire feed speed for thicker metals to maintain a strong, continuous arc. Decrease voltage if you notice excessive spatter or burn-through. Balance settings by observing the weld puddle’s behavior and bead shape.
Use visual feedback and sound; a steady hiss and smooth bead indicate proper adjustment. Avoid abrupt changes; small steps optimize arc stability efficiently.
Although not all welders have an inductance control, adjusting it can markedly reduce spatter and create a smoother bead if your machine includes this feature.
Start by setting inductance to a mid-range value, then perform a test weld on scrap metal similar in thickness and type to your project.
Observe the arc’s stability and bead appearance. Too low inductance causes a harsh, spattery arc; too high results in a sluggish arc with excessive heat.
Incrementally adjust inductance while maintaining voltage and wire feed speed, aiming for a steady, controlled arc with minimal spatter and a uniform bead.
Each adjustment should be followed by a test weld to verify improvements. This fine-tuning optimizes arc characteristics, ensuring consistent weld quality before proceeding to actual workpieces.
Once you’ve optimized your welder’s inductance and confirmed stable arc behavior on scrap metal, the next step is to firmly secure your workpieces.
Use clamps or C-clamps to prevent any movement during welding, ensuring alignment and minimizing distortion.
Secure your workpieces with clamps to maintain alignment and reduce distortion during welding.
Proper security helps maintain consistent bead quality and safety.
Before starting full welds, practice MIG tack welding to join pieces temporarily.
Focus on controlled, short welds spaced evenly to hold parts in place without overheating.
Keep these points in mind:
Position clamps to avoid obstructing the weld path.
Apply tack welds at corners and joints for stability.
Inspect tack welds for penetration and uniformity before proceeding.
This approach guarantees precision and a solid foundation for your final welds.
You should service your welding equipment at least once every six months for peak performance. Regular checks keep connections tight, gas flow steady, and wire feed smooth.
Inspect and clean contact tips, drive rollers, and cables monthly to prevent buildup and wear.
Replace consumables as needed.
If you use the welder heavily or in harsh conditions, consider more frequent servicing.
Consistent maintenance guarantees safety, stable arcs, and consistent weld quality.
“Different strokes for different folks” applies well here.
For mild steel, use a 75/25 Argon-CO2 mix with a V-groove drive roller. Adjust voltage for a smooth bead.
Aluminum needs pure Argon and precise polarity settings. Ensure surfaces are clean and oxide-free.
Stainless steel requires balanced shielding gas and careful wire feed speed to avoid contamination. Always match wire type and diameter to metal thickness.
Adjust amperage and speed for ideal penetration and minimal spatter.
When you see welding machine error codes, first consult the machine’s manual or error code chart for exact meanings.
Common errors often involve wire feed issues, gas flow problems, or electrical faults. Check wire tension, spool alignment, and make certain gas flow is steady at 10-15 CFH.
Inspect connections and polarity. Reset the machine after corrections.
If errors persist, test on scrap metal and adjust settings or contact technical support for advanced diagnostics.
You generally shouldn’t weld outdoors because shielding gas disperses quickly, causing poor weld quality and increased porosity.
If you must, use windshields or enclosures to protect the gas flow and maintain consistent shielding.
Increase gas flow slightly, but avoid excessive amounts to prevent turbulence.
Also, make certain all safety measures remain in place, including PPE and fire extinguishers.
Outdoor welding demands careful control to avoid weld defects and maintain safety standards.
Keeping your shielding gas cylinders in top shape means treating them with respect and care. You’ll want to routinely check for leaks, tighten connections, and make certain regulators and hoses stay clean and damage-free.
Store cylinders upright in a cool, dry place, secured to prevent tipping. Don’t forget to close valves tightly when not in use.
Have qualified technicians inspect internal parts periodically to maintain safe, consistent gas flow for your welding projects.
Setting up your welder might seem complex, but with each step, you’re building a foundation for strong, precise welds.
Remember, safety gear and workspace prep are your first lines of defense. Adjusting voltage, wire speed, and polarity fine-tunes your arc like a maestro tuning an instrument.
So, take your time, trust the process, and soon, your welds will speak volumes about your skill and preparation. Ready to ignite your project?