Phone:
(701)814-6992
Physical address:
6296 Donnelly Plaza
Ratkeville, Bahamas.
Phone:
(701)814-6992
Physical address:
6296 Donnelly Plaza
Ratkeville, Bahamas.
To make a welding cap, start by choosing 100% cotton or a cotton-nylon blend treated for flame resistance.
Avoid synthetic fabrics that melt. Gather flame-resistant fabric, cotton thread, scissors, pins, and Velcro for adjustments.
Measure and cut your panels carefully, sewing them with a 1/4-inch seam allowance. Add a cotton sweatband, neck flap, and adjustable straps for comfort and protection.
This straightforward process will give you a durable, breathable cap suited for long welding sessions. You can explore detailed steps to perfect your design.
Start by selecting a fabric that balances protection, comfort, and durability. Opt for 100% cotton or a cotton-nylon blend treated for flame resistance. These materials absorb sweat well and prevent burns.
Avoid synthetic fabrics that melt under heat.
Next, choose a design style that suits your needs. A traditional cap with a short bill offers solid forehead and ear coverage.
A beanie style provides basic protection with a snug fit.
If you work in varying conditions, consider multi-panel construction for better molding to your head. Neck flaps can offer extended coverage.
Breathability matters, so pick fabrics that promote airflow to keep you comfortable during long welding sessions.
Make sure the cap includes a sweatband to absorb moisture and enhance comfort under your helmet.
For optimal care and longevity, wash your welding cap using warm water between 105–120°F to maintain its flame-resistant properties and fabric integrity.
Once you’ve selected the right fabric and design style, gather the materials and tools that will help you create a durable and comfortable welding cap.
Start with 100% cotton or a cotton-nylon blend that’s flame-resistant and breathable. You’ll need enough fabric for a multi-panel construction, plus an extra strip for the sweatband.
Use cotton thread for stitching to prevent burns. For tools, get sharp fabric scissors, pins or clips, a measuring tape, and a sewing machine or needle for hand sewing.
A fabric marker or chalk will help mark cutting lines. If your design includes a neck flap or adjustable sizing, prepare Velcro or snaps.
Having all these ready guarantees smooth, precise work and a welding cap that fits well and lasts long.
Consider using heat-resistant stitching to enhance durability and safety during use.
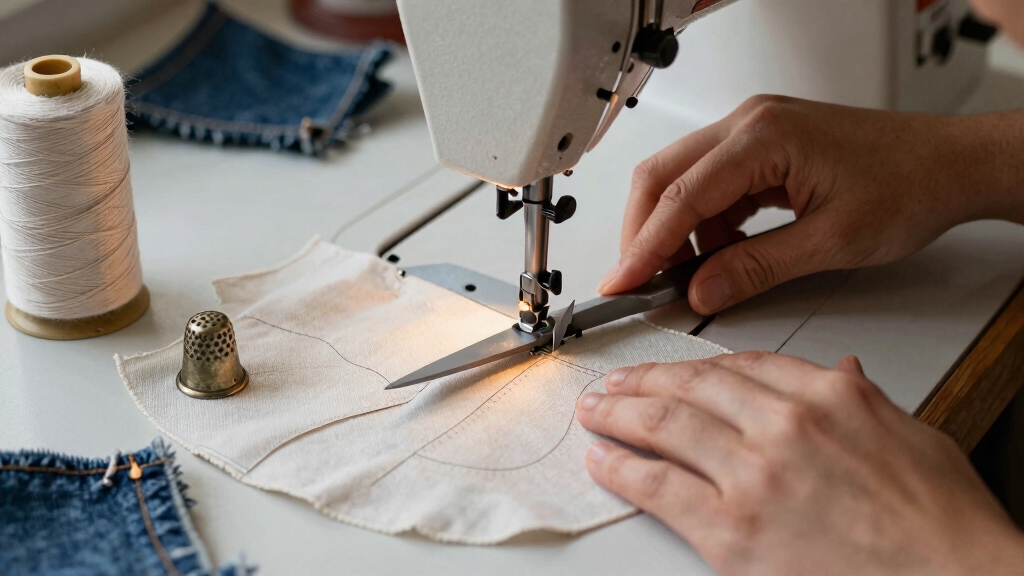
Measure and carefully cut your fabric panels according to the pattern. Ensure each piece matches the design specifications for a snug, comfortable fit. Use sharp fabric scissors to avoid fraying edges and double-check your measurements before cutting.
Measure and cut fabric panels precisely, using sharp scissors and double-checking measurements for a perfect, comfortable fit.
Once cut, lay the panels out to confirm alignment.
When sewing, keep these tips in mind: use a sturdy cotton thread to withstand heat and wear. Sew panels with a ¼-inch seam allowance for durability and proper shaping.
Press seams flat as you go to maintain a smooth, professional look. Take your time to stitch each panel accurately. Precise seams guarantee the cap molds well to your head and provides effective protection during welding.
Choosing the right materials like cotton or wool lining can enhance heat protection and comfort in your welding cap.
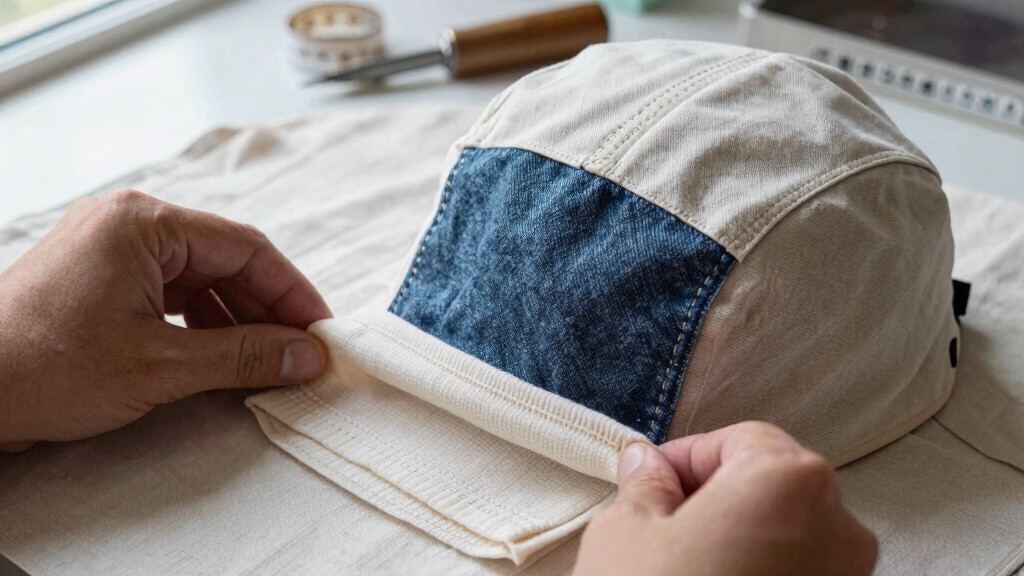
After sewing the panels together, focus on adding functional elements like sweatbands, neck flaps, and adjustable features to enhance comfort and protection.
Start by attaching a cotton sweatband along the inner front edge to absorb moisture and prevent sweat from dripping into your eyes.
For added safety, sew a neck flap extending from the back panel to shield your neck from sparks and heat.
Use flame-resistant fabric to maintain durability.
To guarantee a secure fit, incorporate adjustable features like hook-and-loop straps or elastic bands at the back.
These allow you to customize the cap’s tightness, accommodating different head sizes.
Make sure all stitching uses cotton thread to avoid melting or burning.
Using Kevlar stitching instead can provide superior heat and abrasion resistance, increasing the cap’s durability.
These additions make your welding cap both practical and comfortable during long sessions.
Although adding sweatbands and neck flaps increases protection, customizing the fit and finish guarantees your welding cap stays comfortable and secure throughout long work sessions.
Start by tailoring the cap’s size to your head shape using adjustable straps or elastic bands. This prevents shifting and assures a snug fit.
Begin by adjusting straps or elastics for a secure, comfortable fit that stays put during work.
Next, reinforce stitching around stress points for durability without sacrificing flexibility.
Finally, choose breathable fabrics and add a moisture-wicking liner to keep sweat away and improve airflow.
Use multi-panel construction to mold the cap precisely to your head.
Incorporate cotton stitching to resist heat and avoid burning.
Add a soft, adjustable sweatband for enhanced comfort and moisture control.
These steps help you craft a welding cap that protects effectively while maintaining comfort and safety.
Additionally, pairing your welding cap with heat-resistant gloves ensures comprehensive protection from burns and sparks during welding.
Welding caps protect you against UV rays by using tightly woven, flame-resistant fabrics that block harmful sunlight from reaching your skin.
When you wear a cap with a short bill or neck flap, it covers your forehead, neck, and ears, areas vulnerable to UV exposure.
This barrier reduces your risk of burns and long-term damage while you work under intense light from welding arcs, keeping you safer and more comfortable throughout your job.
Flame-resistant fabrics aren’t mandatory for all welding caps, but you definitely want them for serious protection.
Imagine wearing chainmail in a welding shop. It’s outdated but shows how safety evolves.
Most professional caps use fire-retardant materials to shield you from sparks and heat.
If you’re welding casually, a cotton cap might suffice.
But for industrial work, flame resistance is essential to keep you safe and comfortable throughout long sessions.
You can wear a welding cap without a helmet, but it’s not ideal for full protection.
The cap shields your head from sparks, sweat, and UV rays, adding comfort and hygiene.
However, it won’t protect your face or eyes from intense light and flying debris like a helmet does.
Use the cap alone only for light tasks or when you need extra head comfort, but always rely on a helmet for proper safety.
You should replace your welding cap whenever it shows signs of wear like thinning fabric, holes, or loss of fire resistance.
If it becomes saturated with sweat and odors that won’t wash out, it’s time for a new one.
Typically, replacing it every 6 to 12 months keeps you safe and comfortable.
Regular inspection guarantees it continues protecting your head, ears, and neck effectively during welding sessions.
Imagine you’re a knight in shining armor, but instead of a helmet, you wear a welding cap.
Yes, welding caps do improve your focus during long sessions. They absorb sweat, keeping it from dripping into your eyes and distracting you.
Their breathable fabric prevents overheating, and the protective layer shields your head from sparks and UV rays.
This all helps you stay comfortable, alert, and concentrated on the task at hand.
Now that you’ve selected durable fabric, cut precise panels, and added sweatbands and adjustable straps, your welding cap is ready to protect and fit comfortably.
Imagine Jake, a welder who struggled with heat and sweat until he made this cap himself. It kept sweat out of his eyes and shielded his neck from sparks all day.
By customizing your welding cap like Jake did, you guarantee safety and comfort tailored exactly to your needs.