Phone:
(701)814-6992
Physical address:
6296 Donnelly Plaza
Ratkeville, Bahamas.
Phone:
(701)814-6992
Physical address:
6296 Donnelly Plaza
Ratkeville, Bahamas.
To make a spot welder, start by securing a high-current transformer rated for 1,000–3,000 A with a low-voltage secondary around 2–4 V.
Attach copper alloy electrodes sized to your metal thickness, ensuring proper cooling with a closed-loop water system.
Use heavy-gauge copper wiring with crimped, insulated connections to minimize resistance.
Mount all parts firmly on an insulated frame and maintain electrode tip profiles.
With these steps, you’ll build a reliable spot welder ready for fine-tuning and deeper optimization.

Before you begin building your spot welder, you need to grasp how the spot welding process works and the critical factors involved.
Spot welding joins metal sheets by applying pressure through electrodes while passing a high electric current. The current meets resistance at the contact point, generating heat that melts the metal locally, forming a weld nugget.
Spot welding fuses metal sheets by pressing electrodes and passing current, creating heat to form a strong weld nugget.
Typical sheet thickness ranges from 0.5 to 3 mm, with weld diameters between 3 and 12.5 mm. Electrode materials must conduct electricity efficiently and withstand temperatures above 1200°C.
Copper alloys suit low-carbon steel, while harder alloys like chromium copper handle stainless steel and high currents. Cooling is essential to prevent electrode overheating.
Maintaining precise current control is crucial to balance heat input and avoid defects such as weak fusion or burn-through.
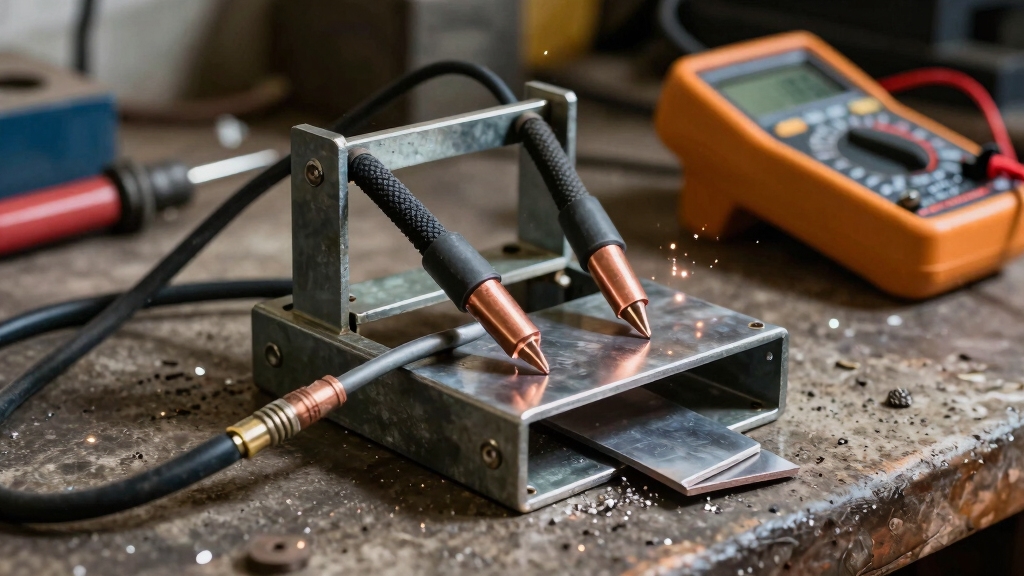
With a solid grasp of spot welding principles, you’re ready to assemble the necessary tools and materials. Start by gathering copper pipe sections, ideally a 1/2-inch hard copper outer pipe with a 3/8-inch soft copper inner pipe to form the electrodes.
Secure these with drywall screws after drilling precise attachment holes. Collect wood scraps for a sturdy base and frame, ensuring proper insulation and mechanical support. You’ll also need a welding transformer capable of delivering high instantaneous current, along with suitable cables and connectors rated for heavy-duty use.
Include clamps or tool holders to firmly secure electrodes and facilitate pressure application. Finally, prepare a water cooling system, hoses and a reservoir, to manage heat during operation. This methodical collection sets the foundation for effective spot welder construction. Be sure to maintain electrode tips regularly to ensure consistent current flow and prolong the life of your electrodes.
When it comes to choosing electrode materials, you’ll want to think about the type of workpiece you’re dealing with. For low-carbon steel, copper alloys are a great fit. But if you’re working with tougher metals that require higher heat, then tungsten or chromium copper will do the trick.
Next up, you’ve got to consider the shape and size of the electrodes. It’s really important that they match your weld diameter and the thickness of the sheets you’re working with. This ensures that you get the right current concentration and pressure for a solid weld.
And don’t forget about cooling! A good cooling system, usually using water or brine, is essential. It helps prevent the electrodes from overheating, which keeps your weld quality consistent. So, make sure to incorporate that into your setup!
Additionally, selecting electrodes with compatible material properties to the base metal helps improve weld strength and durability.
Selecting the right electrode material is essential for achieving consistent, high-quality spot welds and ensuring efficient heat dissipation during operation. You’ll want to match electrode materials to the workpiece and welding conditions.
Copper alloys provide excellent conductivity, while harder alloys like chromium copper resist wear and high temperatures. For refractory metals or high melting points, tungsten or molybdenum electrodes are ideal. Cooling components such as water-cooled copper electrodes prevent overheating and maintain electrode life.
Consider your workpiece type, welding current, and production volume when selecting materials. Using argon gas during welding can enhance weld quality by providing an inert atmosphere that prevents contamination and improves arc stability.
| Electrode Material | Best Use Case |
|---|---|
| Copper | Low-carbon steels, excellent conductivity |
| Chromium Copper | High-carbon, stainless steels |
| Tungsten | Refractory metals, high heat |
| Molybdenum | Impact resistance, machinability |
| Copper/Zirconium | Coated steels, high conductivity |
Determine the best electrode shape and size based on the workpiece thickness, material type, and desired weld diameter.
For thin sheets (0.5–1 mm), use smaller-diameter electrodes (about 3–5 mm) with a slightly rounded tip to concentrate current efficiently and minimize distortion.
Thicker materials (up to 3 mm) require larger electrodes (8–12 mm diameter) with a flatter or truncated cone shape to distribute pressure evenly and generate sufficient heat.
Match electrode geometry to the weld nugget size, ensuring it covers the intended diameter without excessive heat spread.
Use copper alloys shaped precisely for consistent contact and wear resistance.
Avoid overly large electrodes that reduce current density or overly small ones that risk electrode damage.
Maintain uniform electrode tip profiles for repeated weld quality and longevity during operation.
Electrode selection should consider material compatibility to ensure optimal weld integrity and performance.
Effectively managing the heat generated during spot welding is critical to maintaining electrode performance and prolonging equipment life.
You’ll want to select electrodes made from copper alloys like chromium copper or copper/zirconium, as they resist heat and wear.
Incorporate a water-based cooling system using hoses integrated into tool holders to circulate coolant directly around electrodes.
Ensure the flow rate is sufficient to prevent overheating during high-current welds.
Use brass or copper fittings for durability and minimal thermal resistance.
For enhanced cooling, consider a closed-loop system with a radiator and pump to maintain consistent coolant temperature.
Proper insulation of electrical connections prevents short circuits while allowing effective heat transfer.
Implementing these measures secures stable welding, reduces electrode degradation, and extends your spot welder’s operational lifespan.
Additionally, integrating inverter technology can improve energy efficiency and provide precise current control during welding operations.
Begin by securing a welding transformer capable of delivering the high instantaneous current required for spot welding sheet metals up to 3 mm thick.
Select a transformer with a low voltage secondary winding (typically 2–4 volts) and high current rating (1,000–3,000 amps) to guarantee sufficient heat generation.
Mount the transformer securely on a rigid frame using insulated brackets to minimize vibration.
Next, prepare the power supply, guaranteeing it matches the transformer’s input voltage and current specifications.
Use heavy-gauge wiring to connect the primary side, minimizing resistance and voltage drop.
Include a robust on/off switch or contactor rated for high current.
Arrange the transformer and power supply components to allow proper ventilation and cooling.
Double-check all mechanical fixtures for stability before proceeding to electrical connections.
Ensure the transformer’s primary winding integrity is verified to prevent shorts and maintain safety during operation.
To ensure reliable current flow and reduce resistance, it’s essential to use proper wiring techniques. This step is crucial for the overall performance of your electrical system.
Next, make sure all component connections are secured tightly. This helps prevent any loosening that might happen due to vibration or heat. Nobody wants a connection to fail when it matters most, right?
Finally, don’t forget about insulation! Using the right materials will protect against electrical shorts and keep everyone safe while working with the components. It’s a small detail that makes a big difference in safety and performance.
Additionally, selecting the correct wire gauge is vital to prevent overheating and ensure efficient operation.
Make certain all electrical connections are secure and insulated to prevent shorts and maintain consistent current flow in your spot welder.
Proper wiring techniques reduce resistance and heat buildup, ensuring efficient operation and safety.
Follow these steps carefully:
Additionally, ensure cables are firmly attached to avoid resistance and overheating as recommended in cable attachment guidelines.
Make sure all electrical components are firmly connected using appropriate terminals and fasteners to maintain consistent conductivity and prevent loosening under vibration or thermal expansion.
Use crimped or soldered connections where possible to guarantee low resistance joints. Select terminals rated for the high currents typical of spot welders, such as copper lugs or heavy-duty ring terminals.
Tighten all bolts and screws to manufacturer torque specifications, applying lock washers or thread-locking compounds to resist loosening.
Route cables to minimize mechanical strain and avoid sharp bends that could damage insulation or connections.
Regularly inspect joints for discoloration or wear, indicating increased resistance. Securely mounting components on insulated, vibration-resistant supports further stabilizes connections.
Wearing protective gloves during assembly helps ensure hand safety by preventing cuts, burns, and electrical shocks while handling electrical components.
Following these precise steps guarantees reliable electrical continuity, critical for consistent weld quality and equipment longevity.
After securing all electrical connections properly, focus shifts to insulating those connections to prevent accidental contact and short circuits.
Effective insulation guarantees operational safety and protects you from electric shock.
Follow these critical steps:
Although constructing your spot welder is a significant step, ensuring it performs reliably requires thorough testing and troubleshooting.
Begin by verifying electrical connections for continuity and proper insulation to prevent shorts.
Test the transformer output voltage under load to confirm adequate power delivery.
Use scrap metal to perform trial welds, observing nugget size and consistency.
If welds are weak or inconsistent, check electrode alignment, pressure application, and contact surface cleanliness.
Adjust welding time and current to optimize heat generation without overheating electrodes.
Inspect cooling systems for adequate flow to prevent thermal damage.
Monitor electrode wear and replace if necessary to maintain weld quality.
Document settings and results systematically to refine process parameters, ensuring repeatable, high-quality welds tailored to your workpiece materials and thicknesses.
Spot welding can’t be used on non-metal materials because it relies on electrical resistance to generate heat between metal surfaces.
Non-metals lack sufficient electrical conductivity for this process, so you won’t achieve proper heat or fusion.
If you want to join non-metal materials, you’ll need alternative methods like adhesive bonding, ultrasonic welding, or mechanical fastening.
These methods suit plastics, composites, and other insulating substances better than spot welding.
Picture gleaming copper electrodes, glowing orange under pressure.
To maintain them, you’ll clean electrode tips regularly to remove buildup, preventing uneven heat and poor welds.
Dress the electrodes with a fine file or stone to restore their shape and surface finish.
Keep coolant flowing steadily to avoid overheating.
Monitor wear, replacing electrodes before they deform excessively.
Consistent maintenance guarantees reliable, long-term welding performance with minimal downtime.
You must wear insulated gloves to protect against electric shock and burns.
Always use safety goggles or a welding helmet with proper shading to shield your eyes from intense light and sparks.
Wear flame-resistant clothing to prevent injury from hot metal and spatter.
Use ear protection if noise levels are high.
Guarantee proper ventilation or respiratory protection to avoid inhaling fumes generated during spot welding.
Stay methodical and never skip safety gear.
To weld dissimilar metals with a spot welder, first select electrodes compatible with both metals.
Often copper alloys work for low-carbon steel and chromium copper for stainless steel.
Adjust welding current and pressure carefully to accommodate differences in melting points and thermal conductivity.
Use shorter weld times to prevent excessive heat buildup.
Apply consistent pressure to ensure proper contact, and consider pre-cleaning surfaces to improve weld quality and reduce contamination between metals.
You’ll notice electrode wear or failure when weld nuggets become inconsistent or smaller, indicating poor current flow.
Look for pitting, cracking, or deformation on electrode tips, which reduces contact area. Increased weld time or higher current requirements also signal electrode degradation.
Overheating causes discoloration and surface roughness.
Regularly inspect electrodes for these signs to maintain weld quality and prevent equipment damage.
Replace worn electrodes promptly to guarantee reliable spot welding.
Now that you’ve carefully gathered materials, assembled components, and wired everything securely, the final step awaits. Will your spot welder deliver the precise, powerful welds you envisioned?
Testing and troubleshooting are essential; don’t rush through them. Each adjustment brings you closer to peak performance.
Stay methodical, observe results closely, and refine your setup. The moment you achieve consistent, strong welds, you’ll realize the true payoff of your meticulous work.