Phone:
(701)814-6992
Physical address:
6296 Donnelly Plaza
Ratkeville, Bahamas.
Phone:
(701)814-6992
Physical address:
6296 Donnelly Plaza
Ratkeville, Bahamas.
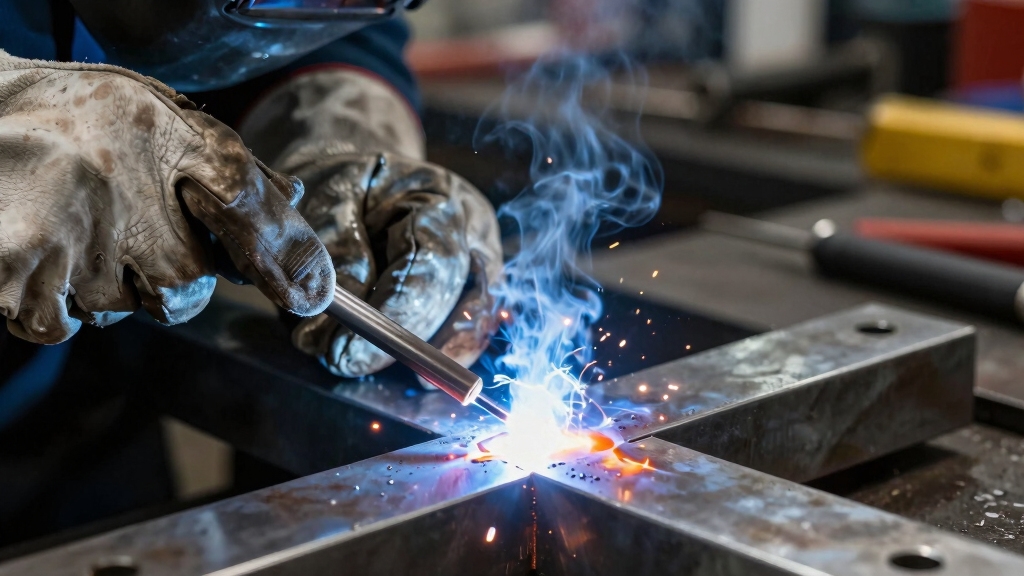
To heliarc weld, you’ll use a non-consumable tungsten electrode in a TIG torch while flowing inert gas like argon or helium to shield the weld pool from contamination.
Start the arc with a clean lift or scratch method, maintaining steady gas flow. Feed the filler rod consistently into the molten pool at a controlled angle, managing heat and pool size with travel speed and amperage.
To achieve best results, applying pulsed current enhances weld quality and control. Explore how to refine each step for precision.
Heliarc welding, also known as Gas Tungsten Arc Welding (GTAW), relies on a non-consumable tungsten electrode to create a stable arc for joining metals.
Heliarc welding uses a non-consumable tungsten electrode to generate a stable arc for metal joining.
You’ll use an inert gas, typically argon or helium, to shield the weld pool from atmospheric contamination.
The tungsten’s high melting point, about 6170°F, guarantees it stays intact during the process.
Initially developed for magnesium with helium shielding, the technique adapted to argon and gas mixtures for improved weld penetration and heat control.
You control the arc intensity precisely, often with a foot pedal, while maintaining a consistent distance between the electrode and workpiece.
This method produces clean, high-quality welds, especially on thin materials, by preventing oxidation and contamination through effective gas shielding and stable arc maintenance.
Heliarc welding is ideal for creating corrosion-resistant welds on lightweight and non-ferrous metals used in aerospace and automotive industries.
Select the proper equipment carefully to guarantee peak weld quality and safety. You’ll need a TIG torch with a non-consumable tungsten electrode, a compatible inverter or transformer welding machine, and a suitable shielding gas source.
Prepare your workpiece by thoroughly cleaning it to remove all contaminants. Ensure the weld area is free of rust, oil, or paint. Proper surface prep prevents weld defects and improves arc stability.
| Equipment | Purpose |
|---|---|
| TIG torch | Produces arc with tungsten |
| Tungsten electrode | Non-consumable arc conductor |
| Welding machine | Controls current and starts arc |
| Shielding gas | Protects weld pool |
| Filler rod | Adds material to joint |
Ensure your workspace is organized and that components are within reach before welding.
Before striking the arc, you need to properly set up the shielding gas to protect the weld area from atmospheric contamination.
Begin by confirming your gas cylinder contains the appropriate inert gas: argon, helium, or a mixture.
Attach the regulator and flowmeter securely, then adjust the flow rate to about 15-20 cubic feet per hour.
Ensure consistent coverage without turbulence. Open the gas valve fully, then fine-tune the flow.
Next, verify the TIG torch’s gas hose connection is tight and free from leaks.
Start the gas flow before initiating the arc to create a protective atmosphere.
Use your welding machine’s HF, lift, or scratch start method to ignite a clean arc.
Ensure the tungsten electrode doesn’t touch the workpiece to avoid contamination.
Maintain gas flow throughout to preserve weld integrity.
For optimal results, adjust the flow rate according to the gas type and welding conditions to prevent contamination or turbulence.
Once you’ve established a stable, clean arc with consistent shielding gas coverage, you can begin adding filler metal to the weld pool.
Hold the filler rod at a 15 to 20-degree angle, feeding it steadily into the leading edge of the molten puddle.
Maintain a 15-20 degree angle, feeding the filler rod steadily into the molten puddle’s leading edge.
Avoid dipping the rod directly into the arc to prevent contamination and spatter.
Maintain a consistent travel speed and electrode position to control the weld pool size and shape.
Watch the puddle carefully; adjust your torch angle or current as needed to keep the pool fluid but contained.
Proper manipulation of the filler metal and weld pool guarantees sound fusion, even penetration, and minimal distortion.
Always keep shielding gas flowing uninterrupted to protect the weld from oxidation throughout the process.
Use a foot pedal or fingertip control to modulate amperage and precisely control heat input during welding.
Although pulsed current requires careful setup, it substantially enhances your control over the heliarc weld pool. By alternating between high and low current phases, you regulate heat input precisely. This minimizes distortion and prevents burn-through on thin materials.
This modulation improves weld bead appearance and consistency while maintaining adequate penetration. To implement pulsed current effectively, configure your welding machine’s pulse frequency, peak current, background current, and duty cycle according to the material thickness and joint design.
Use foot pedal control to adjust the arc dynamically during welding. Pulsed current also reduces the weld pool’s fluidity, giving you better manipulation of filler metal placement. Overall, adopting pulsed current boosts efficiency and weld quality, especially on delicate or heat-sensitive components. The controlled alternation between peak and background currents is key to managing weld pool stability and droplet transfer.
You should clean your TIG torch regularly to prevent contamination and sputtering.
Inspect the tungsten electrode for wear or damage, sharpening or replacing it as needed.
Make sure the gas lens and nozzle are free from debris to maintain proper shielding gas flow.
Tighten all connections securely and check hoses for leaks.
Store your torch in a dry, safe place to avoid physical damage and corrosion, preserving its functionality for longer use.
Common causes of tungsten electrode contamination include touching the electrode to the workpiece or molten weld pool, which deposits metal onto the tungsten.
Using improper arc starting methods, like scratch starting on an inverter, can also introduce contaminants.
Additionally, insufficient shielding gas flow allows atmospheric gases to oxidize the electrode tip.
To avoid contamination, maintain proper arc starting techniques, guarantee continuous gas coverage before and during welding, and never let the tungsten contact molten metal.
Yes, you can automate heliarc welding for large-scale production.
Automated systems use robotic arms equipped with TIG torches to maintain consistent electrode positioning and shielding gas flow.
You’ll benefit from precise control over arc parameters, pulsed current application, and filler wire feeding.
Automation reduces human error, increases speed, and improves weld quality on thin materials.
However, you must guarantee proper programming and maintenance to prevent tungsten contamination and maintain shielding integrity.
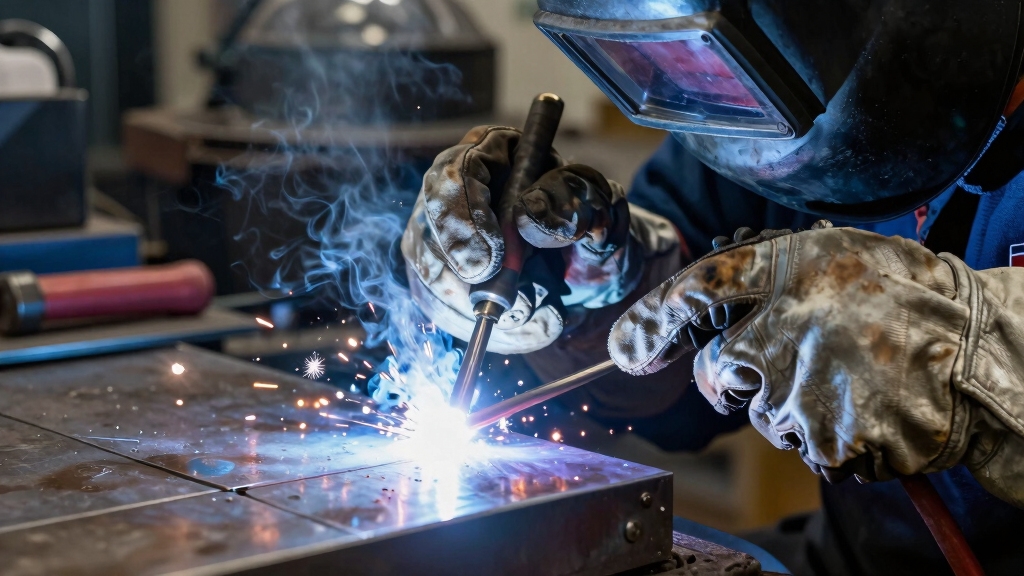
You absolutely must gear up beyond basic gloves and goggles like your welding life depends on it because it does.
Wear a flame-resistant jacket and pants to shield from sparks and UV radiation.
Use a full welding helmet with a proper shade lens to protect your eyes and face from intense arc rays.
Don’t forget ear protection against noise and ventilation or respirators to avoid toxic fumes.
Staying methodical with PPE guarantees your safety.
Different shielding gas mixtures directly influence weld appearance by altering arc stability, penetration, and bead smoothness.
Pure argon produces a clean, bright weld with minimal spatter, ideal for thin metals.
Adding helium increases arc heat, improving penetration and creating a wider, more rounded bead.
Argon-helium blends balance control and heat, resulting in smoother, more aesthetically pleasing welds.
You’ll adjust gas mixtures based on material thickness and desired weld finish.
Now that you’ve mastered heliarc welding’s core steps, think of your weld as a living river. Each controlled current shapes a flawless seam.
By understanding equipment, prepping your workpiece, setting up shielding gas, and precisely adding filler metal, you guarantee a clean, strong bond.
Incorporate pulsed current techniques to refine your weld quality further. With methodical practice, your skills will flow smoothly, producing consistent, professional results every time.