Phone:
(701)814-6992
Physical address:
6296 Donnelly Plaza
Ratkeville, Bahamas.
Phone:
(701)814-6992
Physical address:
6296 Donnelly Plaza
Ratkeville, Bahamas.
To do a muffler delete without welding, first measure your exhaust pipe’s diameter and length precisely. Cut at the muffler connection using a Sawzall or rotary tool, applying penetrating lubricant to hangers for easier removal.
Select heat-resistant, correctly sized clamps and sleeve couplers to guarantee a tight fit. Install the replacement pipe onto hangers with rubber grommets intact, tighten clamps gradually to prevent leaks, and check alignment thoroughly.
Follow these steps carefully to achieve a secure, durable installation before exploring additional tips.
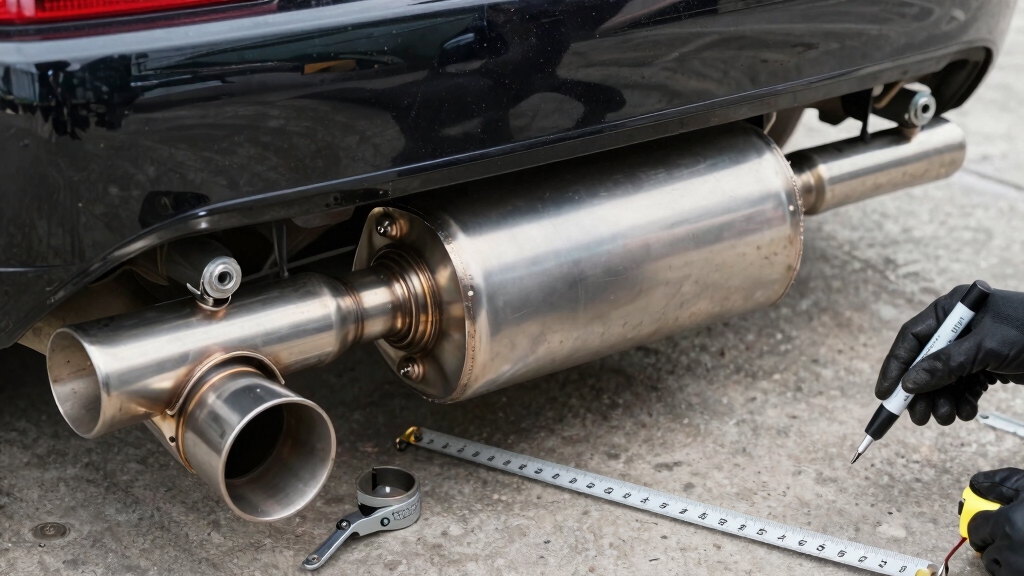
Begin by accurately measuring the diameter and length of your exhaust pipe to assure a proper fit for the replacement pipe.
Start by precisely measuring your exhaust pipe’s diameter and length for an ideal replacement fit.
Use a measuring tape to record the exact outer diameter and the length from the muffler connection point to the hanger or pipe end.
Note these dimensions carefully, as even slight discrepancies can cause leaks or poor alignment.
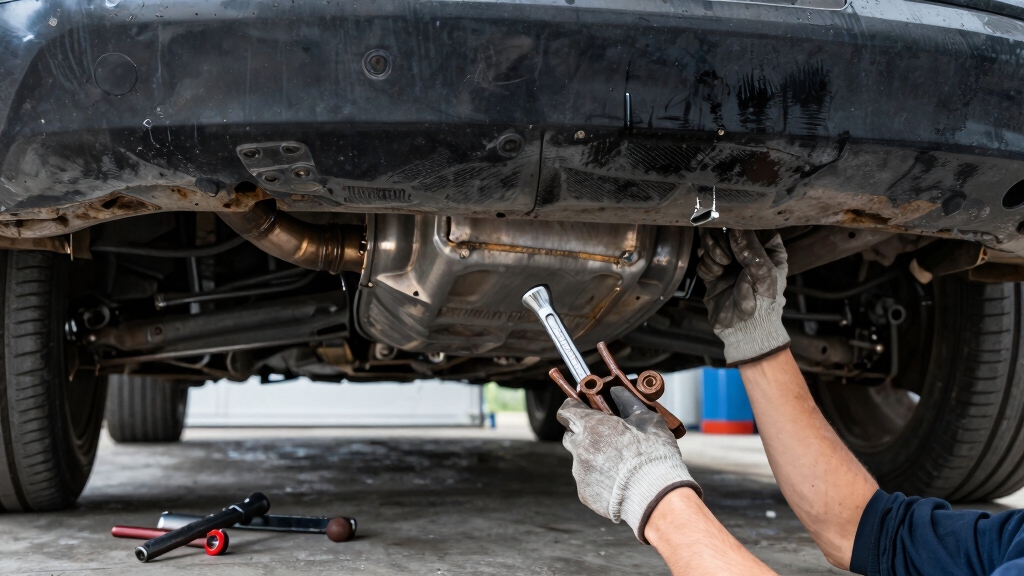
Next, apply a penetrating lubricant like PB Blaster to any rusty hangers to ease removal later.
Allow it to soak thoroughly. If hangers remain stubborn, plan to cut them minimally with a Sawzall or rotary cutting tool, preserving as much bracket as possible for reattachment.
Confirm all measurements against replacement parts from the exhaust shop before proceeding to assure compatibility and a smooth installation process.
It is also important to lubricate rubber hangers with soapy water to facilitate easier removal and prevent damage during disassembly.
Once you’ve prepared your exhaust and guaranteed all measurements are accurate, you can remove the muffler by cutting the pipe at its connection point.
Use a Sawzall or rotary cutting tool for a clean, straight cut to assure proper clamp alignment.
Apply PB Blaster on hangers before loosening or cutting them to avoid damage.
Cut exhaust hangers minimally to reuse brackets and rubber grommets.
After cutting, remove the muffler completely for a straight pipe replacement.
Verify the cut ends line up with mounting bolts for a precise fit.
When removing components like mufflers, using pneumatic tools with controlled impacts can help prevent damage to surrounding metal parts.
| Step | Action |
|---|---|
| 1. Apply PB Blaster | Loosen rusty hangers |
| 2. Cut pipe | At muffler connection point |
| 3. Cut hangers | Minimize to reuse brackets |
| 4. Remove muffler | Confirm straight pipe fit |
Select clamps and pipes that precisely match your exhaust pipe’s diameter and length to guarantee a secure, leak-free connection.
Begin by measuring the exact diameter and length of your existing exhaust pipe with a tape measure.
Choose T-bolt or U-bolt clamps rated for high heat and corrosion resistance to assure durability.
Pipes should be cut straight and sized to slip over or into the existing pipe ends without gaps.
Consider using a sleeve coupler between pipe joints for enhanced sealing.
Flex braided pipes can reduce vibration and back pressure but must still match diameter specifications.
Avoid clamps that are too large or too small, as these will compromise the seal and cause exhaust leaks.
Precision in matching components is critical for a successful muffler delete without welding.
For optimal results, ensure a tight fit with minimal gap between pipe joints to stabilize the connection and prevent leaks.
After making sure your replacement pipe matches the original exhaust diameter and length, position it carefully over the existing hanger stubs.
Align the pipe so it sits flush with the original bracket bolts and make certain the rubber grommets remain in place on the hangers to reduce vibration.
Position the pipe flush with bracket bolts, ensuring rubber grommets stay on hangers to minimize vibration.
Next, perform a dry fit to verify proper alignment and clearance before securing.
Once satisfied, slide the pipe fully onto the hanger stubs and tighten the T-bolt or U-bolt clamps around the connection points, deforming the pipe slightly to create a snug seal.
Confirm the pipe sits securely and doesn’t shift under light pressure.
Recheck hanger tightness and reposition clamps if necessary.
This method keeps your installation solid without welding while maintaining proper exhaust system support.
Be sure to maintain proper heat control during installation to avoid damaging surrounding components.
Guarantee airtight connections by thoroughly inspecting all clamp joints and pipe interfaces after installing your replacement pipe.
Use T-bolt or U-bolt clamps with properly sized sleeves to make certain tight seals.
Tighten clamps incrementally, deforming the pipe slightly for a secure fit.
Check for gaps or misalignment and adjust pipe positioning accordingly.
Reuse rubber grommets to maintain hanger stability and reduce vibration-induced leaks.
| Issue | Cause |
|---|---|
| Exhaust Leak | Loose clamp or misaligned pipe |
| Vibrations | Missing or damaged grommets |
| Clamp Slippage | Incorrect clamp size or torque |
| Rust Formation | Poor surface prep or exposure |
Regularly recheck clamp tightness post-installation to prevent leaks and prolong the integrity of your muffler delete setup.
Proper surface preparation is essential to avoid rust formation and ensure long-lasting protection against corrosion on metal parts during installation, so always follow recommended cleaning and coating procedures for exposed steel surfaces to maintain corrosion resistance.
No, a muffler delete isn’t legal in all states. You’ll find regulations vary widely, especially regarding noise limits and emissions standards.
Some states require vehicles to maintain original exhaust components to pass inspections. Before you remove your muffler, check your state’s Department of Motor Vehicles or local environmental agency rules.
Ignoring these laws can lead to fines or failed inspections, so it’s essential you verify legality beforehand.
Imagine your engine’s roar bursting louder through open pipes. Muffler deletes amplify noise by removing sound-dampening barriers.
You’ll notice a sharper, more aggressive exhaust tone that intensifies during acceleration. This happens because exhaust gases flow freely without muffler restrictions, increasing decibel levels markedly.
To manage this, make sure your replacement pipes and clamps fit precisely. Loose joints can cause unwanted rattles and noise leaks beyond the expected louder exhaust sound.
Yes, a muffler delete can improve fuel efficiency slightly by reducing exhaust back pressure. This allows your engine to expel gases more freely.
However, the gain is typically minimal and depends on your engine’s design. To maximize benefits, ensure your replacement pipe matches the original diameter.
Also, install flex pipes correctly to maintain efficient exhaust flow. Remember, improper installation might negate efficiency gains or cause performance issues.
You should check your clamps every 3 to 6 months, especially after harsh weather or long drives.
Look for signs of rust, loosening, or deformation. Replace clamps immediately if they show corrosion, cracks, or if the seal weakens, causing leaks or rattling.
Regular inspection guarantees a secure, leak-free connection. Keeping clamps tight and intact prevents exhaust leaks and maintains performance, extending the life of your muffler delete setup.
Remember, “measure twice, cut once.”
By carefully measuring and preparing your exhaust, removing the muffler without welding, and securely installing the replacement pipe with the right clamps and hangers, you’ll guarantee a clean muffler delete.
Don’t forget to inspect for leaks thoroughly to maintain peak performance and safety.
Following these precise steps guarantees a professional muffler delete job without welding, saving you time and effort while achieving the desired sound and function.