Phone:
(701)814-6992
Physical address:
6296 Donnelly Plaza
Ratkeville, Bahamas.
Phone:
(701)814-6992
Physical address:
6296 Donnelly Plaza
Ratkeville, Bahamas.
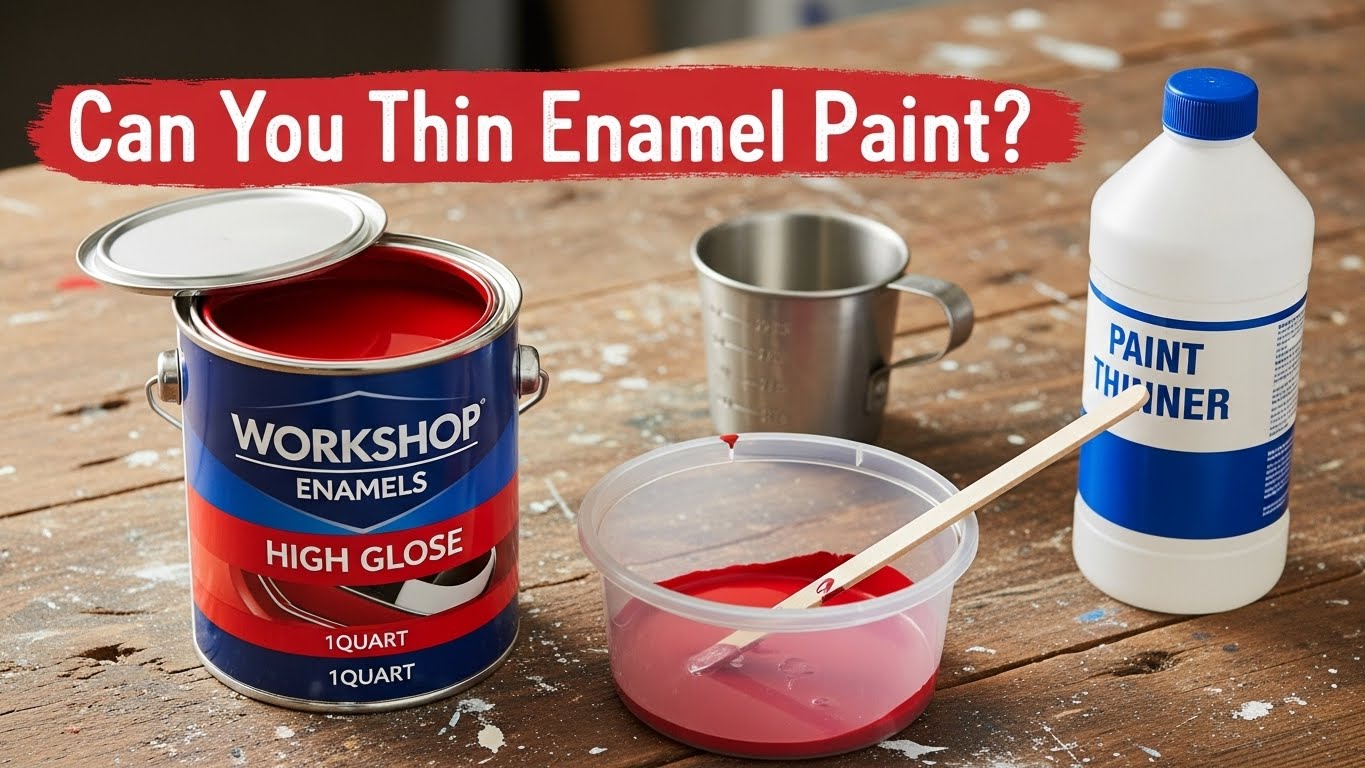
You can thin enamel paint by adding the appropriate thinner: mineral spirits for oil-based or enamel paints, and water for water-based types. This improves flow and application.
Start with about 3–5% thinner of the total paint volume. Mix thoroughly and test consistency before use. Avoid over-thinning to prevent adhesion issues and poor coverage.
Using the right thinner and ratio guarantees a smooth, durable finish. Explore further to master thinning ratios, tools, and safety tips for peak results.
Although enamel paints vary widely in composition and application, understanding their types helps you select the right product for your project.
Oil-based enamel contains linseed oil and organic solvents, delivering a durable finish with superior scratch resistance. However, it requires mineral spirits for cleanup and has a longer drying time. It is known for its long-lasting durability, often lasting up to 15 years when properly applied.
Oil-based enamel offers a tough, scratch-resistant finish but needs mineral spirits for cleanup and longer drying times.
Water-based enamel uses resin binders and water, drying quickly with easy water cleanup. It’s ideal for interior surfaces but is less wear-resistant. Proper surface preparation and coating thickness are critical to preserving corrosion resistance for water-based enamels.
Acrylic enamel blends oil and water properties, offering quick drying, UV resistance, and flexible, corrosion-resistant finishes. This makes it suitable for exterior and automotive use.
Alkyd enamel modifies oil-based formulas with synthetic polymers and siccatives. It dries faster than traditional oils while providing a glossy, durable coating.
Specialty enamels include epoxy for chemical resistance and high-temperature options for heat exposure, expanding functional applications with enhanced corrosion and chemical resistance.
Selecting the appropriate thinner for your enamel paint depends on the paint type and application method you’ve chosen.
Mineral spirits, especially odorless variants, serve as a versatile, balanced thinner suitable for most enamel paints, minimizing defects.
For alkyd enamels, aliphatic hydrocarbon thinners enhance leveling, gloss, and sheen.
If you’re spraying, VM&P naphtha’s fast-drying properties accelerate drying time effectively.
Toluene offers a smoother finish but raises safety concerns and drying time, so use it cautiously within legal limits.
Xylene thinners improve flow but risk damaging certain brushes or rollers and may affect adhesion.
Always verify compatibility with your specific paint and guarantee proper ventilation due to flammability and fumes.
Prioritize manufacturer guidelines to match thinner type with your enamel paint’s chemistry and application requirements.
Ensure the work area is well-ventilated and away from heat or open flames to maintain safety during application. Proper use of personal protective equipment helps minimize exposure risks during thinning and painting.
When you thin enamel paint, achieving the right ratio is crucial for ideal flow and finish quality. Commonly, a 2:1 paint-to-thinner ratio works well for both airbrushing and brushing, providing a consistency close to milk, which guarantees smooth application. Wearing protective gloves during the thinning process helps prevent skin irritation from solvents and chemicals.
For airbrushing, some users prefer starting with 1:1 but adjust to avoid opacity loss. Ratios may vary from 3:2 to 3:1 depending on paint age and viscosity. Special effects might require much higher thinner amounts, even up to 1:10. It is also important to consider the operating pressure of your airbrush, as typical spraying at 20 psi influences the paint flow and thinning needs.
Consider environmental factors and solvent types, as they affect evaporation and flow. Always stir paint before thinning and test small samples to refine ratio. Over-thinning reduces adhesion and color density, especially when brushing, where less thinner maintains control and prevents runs.
First things first, you need to pick the right thinner for your enamel paint. If you’re using water-based paint, go for water. On the other hand, if you have oil-based paint, mineral spirits are your best bet.
Once you’ve got your thinner, it’s time to measure it out. Start with a small amount—about 3-5% of the total paint volume is usually recommended. This helps you control the viscosity without making it too runny right off the bat. Be sure to follow manufacturer guidance closely to avoid thinning issues that can affect adhesion and finish quality.
After mixing the thinner into your paint thoroughly, give it a test. Check how it flows; this will give you a good idea of whether you need to adjust the consistency. If it’s not quite there yet, feel free to tweak it a little at a time until you hit that sweet spot for application.
Because choosing the right thinner directly affects your enamel paint’s performance and finish, understanding the properties and compatibility of available thinners is essential.
Mineral spirits serve as the most universal thinner, compatible with most oil-based and alkyd enamels and suitable for brushing or spraying. It is important to follow manufacturer guidelines when mixing to maintain the paint’s protective qualities.
Naphtha offers fast drying, ideal for alkyd enamels and spray applications but may dry too quickly for some uses.
Toluene, used in professional settings, supports high-performance enamels but demands careful handling due to toxicity and flammability.
Avoid lacquer thinner entirely, as it reacts adversely with enamel paint. Enamels require enamel thinner for thinning and brush cleaning to avoid damage.
Penetrol, used as an additive with mineral spirits, improves flow and reduces brush marks, mainly for brushing but also spray-compatible.
Always prioritize manufacturer guidelines to assure peak results and safety during application.
Selecting the appropriate thinner is only part of achieving an ideal enamel paint application. Accurately measuring the thinner-to-paint ratio guarantees proper consistency and performance.
Start by pouring a measured amount of paint into a clean container. Then add thinner incrementally, beginning around 10% thinner by volume for brush applications. For beginners, it is recommended to err toward thinner mixtures to allow multiple applications and avoid overdoing the effect.
Use precise tools like measuring cups or syringes to maintain accuracy. Stir thoroughly after each addition to assure uniform mixing.
Adjust thinner amounts based on your application method: brush typically needs about 10%, spray guns require 33% to 50% for a milk-like flow, and washes demand much higher ratios.
Consider ambient temperature and paint formulation, as colder conditions or thicker paints may require more thinner. Always mix and measure carefully to optimize flow, coverage, and drying characteristics before testing.
When you test the consistency of thinned enamel paint, you’ll want to evaluate its flow, opacity, and surface adherence carefully. Applying the paint with a light touch ensures that it behaves like ink and flows smoothly from the brush, filling details without force.
Start by applying a small amount on your hand or a test surface, observing for brush marks and smoothness. Check how quickly the paint flows through application tools or spray gun filters to assess thickness and viscosity. Note opacity changes; if coverage is too thin, add more paint.
If too thick, add thinner gradually. Make certain the paint follows surface contours during drying, considering water evaporation and shrinkage effects. After each adjustment, mix thoroughly and retest.
Avoid over-thinning to prevent weakened gloss and uneven drying. This iterative process guarantees peak flow and finish quality, readying your enamel paint for consistent, smooth application. Like shrinkable gloves, controlling material thickness precisely ensures optimal performance and durability.
Although thinning enamel paint requires careful attention, using the right tools and techniques guarantees a smooth, even application.
Thinning enamel paint properly ensures a flawless, professional-quality finish with smooth, even coverage.
When spraying, HVLP sprayers with adjustable nozzles offer precise control. Airless sprayers suit larger surfaces but demand careful thinning. Airless spraying applies thicker paint without brush marks. Gloves with heat-resistant stitching can protect your hands during spray application when working with solvent-based thinners.
For brushing, select quality flat or round brushes depending on your surface shape. Gradually add thinner—water for water-based or mineral spirits for oil-based—testing consistency before application.
Always apply multiple thin coats for optimal coverage and finish.
When you over-thin enamel paint, it can lead to a muddy consistency that not only clogs your spray equipment but also ruins the finish quality. It’s frustrating, right? Additionally, improper thinning can compromise the protective properties of the coating, similar to how damaging the zinc coating on galvanized steel reduces its corrosion resistance.
Plus, if you choose the wrong thinner, you might end up accelerating the drying process or triggering chemical reactions. This could mess with adhesion and leave your surface looking less than smooth.
Using a thinner specifically designed for enamel paint is essential to avoid poor adhesion and paint finish issues.
Exceeding recommended thinning levels can severely compromise enamel paint’s performance by altering its consistency and drying behavior.
When you thin enamel paint too much, it loses body, leading to poor coverage and a runny texture that causes sagging or drips.
The drying process also suffers; fast-evaporating solvents can induce surface defects like orange peel, while diluted binders prolong tackiness and reduce durability.
Over-thinned paint weakens adhesion, increasing peeling risk and reducing resistance to abrasion and chemicals.
You’ll notice uneven finishes, streaks, and possible flaking due to pigment separation.
Additionally, proper surface preparation is essential to avoid contamination and ensure optimal adhesion when applying enamel paint over metal substrates coated with corrosion-resistant primers.
Selecting the wrong thinner for enamel paint can severely compromise both application and finish quality.
Using solvents not formulated for enamel, such as lacquer thinner or acetone, risks improper paint dissolution, uneven drying, and fish-eye defects.
These aggressive solvents evaporate too fast, disrupt film formation, and increase flammability hazards. Proper ventilation and respiratory protection are crucial to minimize inhalation risks.
Additionally, incompatible thinners like xylene degrade application tools by softening roller glue and causing brush hair loss.
Non-enamel thinners often contain additives that interfere with paint flow and adhesion, leading to cracking or peeling.
They can also dull the intended high-gloss finish.
For safety and best results, use mineral spirits or odorless mineral spirits, which are specifically compatible with enamel chemistry.
Avoid mixing solvents to prevent cloudiness or separation and preserve equipment integrity and environmental safety.
It is important to ensure proper ventilation due to the strong odour emitted by many enamel paint thinners.
Although achieving a smooth finish with enamel paint requires attention to multiple factors, focusing on proper thinning, multiple thin coats, and consistent application techniques will greatly improve your results.
Achieving a smooth enamel finish hinges on proper thinning, multiple thin coats, and consistent application techniques.
Start by thinning your paint within the 5–10% range using the recommended thinner for your enamel type. For brush painting, it is best to use the manufacturer-recommended thinner since it provides a longer workable open time. Apply several thin coats rather than one thick layer, allowing adequate drying time in between.
Lightly sand primer coats to enhance adhesion and smoothness. Consider additives like Penetrol to improve flow and leveling, reducing brush marks and orange peel texture.
Maintain a steady spray technique and consistent distance to guarantee uniform coverage.
Proper thinning and application techniques improve enamel paint finishes, but working with paint thinners demands strict safety measures to protect yourself and your environment.
Always wear chemical-resistant gloves, safety goggles, and respiratory protection in poorly ventilated areas. Make sure proper ventilation by opening windows and using exhaust fans to disperse harmful vapors. Wear gloves, goggles, and splash guards to protect exposed skin from harmful chemicals. It is essential to use a respirator rated for chemical fumes to prevent inhalation hazards.
Keep ignition sources away, use non-sparking tools, and ground containers to prevent fire hazards. Immediately contain and clean spills with absorbent materials, removing contaminated clothing and washing exposed skin thoroughly.
Dispose of paint thinner according to local hazardous waste regulations, never pouring it down drains. Keep a Class B fire extinguisher and a first aid kit nearby.
Follow safety data sheet instructions closely, and seek medical attention for exposure-related symptoms to minimize health risks.
Thinning enamel paint can reduce its durability over time by weakening the binder concentration. This leads to a less robust film that’s prone to cracking, chipping, and abrasion.
If you over-thin, the paint’s hardness and chemical resistance decline, causing softer finishes that attract dirt and degrade quicker. To maintain long-term durability, you should thin enamel paint carefully within recommended ratios and use compatible solvents.
This ensures proper adhesion and film integrity.
Yes, you can thin enamel paint for airbrush use. Start with a 50/50 ratio of paint to thinner, adjusting as needed for proper flow and atomization.
Use mineral spirits or a proprietary enamel thinner for best results. Avoid over-thinning to prevent poor coverage or spider webbing.
Always mix thoroughly, test spray, and apply multiple thin layers. Clean your airbrush promptly to avoid clogging from dried enamel paint.
They say, “A stitch in time saves nine,” and that applies here—you should use thinned enamel paint within months up to two years max.
Thinning accelerates solvent evaporation, causing degradation faster than unthinned paint.
Store it in airtight glass containers with tight caps to extend life.
Keep it cool, clean bottle threads before sealing, and stir well before use.
Regularly inspect paint to avoid gumming or separation that can harm your airbrush.
Yes, thinning enamel paint can change its color and gloss finish.
When you over-thin, the paint becomes more transparent, revealing underlying surfaces and reducing opacity.
Excessive thinner lowers the solid content, resulting in a thinner dry film and diminished gloss.
Choosing the wrong thinner or thinning ratio may cause gloss loss, surface defects like orange peel, or uneven color.
Precise thinning guarantees consistent color and maintains the desired gloss level.
Sure, you can confidently combine different brands of thinners with enamel paint.
Most enamel thinners mix well, maintaining material integrity and minimizing mishaps.
Manufacturers often share similar solvents, so compatibility is common.
However, you should still test a small sample to confirm there’s no adverse reaction or finish flaw.
Following this careful check keeps your coating consistent, clean, and complete, while preserving paint performance and preventing potential problems.
Just as a skilled chef knows the perfect balance of ingredients, you’ll master thinning enamel paint by choosing the right thinner and ratio.
This precision guarantees a flawless finish, avoiding common pitfalls like cracking or poor adhesion.
Follow each step carefully, use appropriate tools, and always prioritize safety.
With attention to detail, your enamel paint job will reflect both craftsmanship and durability, proving that even the toughest coatings respond well to thoughtful preparation.