Phone:
(701)814-6992
Physical address:
6296 Donnelly Plaza
Ratkeville, Bahamas.
Phone:
(701)814-6992
Physical address:
6296 Donnelly Plaza
Ratkeville, Bahamas.
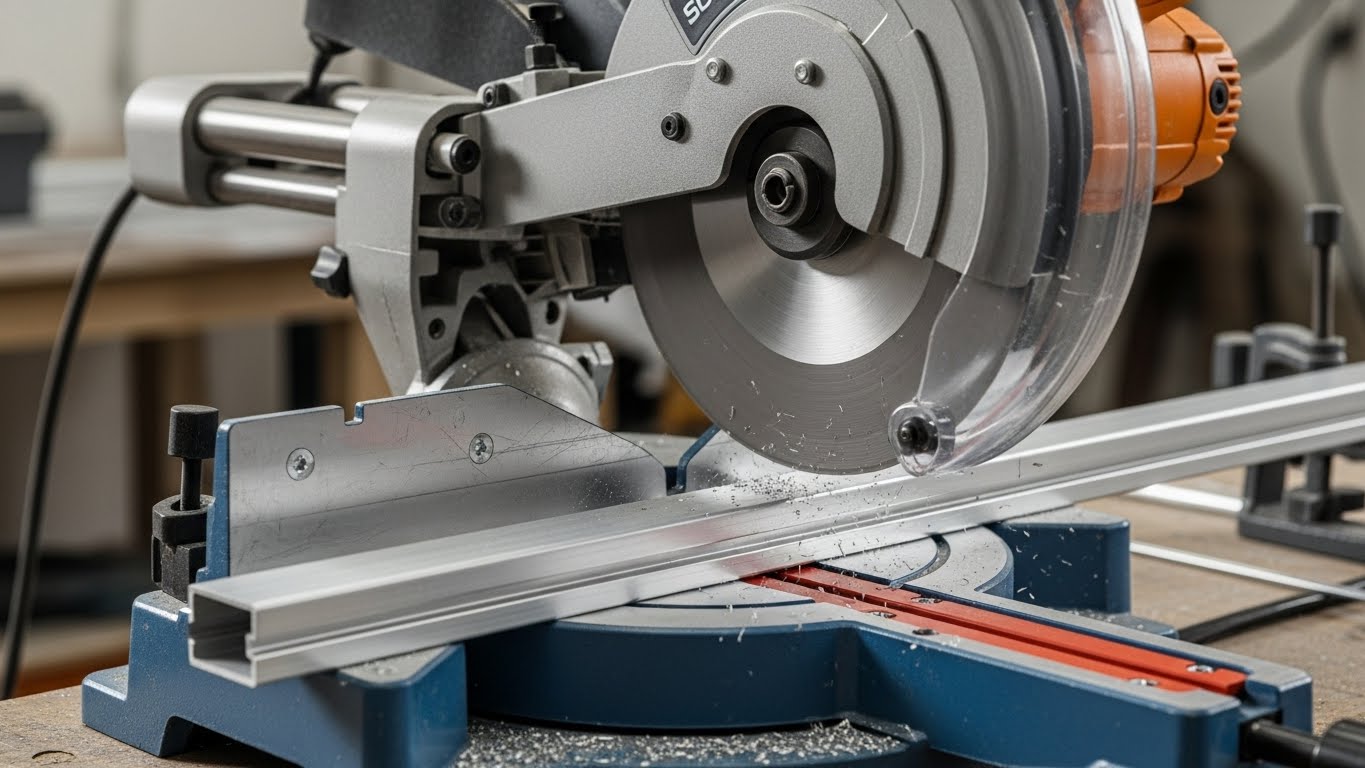
Yes, you can cut aluminum with a miter saw if you use the right blade. A carbide-tipped blade designed for non-ferrous metals is essential.
Secure the aluminum firmly with clamps against the fence to minimize vibration. Support it properly to guarantee stability.
Use slow, steady cuts with gentle pressure and consider applying a lubricant like candle wax to reduce heat and chip buildup. Following these practices guarantees clean, precise cuts.
Further guidance can help optimize your setup and technique.
When cutting aluminum with a miter saw, you’ll want to zero in on blades specifically designed for non-ferrous metals to guarantee clean, accurate cuts. Using blades optimized for aluminum helps minimize thermal distortion caused by the metal’s high thermal conductivity.
Carbide-tipped blades with tungsten carbide teeth offer the ideal combination of strength and precision, assuring polished finishes without jagged edges.
Carbide-tipped tungsten teeth deliver unmatched strength and precision for smooth, flawless aluminum cuts.
Opt for blades featuring a C6 grade carbide rating and specialized tooth geometries like triple-chip grind (TCG) or alternating top bevel (ATB) to reduce material distortion and friction. These specialized geometries also reduce deburring time significantly, making post-cutting cleanup much easier.
Choose an 80-100 tooth count for general aluminum thickness, while higher counts (up to 120) suit thin aluminum, and lower counts (around 60) are better for thicker stock.
Confirm your blade diameter—typically 10 or 12 inches—and arbor size match your miter saw specifications to avoid operational issues and maximize cutting performance. Proper matching of blade size and arbor ensures smooth kerf tolerances and safe operation.
Start by securing both your miter saw and workspace to guarantee stable, safe operation when cutting aluminum.
Firmly mount your saw to a sturdy workbench or pedestal to prevent movement and minimize vibration for cleaner cuts.
Clamp your aluminum workpiece securely against the back fence, assuring no contact between the blade and fence.
Support the workpiece with level blocks while leaving the cutting end free to avoid binding or kickback. Using washers to raise and level the workpiece can help achieve a consistent flat surface and improve cut quality.
Prepare your workspace with:
Also, inspect tools, blades, and clamps for damage and replace faulty items to ensure a safe cutting environment and reduce kickback hazards.
These steps assure precision and protect you during aluminum cutting operations.
Securing your miter saw and workspace sets the foundation for accurate and safe aluminum cutting.
Begin by selecting a sharp carbide blade designed for non-ferrous metals. Fine-tooth blades guarantee precision on thinner aluminum, while coarser blades suit thicker sections. Choosing the right saw and blade is essential to ensure efficient, high-precision cutting.
Measure and mark your aluminum tubing or extrusion clearly with a marker, then follow with a scriber for exact lines.
Position the workpiece firmly in the clamp, aligning it with the blade path, and support large pieces adequately.
Apply candle wax to the blade for lubrication, minimizing heat and friction.
Slowly lower the blade using gentle pressure, allowing it to cut without forcing.
Adjust miter angles as needed for specific shapes.
Guarantee chip management by using a vacuum attachment to maintain cleanliness and safety throughout the process.
Always prioritize personal protective equipment (PPE) to safeguard yourself during aluminum cutting. Wearing heat-resistant gloves can protect your hands from sharp edges and hot metal caused by friction during cutting.
Wear industrial-quality safety glasses or a face shield to protect your eyes from flying debris.
Use ear protection to prevent hearing damage and a dust mask to avoid inhaling fine particles.
Avoid loose clothing, jewelry, or long hair that could entangle in moving parts.
To maintain safe cutting conditions, remember to inspect your miter saw for blade sharpness, alignment, and secure installation.
It is also essential to keep the blade guard functioning properly to ensure safety during operation blade guard.
Secure the saw and support long workpieces to prevent movement.
Brace and clamp the aluminum firmly against the fence during cutting.
Keep hands at least 4-7 inches from the spinning blade and avoid freehand cuts.
Following these practices minimizes risks and guarantees precise, controlled aluminum cuts.
Managing aluminum chips can be quite a task, right? To keep your cutting area clean and avoid blade clogging, it’s a good idea to attach a vacuum hose or even use something like candle wax for lubrication. It really helps! Using a vacuum hose attached to a vacuum cleaner significantly reduces the spread of aluminum chips and keeps the workspace cleaner aluminum chip control. Regular cleaning also extends the lifespan of your aluminum tools and workpieces by preventing buildup that can lead to corrosion.
Now, when it comes to preventing blade damage, you want to make sure you’re using the right type of blade and that it’s sharp. Proper alignment is key, too, along with a slow and controlled cutting pressure. It really makes a difference! Avoid harsh abrasives or aggressive techniques that could damage the protective oxide layer on aluminum surfaces.
And if you’re working with thick extrusions, just remember to apply steady, gentle force. Check that your clamping is stable so you can achieve those accurate, burr-free cuts without putting too much strain on the saw motor. It’s all about finding that balance! Additionally, rinsing and cleaning the aluminum after cutting can prevent corrosion caused by leftover metal particles and contamination.
When cutting aluminum with a miter saw, managing the resulting chips is crucial to maintaining a clean workspace and ensuring blade efficiency. You can effectively control chips by integrating vacuum collection, applying proper lubrication, controlling cutting speed, and securing the workpiece firmly. Using dust control methods can significantly reduce airborne particulates generated during cutting.
Attach a hose from a shop vac or dust collector directly to the saw for continuous chip suction. Pre-apply candle wax on the carbide blade to reduce chip adhesion and keep the blade cool. It is also helpful to hang tarps or build a temporary box near the saw to catch scattered chips, especially for larger projects, as aluminum chips are conductive and sharp.
Use slow, steady cuts with gentle downward pressure to minimize chip buildup and avoid overheating. Clamp the aluminum tightly to prevent vibration and erratic chip scatter during cutting.
These methods help reduce airborne debris, ease cleanup, and maintain blade performance during aluminum cutting.
To prevent blade damage while cutting aluminum with a miter saw, you need to choose the right blade and maintain precise alignment. Using a blade suited for aluminum helps mitigate issues related to its softer and more ductile mechanical behavior compared to other metals.
Use a sharp, high-tooth-count carbide blade designed for aluminum to avoid binding and reduce wear. It is also important to use light lubrication such as WD-40 or a wax stick to help chip release and prolong blade life. Align the longest tooth with the waste side of the cut line and verify blade trueness before use.
Always check alignment after clamping the workpiece to minimize extrusion damage.
| Aspect | Key Action |
|---|---|
| Blade Type | Aluminum-specific carbide blade |
| Tooth Count | High tooth count for smooth cut |
| Alignment | Longest tooth on waste side |
| Maintenance | Blade trued and sharp |
Adopting these practices guarantees efficient cutting and protects your blade from premature damage.
Although cutting thick aluminum extrusions poses unique challenges, adopting specific techniques guarantees clean, precise cuts without damaging your miter saw blade.
Make sure at least three teeth engage the material simultaneously and position angular extrusions edges down for maximum contact. Use slow, steady pressure to prevent motor strain, securely clamp the workpiece, and consider lubrication with beeswax or cutting oil to reduce heat buildup. For best results, use a 120T carbide thin-kerf blade specialized for aluminum to achieve a fine finish and reduce cutting temperature. Remember that aluminum generally requires greater thickness than steel due to its lower modulus of elasticity and differing yield strengths.
Manage chips by attaching a vacuum hose and select a high-tooth-count carbide blade for fine finishes.
Position extrusions edges down in an upward arrow shape for stability. Apply candle wax or beeswax on the blade for heat reduction. Clamp tightly and use stop blocks for consistent length cuts. Attach vacuum hose to control aluminum chips and minimize burrs.
When you’re ready to make those cuts, go for a sharp, fine-tooth carbide blade that’s specifically designed for aluminum. It really makes a difference in ensuring those cuts are smooth and precise.
Now, let’s talk about setting up your miter saw. It’s super important to use secure clamps, make sure your blade is aligned properly, and don’t forget about dust extraction. This will help you maintain both accuracy and safety while you work. Always clamp work securely to the saw bed and use scrap wood supports for added stability. Using the correct blade type, such as one optimized for aluminum, reduces the risk of material deformation.
When you actually start cutting, remember to apply steady, light pressure. It’s all about control!
And of course, make sure you’re wearing the right protective gear. You definitely want to avoid any damage or injury while you’re getting the job done.
Selecting the right blade is essential for achieving clean, precise cuts when working with aluminum on a miter saw. You’ll want a carbide-tipped blade specifically designed for non-ferrous metals to avoid jagged edges and burrs. Using blades with proper tooth geometry helps in reducing spitting and tungsten inclusion during cutting.
Choose a blade with 80 to 100 teeth to balance cutting speed and finish quality. Higher tooth counts reduce roughness on aluminum surfaces. Pay attention to tooth geometry; triple-chip grind (TCG) designs slice smoothly without grabbing the material.
Carbide-tipped blades produce burr-free, smooth cuts. 80-tooth blades optimize cuts on aluminum up to 7/16” thick. Triple-chip grind teeth prevent edge burrs and clear chips efficiently.
Blade sizes from 10” to 14” fit most miter saws for various aluminum thicknesses. This guarantees clean, precise cuts with minimal finishing. For aluminum cutting, a 14-inch saw blade diameter is common and offers larger cutting capacities compared to smaller blades.
After fitting a carbide-tipped blade with an appropriate tooth count and geometry, focus on setting up your miter saw for peak performance when cutting aluminum. Position your saw in a clean, open workspace with ample room to maneuver. Place it on the floor to enhance stability when handling large aluminum pieces. Keep in mind that using a metal-cutting blade that is heavier and harder than wood blades improves cutting efficiency on aluminum. Because aluminum dust can be hazardous, ensure your workspace has proper ventilation to reduce inhalation risks.
Keep the saw unplugged during initial setup and confirm blade alignment by matching the longest tooth to the cut line before clamping. Accurately measure and mark your cut line using a speed square and a sharp pencil. Secure the workpiece firmly, rechecking alignment after clamping. Connect a dust collection system to minimize chip scatter. Apply candle wax or cutting oil to the blade to reduce heat and burrs. Adjust bevel or miter angles precisely for complex cuts.
When cutting aluminum, using the correct blade is essential to guarantee clean, precise cuts and prevent damage. Choose a high-tooth-count, non-ferrous blade or a sharp wood carbide blade as a substitute to reduce burrs. Securely clamp the workpiece, aligning the longest blade tooth on the waste side of your cut line.
Apply slow, steady pressure, letting the blade do the work without forcing it. Always wear protective gear and unplug the saw during setup.
Mark cut lines precisely with a speed square and verify twice. Clamp the aluminum firmly, avoiding blade interference. Use candle wax or cutting oil to lubricate the blade.
Attach a vacuum hose to collect aluminum chips and maintain a clean workspace. These practices are essential for clean, accurate cuts while maximizing safety.
Yes, you can cut aluminum pipes with a miter saw if you use a fine-toothed, carbide-tipped blade designed for metal cutting.
Make sure to mark your cuts accurately, apply light pressure, and cut slowly to avoid overheating or motor strain.
Secure the pipe firmly and consider lubricating the blade with wax or cutting oil to reduce buildup.
Always wear safety gear and use a vacuum to control aluminum chips for a clean, precise cut.
To prevent aluminum bending, balance your blade’s bite by backing the billet with a brace or board.
Bolster your block with balanced, beefy clamps to banish bending.
Break big cuts into bite-sized, shallow segments, avoiding abrupt aggression.
Boost feed rates but back off depth to balance force.
Bring in coolant to curb heat and chip clumping.
You don’t necessarily need water cooling when cutting aluminum on a miter saw.
While water cooling helps manage heat, you can use alternatives like wax sticks or spray lubricants to reduce friction and prevent aluminum from sticking to the blade.
These methods keep the blade sharp and cuts smooth without the mess of water.
Just make sure proper blade speed, use sharp carbide blades, and allow cooling breaks for peak results.
Start by soaking skin in steaming soapy water, then switch swiftly to a short, sharp ice-cold soak.
Stick on duct tape to snatch stubborn swarf, repeating sessions as needed.
Scrub skin softly after hot showers to strip fine particles.
For tools, soak cutters in a sodium hydroxide solution to dissolve debris safely.
Always rinse thoroughly and wear safety gear.
This systematic sequence guarantees swift, safe, and successful aluminum chip removal.
Yes, you can use a cordless miter saw to cut aluminum, especially if it features a multi-material or aluminum-specific carbide blade.
Models like Evolution 40V or Makita 18V LXT handle aluminum well, providing clean, precise cuts.
For best results, use cutting lubricant and blades designed for aluminum.
Keep in mind, extended aluminum work may require dedicated saws for efficiency.
Adjust blade speed and depth stops for accuracy.
Cutting aluminum with your miter saw is like sculpting metal with precision tools. Each blade choice and technique shapes your success.
By preparing your saw properly and following safety measures, you control the cutting edge. This allows you to turn raw aluminum into clean, exact pieces.
Challenges may arise, but with the right approach, you’ll slice through smoothly. Transform your workspace into a hub of efficiency and craftsmanship. Keep these principles sharp, and your cuts will always shine.