Phone:
(701)814-6992
Physical address:
6296 Donnelly Plaza
Ratkeville, Bahamas.
Phone:
(701)814-6992
Physical address:
6296 Donnelly Plaza
Ratkeville, Bahamas.
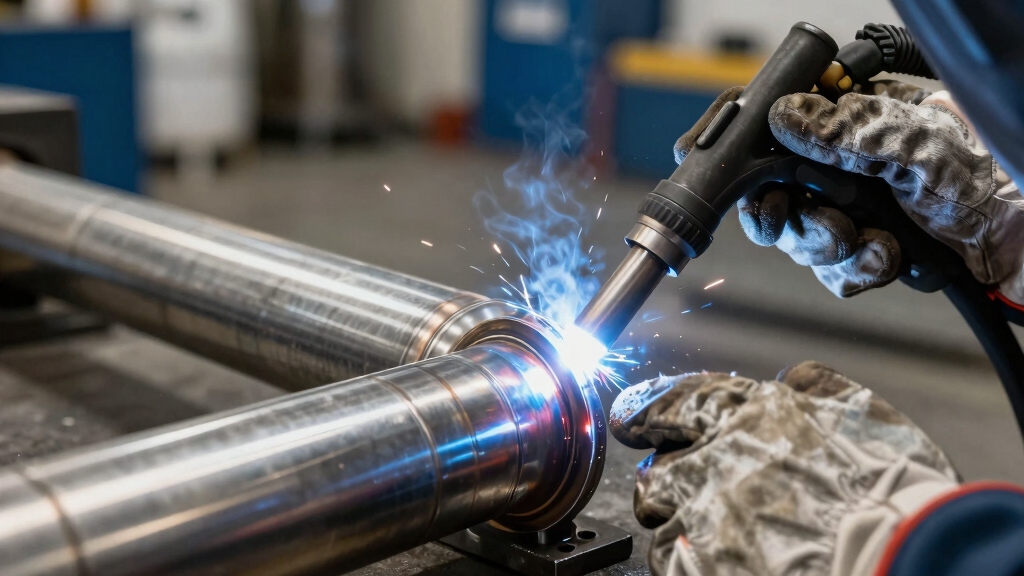
To weld stainless steel pipe effectively, you need precise fit-up with clean, square-cut edges and a 1/8-inch root gap. Use 100% argon shielding gas at about 25 cfh and back purge the pipe interior to avoid oxidation.
TIG welding with DCEN polarity and a sharp tungsten delivers ideal control and corrosion resistance.
Maintain consistent travel speed to balance heat and prevent distortion. Considering Regulated Metal Deposition can also boost speed and reduce heat input. Understanding these basics sets the stage for mastering advanced welding techniques.
When welding stainless steel pipe, you’ll want to zero in on the method that best matches your pipe’s diameter, wall thickness, and application requirements.
For pipes up to 6 inches in diameter with schedule 10 wall thickness, TIG welding is the preferred method, offering precise control and superior weld quality.
If you’re working with food-grade stainless steel thinner than 1/8 inch, autogenous TIG square butt welds guarantee high purity without filler contamination.
MIG welding works for functional welds but sacrifices aesthetics and corrosion resistance.
When speed and reduced heat input matter, consider the Regulated Metal Deposition (RMD) process, especially on 304 stainless steel, achieving 6 to 12 inches per minute without back purge.
Proper heat input control is essential to minimize distortion and preserve corrosion resistance in stainless steel pipe welds.
Before welding stainless steel pipe, you need to guarantee precise preparation to achieve strong, contamination-free joints. Start by making square cuts using an orbital saw to assure proper fit-up and alignment.
Next, clean the pipe ends meticulously, removing any oils, dirt, or oxides that could compromise weld integrity.
Thoroughly clean pipe ends to remove oils, dirt, and oxides that can weaken the weld.
Finally, maintain a consistent root gap of about 1/8 inch for peak penetration during root passes.
These steps guarantee proper weld quality, prevent oxidation, and facilitate consistent arc stability when you proceed with TIG or MIG welding. Proper machining or beveling of pipe edges is also critical to ensure consistent root penetration and a reliable joint.
Alright, let’s dive into setting up your shielding gas and back purge for welding stainless steel pipe.
First things first, you’ll want to go with pure argon as your shielding gas for TIG welding. This choice will help ensure that your arc stays nice and stable while also preventing any contamination—super important for a clean weld!
Once you have your shielding gas sorted, it’s time to focus on the back purge. You’ll be using argon here too, and the goal is to push out any oxygen inside the pipe. Aim for a flow rate of around 25 cubic feet per hour (cfh) and let that run for at least five minutes before you start welding. This step is crucial!
Oh, and don’t forget about sealing the purge area. It’s really important to maintain that inert atmosphere so you can avoid oxidation on the backside of your weld. Taking these steps will set you up for a successful welding experience.
Pure argon’s inert atmosphere effectively displaces oxygen and nitrogen, preventing oxidation and porosity during the weld.
How do you guarantee peak weld quality and corrosion resistance when working with stainless steel pipes? The key lies in selecting the appropriate shielding gas. For TIG welding, use straight argon to assure a stable arc and clean weld pool. Avoid mixed gases that can introduce carbon contamination or oxidation.
Follow these steps to optimize shielding gas selection:
This methodical approach preserves weld purity and structural performance. For enhanced penetration and weld bead quality on stainless steel, consider argon blends with small amounts of nitrogen or hydrogen.
When welding stainless steel pipes, setting up an effective back purge is critical to prevent oxidation on the weld backside and guarantee corrosion resistance.
You start by sealing the pipe ends with aluminum tape, assuring no oxygen leaks in. Then, introduce pure argon gas at about 25 cfh into the purge zone, allowing at least five minutes for complete oxygen displacement.
Maintain a stable flow throughout the root pass to protect the weld metal internally. Use a flowmeter to monitor purge gas rates precisely.
Assure purge holes in the tape direct gas to push oxygen out efficiently. Proper back purging avoids intergranular oxidation, securing weld integrity, especially on 304 schedule 10 pipes.
Neglecting this step risks oxidation and compromises corrosion resistance. Using 100% argon as the purge gas ensures excellent shielding and prevents contamination during welding.
In mastering TIG welding techniques for stainless steel pipe, you focus on precise control of heat and motion to ensure clean, corrosion-resistant joints.
Start by preparing a sharp tungsten electrode and maintain a steady argon shielding gas flow to prevent oxidation.
Control your weld puddle using a balanced forward and back motion with minimal side-to-side movement, especially during the root pass.
Key steps include:
Using a post-weld cleaning process such as brushing or pickling helps remove heat tint and restores corrosion resistance.
When it comes to welding stainless steel pipes, managing heat input is crucial. You really want to keep that corrosion resistance intact and avoid any distortion. So, how do you do that? Well, it’s all about finding the right balance.
Make sure you avoid cranking up the amperage too high. The key is to match your travel speed just right with the amount of heat you need for fusion. If you can nail that down, you’ll be on the right track. Using the proper shielding gas mixture is also essential to prevent oxidation and maintain corrosion resistance.
Controlling heat input during stainless steel pipe welding directly influences corrosion resistance and distortion levels. You’ll want to balance amperage and travel speed carefully to avoid overheating, which reduces corrosion resistance and causes warping.
Follow these key steps:
Choosing DCEN polarity helps concentrate heat on the workpiece, promoting precise penetration and reducing electrode wear for stainless steel welding.
Balancing amperage and travel speed not only optimizes weld quality but also prevents overheating. This can compromise corrosion resistance and cause distortion in stainless steel pipe welding.
You should match travel speed precisely to amperage, avoiding excessive heat input. Use trail-out techniques on bevel walls to reduce root pass overheating. Monitor heat to maintain integrity, especially with Type 304 steel that requires less heat.
| Parameter | Effect of Overheating | Control Method |
|---|---|---|
| Amperage | Grain growth, loss of corrosion resistance | Adjust to match travel speed |
| Travel Speed | Excessive heat accumulation | Increase speed to reduce input |
| Heat Input (J/mm) | Distortion, oxidation risk | Use trail-out technique and controlled amperage |
Control heat input methodically to preserve stainless steel properties and structural stability. Additionally, effective heat control techniques are essential to minimize defects like porosity and to maintain weld integrity.
When welding stainless steel pipe, avoiding common mistakes is crucial to guarantee strong, corrosion-resistant joints. You must control heat input carefully to prevent overheating, which causes discoloration and weakens the weld.
Controlling heat input is essential when welding stainless steel pipe to ensure strong, corrosion-resistant joints without discoloration.
Maintain proper shielding gas flow; insufficient coverage leads to oxidation and contamination inside the weld. Also, make certain your tungsten electrode is clean and sharp to promote consistent arc stability.
Focus on these critical points:
Additionally, ensure you use the correct polarity settings—typically DCEP for stainless steel MIG welding—to optimize heat distribution and weld quality.
Speed up your stainless steel pipe welding by using the Regulated Metal Deposition (RMD) process, which offers a controlled metal transfer method that minimizes heat input while maintaining weld quality.
RMD enables welding 304 stainless steel at 6-12 inches per minute without requiring back purge, doubling typical TIG speeds. You’ll reduce distortion and oxidation risks due to lower heat and precise metal flow.
| Parameter | RMD Advantage |
|---|---|
| Travel Speed | 6-12 in/min vs. TIG’s 3-5 in/min |
| Heat Input | Lower, reduces warping |
| Metal Transfer | Controlled, less spatter |
| Purging Requirements | No back purge needed |
| Weld Quality | Consistent, high integrity |
Use RMD for efficient, high-quality stainless steel pipe welds when speed and precision matter.
After completing your weld with the Regulated Metal Deposition process, you need to thoroughly inspect and finish the joint to guarantee it meets food-grade stainless steel standards.
Start by visually inspecting for porosity, cracks, or inclusions that compromise integrity. Next, perform dye penetrant testing to detect surface flaws undetectable to the naked eye.
Finally, measure weld profile and ensure smooth changes without undercut or excessive convexity.
This methodical approach assures your welds align with stringent food-grade requirements.
You must wear a welding helmet with a proper shade lens to protect your eyes from intense UV radiation and sparks.
Use flame-resistant gloves and long-sleeve clothing to shield your skin from heat and spatter.
Respiratory protection, like a respirator, is essential to avoid inhaling stainless steel fumes.
Don’t forget ear protection for noise and safety boots to guard against heavy objects or molten metal.
Always make certain your PPE fits correctly and is in good condition.
Oh sure, just weld stainless steel pipe in a hurricane; why not?
Environmental conditions critically affect weld quality.
Excessive wind disrupts shielding gas coverage, causing oxidation and weak, discolored welds.
Humidity promotes contamination; dust or debris leads to inclusions. You must maintain stable, clean environments with controlled airflow and proper gas purge rates.
Otherwise, you risk compromised corrosion resistance and structural integrity. Don’t let careless surroundings sabotage your stainless steel welds.
Yes, you can automate stainless steel pipe welding for large-scale projects.
Automated TIG and RMD processes guarantee consistent heat control, precise gas purging, and ideal travel speeds. This improves weld quality and speed.
You’ll need orbital welding equipment for square cuts and controlled root gaps.
Automation minimizes human error, maintains corrosion resistance, and enhances productivity, especially for high-purity or food-grade applications.
Proper setup and calibration are critical to avoid oxidation and guarantee repeatable weld integrity.
You can’t overlook post-weld cleaning; it’s as essential as the weld itself.
Start with mechanical cleaning. Grinding or wire brushing removes surface oxides and discoloration.
Then, pick chemical pickling or passivation, using nitric or citric acid to restore corrosion resistance by dissolving iron particles.
Always rinse thoroughly with clean water to prevent residue. Precision matters here; improper cleaning invites corrosion, undoing your careful welding work.
You choose filler material based on stainless steel grade to guarantee corrosion resistance and mechanical compatibility.
For example, 304 stainless steel typically requires a 308L filler, matching its chromium and nickel content to avoid sensitization.
Duplex stainless steels need duplex-specific fillers to maintain strength and corrosion properties.
Selecting improper filler risks cracking or corrosion.
Always match filler chemistry closely to the base metal’s grade for peak weld integrity and performance.
Welding stainless steel pipe demands precision and care. Your careful preparation contrasts sharply with the intense heat applied during welding.
While mastering TIG or RMD techniques, you’ll balance shielding gas flow against distortion risks. Avoiding common mistakes guarantees corrosion resistance, but skipping inspection undermines your efforts.
By methodically controlling each step, from setup to finishing, you transform complex challenges into reliable, food-grade welds that stand the test of time.