Phone:
(701)814-6992
Physical address:
6296 Donnelly Plaza
Ratkeville, Bahamas.
Phone:
(701)814-6992
Physical address:
6296 Donnelly Plaza
Ratkeville, Bahamas.
You can weld pot metal, but you’ll need to control heat very precisely because of its low melting point and inconsistent alloy makeup.
Thin sections burn through easily, and high zinc content causes porosity and cracking.
TIG welding at low amperage works best for thin parts, while MIG suits thicker pieces, though it risks melting through.
Surface prep and correct filler choice are vital. If you want to master these methods and avoid common pitfalls, there’s more to understand about pot metal repair techniques.
Why does pot metal pose such a challenge when welding? You face multiple issues due to its low melting point, typically between 420-750°F, causing rapid distortion and warpage under heat.
Its variable alloy composition, including zinc, aluminum, lead, and tin, complicates heat control, as different elements melt or vaporize unevenly.
High zinc content is particularly problematic, promoting porosity and cracking during TIG or MIG welding, which demand precise thermal management.
Additionally, thin sections common in pot metal increase the risk of burning through.
Surface contamination further impairs weld integrity, preventing strong metallurgical bonds.
Because pot metal’s heterogeneous nature and heat sensitivity require exacting parameters, you must understand its material limits before attempting any welding.
Otherwise, you risk structural failure or unusable repairs. Proper ventilation and respiratory protection are crucial due to the zinc fume hazards generated when welding zinc-containing alloys like pot metal.
Sure, you can actually weld pot metal! However, you need to be careful because it has a low melting point and its composition can change a lot. This means you’ll need to control the heat really well to avoid any distortion or cracking.
Now, if you’re working with thinner sections, TIG welding is a great option since it allows for precise heat input. On the other hand, if you’re dealing with thicker parts, MIG welding might be the way to go, but just keep in mind that it can risk melting through the material.
If welding seems a little too risky for your project, you might want to consider soldering instead. Using specialized alloys for soldering can be a reliable repair method that works well when welding isn’t the best choice.
Because pot metal alloys often contain zinc and other low-melting constituents, understanding their thermal properties is crucial to prevent defects during joining.
Although pot metal offers cost-effective versatility in manufacturing, welding it presents significant challenges due to its variable composition and low melting point.
You’ll face issues like distortion and warping when applying high heat because pot metal melts between 420°F and 750°F.
High zinc content exacerbates problems by causing porosity and cracking during welding attempts, especially with TIG or MIG methods.
Precise heat control is critical; excess heat risks melting through thin sections.
Contaminants such as dirt or oxidation further hinder bond strength, demanding meticulous surface preparation.
Since pot metal alloys vary widely, not all respond well to welding, making the process unpredictable.
Understanding these technical constraints is essential before attempting repairs or modifications involving pot metal welding.
Proper surface preparation and fume control are critical to minimize zinc vaporization and ensure weld quality.
Welding pot metal demands careful technique due to its complex composition and sensitivity to heat. You need to control heat input precisely to avoid melting or warping.
TIG welding suits thin sections because it uses a non-consumable tungsten electrode and low heat, but only certain pot metal alloys respond well. Prepare the surface meticulously with steel wool to guarantee a clean bond.
MIG welding provides stronger joints on thicker parts but risks overheating. For many repairs, soldering with Super Alloy 1 at 350°F offers safer thermal control, bonding pot metal to diverse metals efficiently.
Apply flux correctly to prevent porosity and preheat evenly to avoid localized melting. Always back gaps with sand or soaked wood to stabilize cooling and reinforce structural integrity.
Controlling heat input through techniques like short, controlled passes is crucial to minimize thermal stress and avoid cracking during welding.
Frequently, soldering proves more effective than welding for pot metal repairs due to the alloy’s low melting point and variable composition.
Soldering often outperforms welding for pot metal repairs because of its low melting point and variable alloy composition.
When you attempt welding, the intense heat risks melting or warping thin sections, especially given pot metal’s melting range of 420-750°F.
Soldering operates at lower temperatures, around 350°F with Super Alloy 1, minimizing thermal distortion and preserving structural integrity.
Additionally, pot metal’s inconsistent alloy makeup complicates welding bond reliability but accommodates soldering’s gentler flux-assisted adhesion.
You can use soldering to fill gaps, rebuild missing material, and join to dissimilar metals without risking porosity or cracking common in TIG or MIG welds.
To summarize, when precision and heat control are paramount, and the metal’s thinness or fragility is a factor, soldering offers superior results over welding for pot metal repair.
However, unlike welding processes that require weld-through primer to maintain corrosion resistance and joint integrity under high heat, soldering typically avoids these complications.
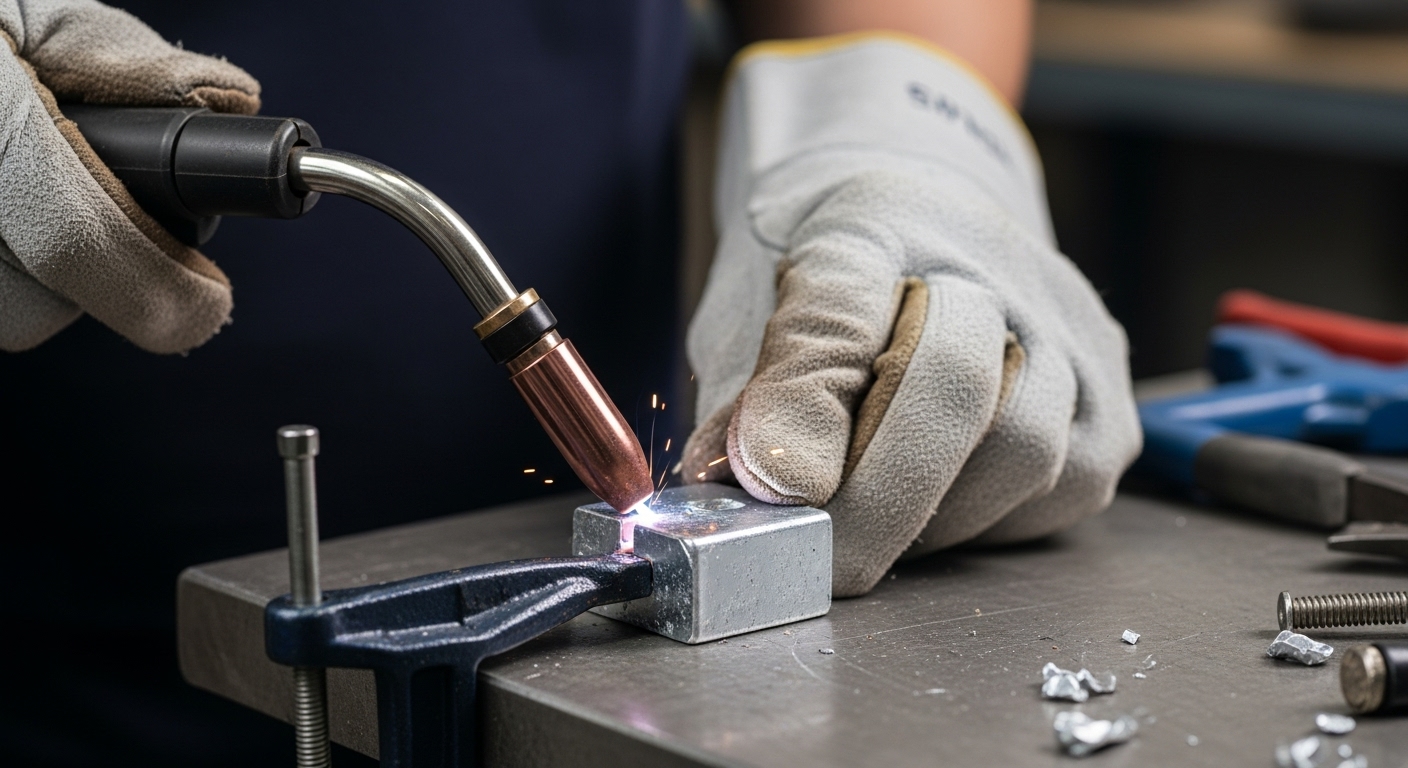
When you TIG weld pot metal, controlling heat input precisely is critical to prevent melting or warping the alloy’s thin sections. Start by thoroughly cleaning the surface with steel wool to remove contamination.
Use a low amperage setting and an appropriate filler rod designed for pot metal alloys. Maintain a steady hand and apply shielding gas to avoid oxidation. Monitor the weld pool carefully to prevent porosity or cracking caused by zinc content.
| Step | Action | Key Consideration |
|---|---|---|
| Surface Prep | Clean with steel wool | Remove dirt and oils |
| Equipment Setup | Set low amperage | Avoid overheating |
| Filler Selection | Use pot metal filler | Ensure alloy compatibility |
| Welding Technique | Steady hand, short welds | Minimize heat input |
| Post-Weld Cooling | Cool slowly | Prevent warping |
While TIG welding offers precise control needed for thin pot metal sections, you might find MIG welding better suited for thicker or more substantial repairs.
MIG welding provides higher deposition rates and deeper penetration, which helps when filling larger gaps or rebuilding worn areas on pot metal components.
MIG welding excels at filling larger gaps and restoring worn pot metal parts with deeper penetration.
However, you must carefully manage the amperage and wire feed speed to minimize heat input and prevent melting or warping.
Surface preparation remains critical; clean the metal thoroughly to avoid contamination that causes porosity.
Also, MIG’s higher heat output increases the risk of burn-through on thin sections, so reserve this method for parts with sufficient thickness.
To summarize, choose MIG welding for robust pot metal repairs where TIG’s precision is unnecessary or impractical.
Always apply controlled parameters to mitigate pot metal’s susceptibility to thermal damage.
Additionally, controlling heat input during MIG welding is essential to reduce distortion and defects in heat-sensitive pot metal materials.
Mastering pot metal soldering demands meticulous surface preparation and controlled heat application to assure strong, durable bonds without compromising the metal’s integrity.
First, thoroughly clean the joint area using a Dremel tool or fine sandpaper to remove oxidation and contaminants.
Next, position a wood or sand backer behind gaps to support the solder during cooling.
Apply flux evenly; watch for the color shift from golden to brown, signaling readiness.
Preheat the metal evenly with a propane or butane torch, moving side-to-side to prevent localized overheating.
Dip the solder rod into flux, then gently touch it to the heated joint, allowing it to melt and flow into the gap.
Blend the solder smoothly with the parent metal, avoiding excessive flux that causes porosity.
Finally, apply a heat-freezing agent to stabilize the repair and prevent remelting.
Because pot metal is brittle and contains multiple alloys, understanding its material properties helps prevent cracking during soldering.
When you’re repairing pot metal, one of the biggest mistakes you can make isn’t cleaning the surface properly. If there are contaminants left on the surface, they can really mess with the bond and lead to weld defects. So, make sure you give it a good clean!
Another thing to watch out for is applying too much heat. Pot metal has a low melting point, and if you overdo it with the heat, you might end up warping or even melting the metal. It’s a delicate balance, so keep that in mind when you’re working.
And let’s not forget about the filler materials. Using the wrong type can really compromise your repair. It can lead to weak joints and even cracking down the line. Always make sure you match your fillers to the alloy composition to ensure a strong, durable repair.
Additionally, controlling heat input carefully is essential to prevent thermal stresses that can cause cracking or distortion in pot metal repairs.
Neglecting thorough surface cleaning materially undermines the integrity of pot metal repairs. Contaminants like oil, dirt, and oxidation obstruct the bonding process, causing weak welds or solder joints prone to failure. You must prepare the surface meticulously before repairing.
To guarantee peak adhesion, follow these steps:
Adhering to these cleaning protocols appreciably improves weld quality and durability while reducing the risk of porosity and cracking in pot metal repairs. Additionally, wearing protective gloves during surface preparation safeguards your hands from cuts, contaminants, and chemical exposure.
Although controlling heat is critical when working with pot metal, applying excessive heat remains a frequent error that compromises repair integrity. You risk warping, melting, or causing porosity by overheating.
Pot metal’s low melting point demands precise thermal input; exceeding it weakens the structure and voids the weld.
| Consequence | Cause | Preventive Action |
|---|---|---|
| Warping | Prolonged high heat | Use short, controlled welds |
| Meltdown | Heat above melting point | Employ TIG with low amperage |
| Porosity & Cracks | Rapid overheating | Preheat gradually, maintain steady speed |
To avoid these issues, monitor temperature closely. Use appropriate welding settings and apply heat incrementally. Your focus on thermal management guarantees a durable, defect-free repair. Achieving this level of control often requires extensive training and practice to master precise heat input and torch manipulation.
When selecting filler materials for pot metal repairs, choosing an incompatible alloy can severely undermine the joint’s strength and durability.
Pot metal’s variable composition demands filler metals closely matching its thermal and mechanical properties to prevent cracking, porosity, or weak adhesion.
Avoid these common mistakes when selecting fillers:
You must analyze alloy compatibility and melting behavior precisely.
Employ specialized pot metal filler rods or Super Alloy 1 solder to safeguard structural integrity and avoid repair failures.
You’ll need a few essential tools to clean pot metal before repair.
Start with steel wool or fine sandpaper to remove surface dirt, oxidation, and contaminants.
A Dremel rotary tool fitted with a grinding or sanding disc helps reach intricate areas and ensures thorough cleaning.
Use a degreaser or isopropyl alcohol to wipe away oils.
Proper cleaning guarantees better adhesion and prevents porosity or weak joints during welding or soldering.
To identify if your pot metal contains high zinc content, you’ll need to analyze its physical and chemical properties.
High-zinc pot metal often has a silvery-white appearance and can feel brittle. You can perform a spark test; zinc alloys produce shorter, less branched sparks.
For precise analysis, use X-ray fluorescence (XRF) spectroscopy or a metal analyzer to determine elemental composition. This helps predict weldability and potential porosity issues.
Yes, you can repaint pot metal after welding or soldering repairs, but you must prepare the surface meticulously.
Start by cleaning thoroughly to remove flux residues, oxidation, and any contaminants.
Sand the area smooth to assure paint adhesion. Use a suitable primer designed for metal to prevent peeling or corrosion.
Once primed and dried, apply paint compatible with pot metal alloys. Proper surface prep guarantees a durable, professional finish on your repaired part.
Yes, you must take specific safety precautions welding pot metal. Its low melting point means you should control heat carefully to avoid warping or burning through.
Always work in a well-ventilated area, since zinc alloys can release toxic fumes when heated. Wear appropriate PPE, including a respirator, gloves, and eye protection, to guard against fumes and sparks.
Clean the surface thoroughly to prevent contamination that could cause weak bonds or hazardous spatter during welding.
A typical pot metal repair under stress can last from several months up to a few years, depending on the repair quality, stress type, and environmental conditions.
You’ll need precise heat control and surface prep to minimize porosity and cracking.
Keep in mind that pot metal’s variable composition and low melting point limit durability.
For critical applications, regularly inspect repairs and consider alternative joining methods like soldering for longer-lasting results.
Welding pot metal challenges you with its unpredictable composition and low melting point, making traditional welding risky and often ineffective.
Yet, with precise TIG or MIG techniques, you can achieve solid joins. Soldering often offers a safer, more reliable alternative.
Balancing these methods requires careful analysis of your project’s demands and material behavior. Understanding when to weld and when to solder transforms a frustrating repair into a controlled, successful outcome.